
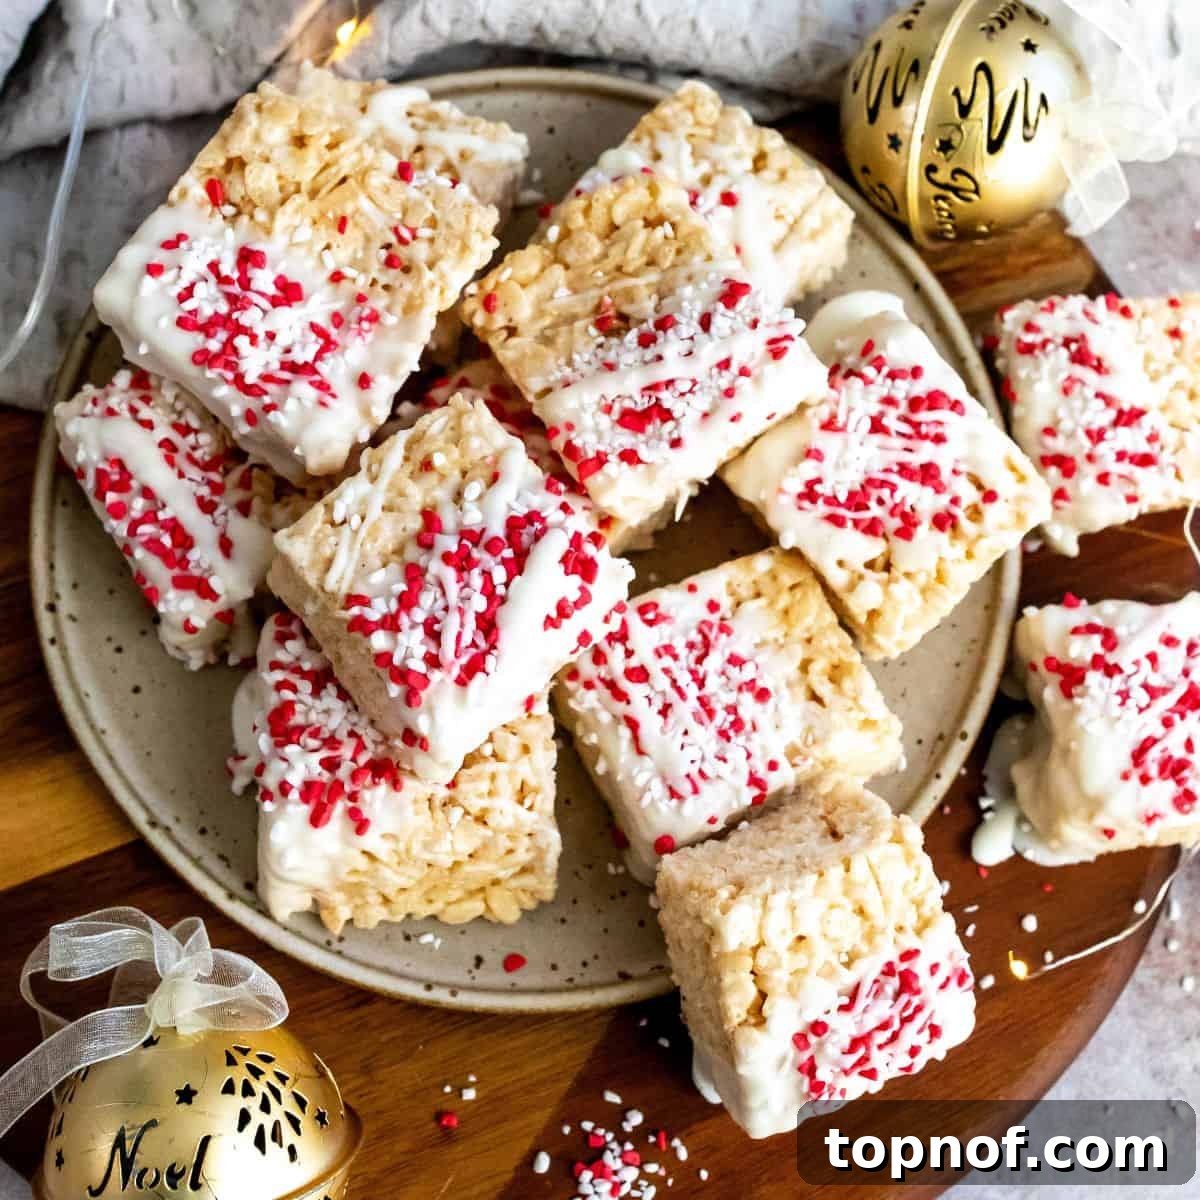
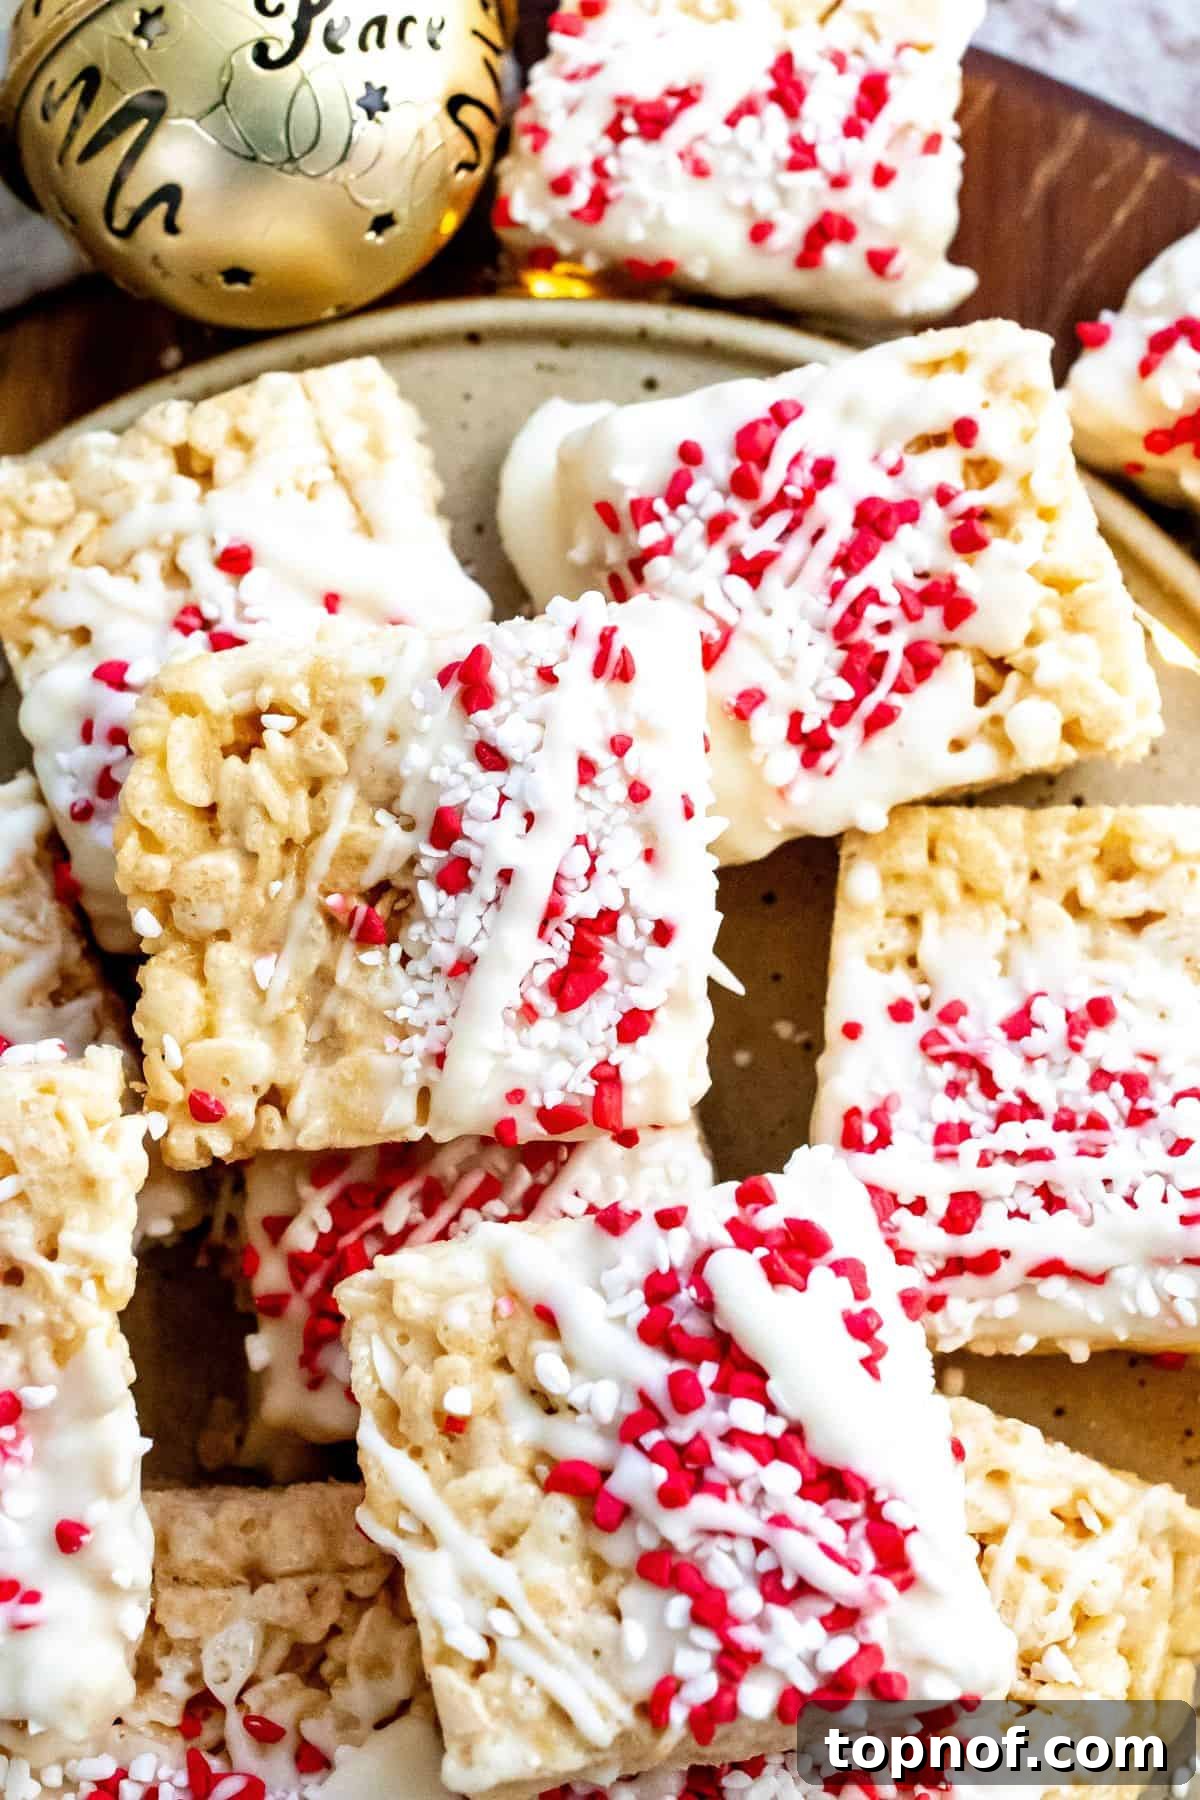
Transform your festive season with these incredibly **easy and adorable Christmas Rice Krispies treats**. Perfect for holiday gatherings, school parties, or simply enjoying a cozy night in, these festive delights are guaranteed to impress family and friends alike. Their simple preparation and customizable charm make them a favorite for bakers of all skill levels. Whether you prefer classic white chocolate or a dark chocolate drizzle, paired with your favorite holiday sprinkles, these treats are a blank canvas for your creative spirit. Get ready to add a burst of color and a touch of magic to your holiday dessert table!
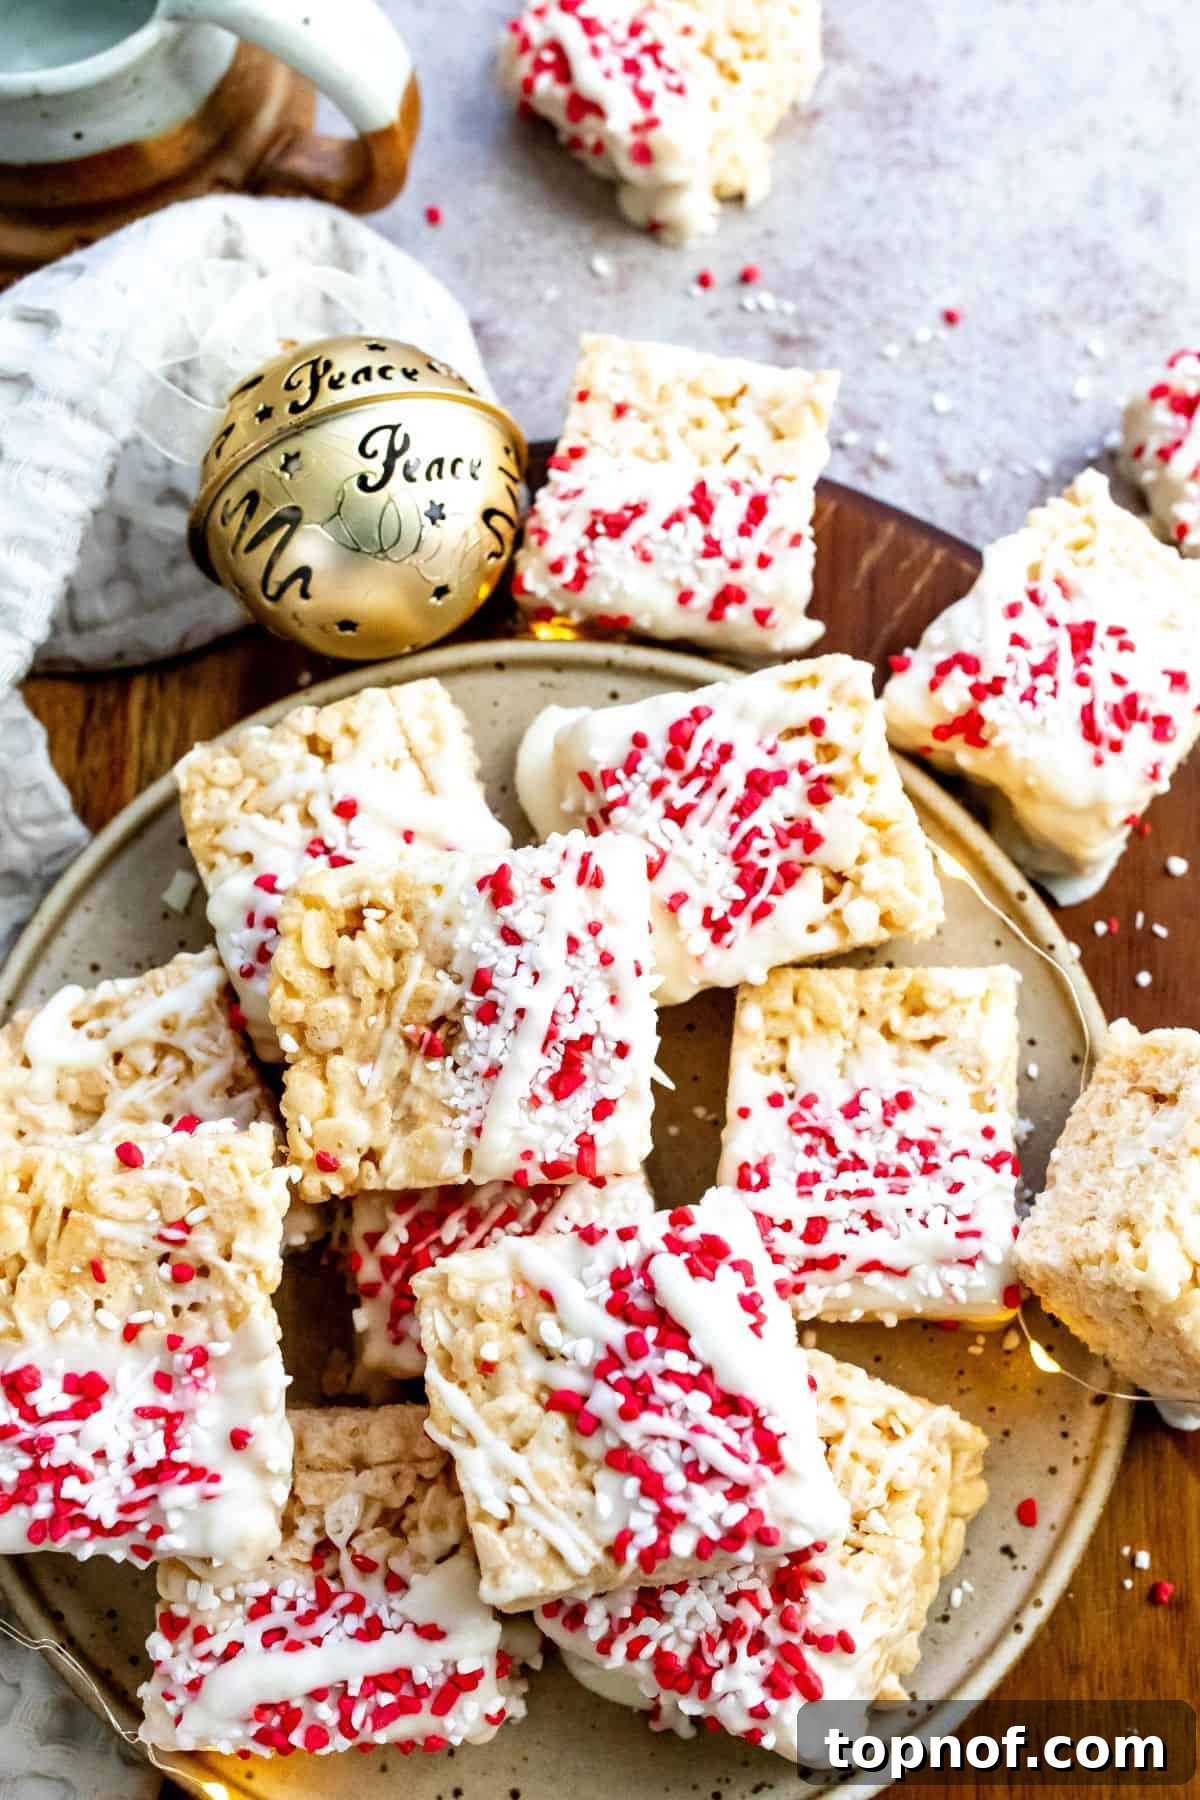
Table of Contents
- Why Make These Easy Christmas Rice Krispies
- The Magic of Marshmallows and Rice Cereal
- Essential Ingredients for Festive Treats
- Creative Recipe Variations for Any Occasion
- Step-by-Step Guide to Perfect Rice Krispies
- Serving and Storage Tips
- Frequently Asked Questions
- Expert Tips for the Best Rice Krispies
- More Festive Treats to Delight
- Printable Christmas Rice Krispies Recipe Card
Why Make These Easy Christmas Rice Krispies
The holiday season is all about spreading joy, and what better way to do that than with homemade treats that bring a smile to everyone’s face? These Christmas Rice Krispies are more than just a dessert; they’re an experience. Imagine biting into a perfectly soft, buttery marshmallow-based treat, followed by a delicate crunch of rice cereal, all enveloped in a smooth layer of rich chocolate and vibrant sprinkles. It’s a symphony of textures and flavors that embodies the festive spirit.
Beyond their delightful taste, these treats are a fantastic choice for the bustling holiday season because they are incredibly quick and easy to prepare. Unlike complex baked goods that require hours in the kitchen, these no-bake wonders come together in minutes, leaving you more time to enjoy with loved ones. They’re ideal for last-minute party contributions, thoughtful edible gifts, or a fun activity to do with kids. The light chocolate coating provides the perfect canvas for a dazzling array of festive sprinkles, allowing you to customize each batch to match your holiday theme or personal preference. Plus, their versatility extends beyond Christmas; simply swap out the sprinkles, and you have a delightful treat suitable for birthdays, Valentine’s Day, Halloween, or any special occasion you wish to celebrate. If you’re a peanut butter enthusiast, don’t miss out on trying my equally delicious Peanut Butter Rice Krispies for another irresistible variation!
The Magic of Marshmallows and Rice Cereal
At the heart of every great Rice Krispies treat lies the perfect balance of melted marshmallows and crispy rice cereal. This classic combination creates a chewy, gooey texture that is universally loved. When marshmallows are gently melted with butter, they transform into a warm, sticky binder that coats every single grain of rice cereal, holding them together in a delightful embrace. The secret to an irresistible treat is not to overcook the marshmallows, ensuring they remain soft and pliable rather than becoming stiff. The subtle hint of vanilla extract further enhances the flavor profile, adding a comforting warmth that complements the sweetness of the marshmallows. This foundational base is what makes our Christmas Rice Krispies so incredibly satisfying and a beloved staple during the holidays. It’s a recipe that transcends generations, bringing back nostalgic memories while creating new ones.
Essential Ingredients for Festive Treats
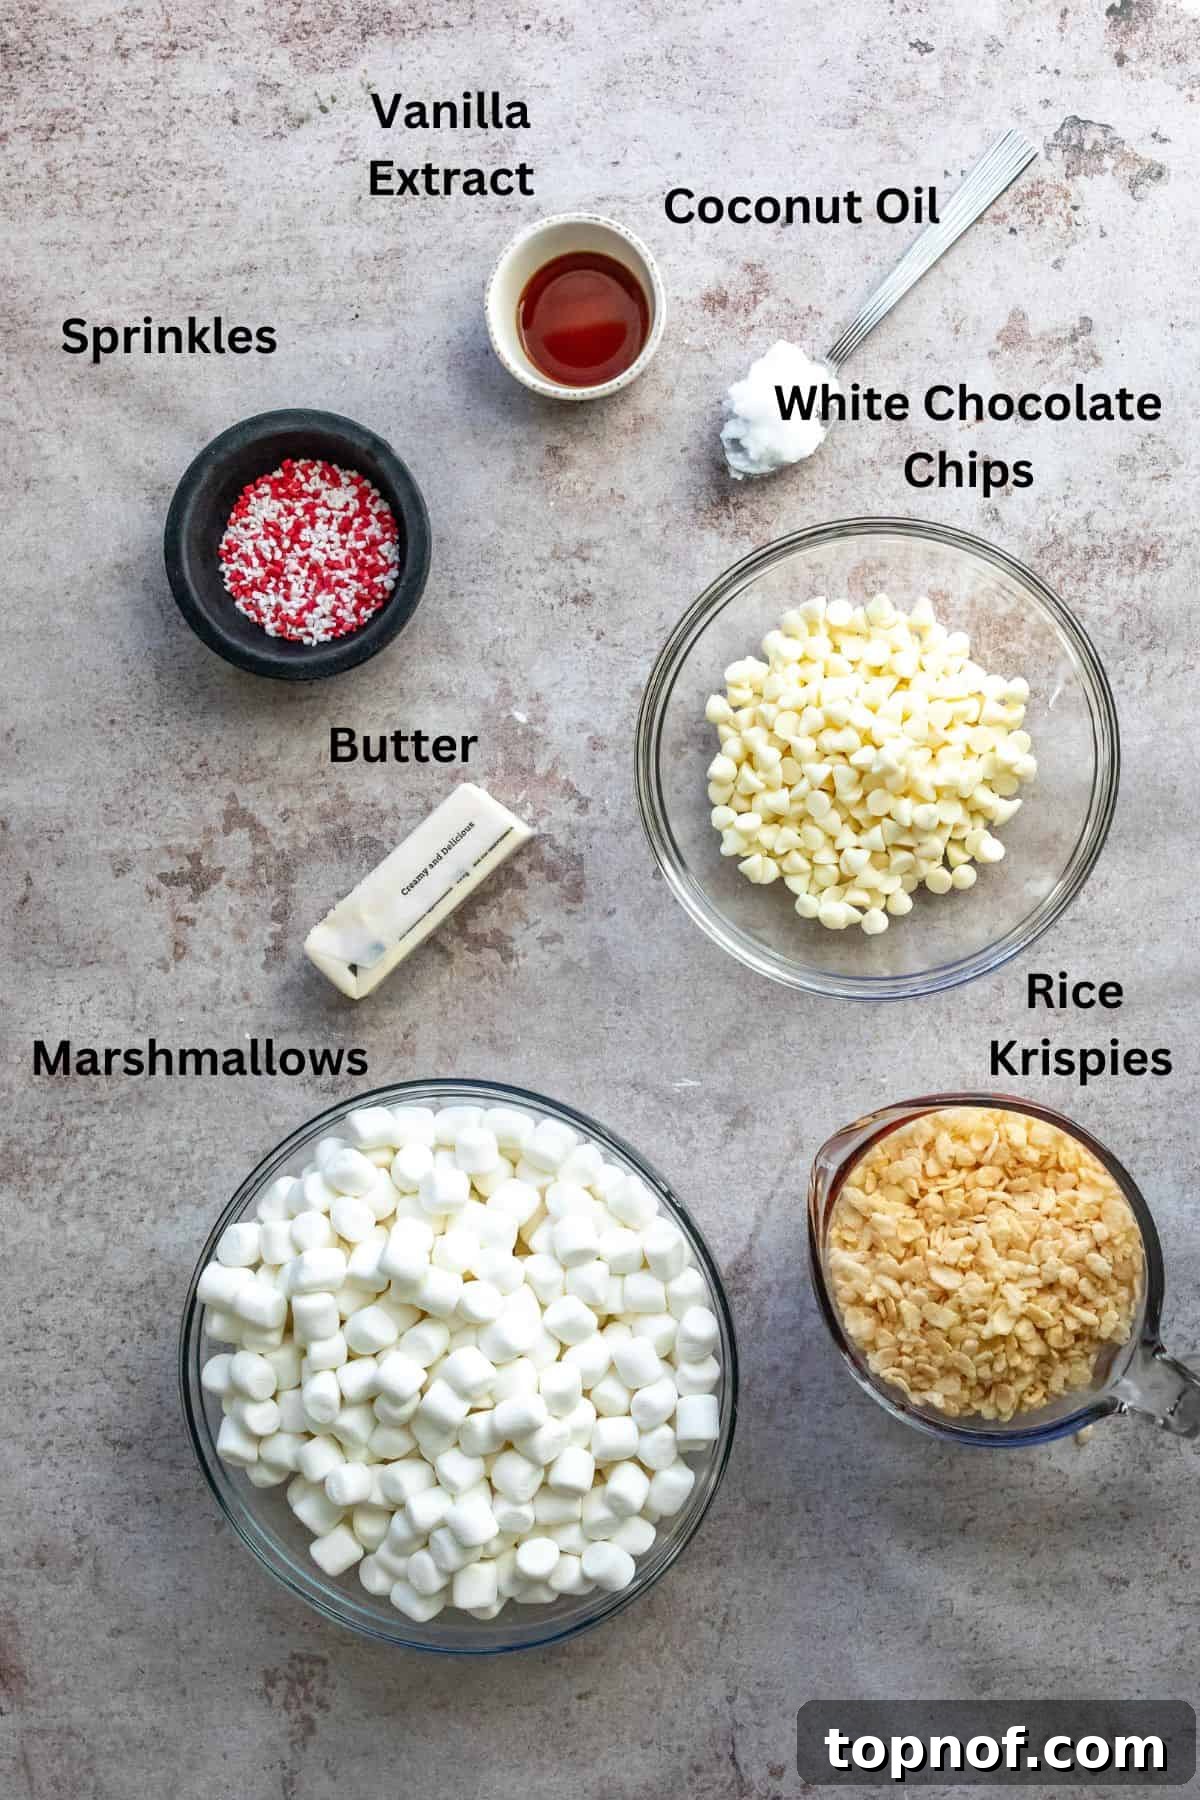
Crafting these delightful Christmas Rice Krispies treats requires just a handful of simple ingredients, most of which you likely already have in your pantry. Each component plays a crucial role in achieving that perfect texture and festive flavor:
- Marshmallows: For the best results, mini marshmallows are highly recommended. Their smaller size allows them to melt much more quickly and evenly, making them easier to stir and incorporate into the mixture. This ensures a consistently smooth and gooey base for your treats.
- Rice Krispies Cereal: The star of the show! While Rice Krispies is the most common choice, any brand of crisp rice cereal will work beautifully. Feel free to use your preferred brand to achieve that signature crunch. The amount used will affect the chewiness – using slightly less cereal will result in a softer, chewier bar.
- White Chocolate Chips: These are essential for creating that iconic wintery aesthetic, providing a pristine white backdrop that truly makes your holiday sprinkles pop. White chocolate offers a sweet, creamy flavor that complements the marshmallow and cereal perfectly.
- Coconut Oil: A small amount of coconut oil is added to the white chocolate to achieve the ideal dipping consistency. It thins the melted chocolate, making it smoother and more spreadable, which allows for an even, glossy coating on your treats. Any neutral-flavored oil like canola, olive, or avocado oil can be used as a substitute if needed.
- Butter: Essential for melting the marshmallows and adding a rich, buttery flavor to the base. Plant-based butter can also be used for a dairy-free option.
- Vanilla Extract: A touch of vanilla extract elevates the flavor, adding a warm, inviting aroma and a subtle depth that makes these treats extra special.
- Holiday Sprinkles: This is where the magic happens! Choose an assortment of festive red, green, silver, or gold sprinkles, nonpareils, or sanding sugars to transform your treats into dazzling holiday masterpieces.
All other specific ingredient quantities and detailed measurements can be found in the comprehensive recipe card below.
Creative Recipe Variations for Any Occasion
While the classic Christmas Rice Krispies are undeniably delicious, one of their greatest strengths is their adaptability. These treats can be easily customized to suit various holidays, dietary preferences, or simply to satisfy a craving for something new. Here are some exciting ways to experiment with this versatile recipe:
- Marshmallow Alternatives: While mini marshmallows are preferred for their quick melting, any size will work. If using larger marshmallows, simply allow a little extra time for them to melt down completely, stirring frequently to prevent scorching. For those seeking a vegan option, many brands now offer plant-based marshmallows that perform similarly to traditional ones, ensuring everyone can enjoy these treats.
- Oil Substitutions: If coconut oil isn’t available or preferred, feel free to use other neutral oils such as canola oil, light olive oil, or avocado oil. These oils will achieve the same goal of thinning the chocolate to a smooth, dippable consistency without imparting strong flavors.
- Chocolate Choices: The white chocolate coating is perfect for showcasing vibrant holiday sprinkles, but your options are limitless.
- **Milk Chocolate or Dark Chocolate:** For a richer, more intense chocolate flavor, switch to milk chocolate or dark chocolate chips. Keep in mind that darker chocolate might make the sprinkles slightly less visually prominent, but the taste will be equally delightful.
- **Colored Candy Melts:** For an extra pop of color, consider using red, green, or even blue candy melts. These are specifically designed for melting and coating, offering a smooth finish and a wide array of vibrant hues perfect for themed treats.
- **Swirls and Drizzles:** Instead of dipping, try drizzling multiple colors of melted chocolate or candy melts over the treats for a marbled effect.
- Flavor Boosters:
- **Peppermint:** Add a few drops of peppermint extract to the melted chocolate for a cool, minty flavor, then top with crushed candy canes for a festive crunch.
- **Citrus Zest:** A teaspoon of orange or lemon zest can brighten the flavor of the marshmallow base, offering a refreshing twist.
- **Spices:** Incorporate a pinch of cinnamon, nutmeg, or pumpkin spice into the melted marshmallow mixture for a warm, autumnal feel, especially great for fall holidays.
- Mix-Ins and Toppings:
- **Nuts:** Finely chopped pecans, walnuts, or almonds can be mixed into the cereal blend or sprinkled on top of the chocolate for added texture and nutty flavor.
- **Dried Fruit:** Small pieces of dried cranberries, cherries, or candied ginger can add a chewy element and a burst of fruity flavor.
- **Candy Pieces:** Crushed Oreos, mini M&M’s, or small chocolate candies can be folded into the cereal mixture or used as toppings.
- **Pretzels:** Crushed pretzels can add a salty-sweet dimension and a satisfying crunch.
- Shape Shifters: Instead of traditional squares, use holiday-themed cookie cutters (stars, trees, gingerbread men) to create fun shapes before the treats fully set. This makes them even more appealing for children and festive gatherings.
Step-by-Step Guide to Perfect Rice Krispies
Creating these festive Christmas Rice Krispies is a straightforward and enjoyable process. Follow these simple steps to ensure your treats are perfectly gooey, crispy, and beautifully adorned:
Step One: Prepare the Cereal and Melt the Base
Begin by accurately measuring out your desired amount of rice cereal and setting it aside in a large bowl. This ensures it’s ready to be quickly added once the marshmallow mixture is prepared. In a spacious 4-quart (or larger) pot, combine the butter, vanilla extract, and all the mini marshmallows. Place the pot over medium-low heat. Stir the mixture frequently and gently to prevent sticking and burning. Continue cooking until the marshmallows have completely melted into a smooth, creamy liquid. Patience is key here to achieve a silky base.
Step Two: Combine and Prepare Your Dish
As soon as the marshmallows are fully melted and smooth, remove the pot from the heat. Promptly add the measured rice cereal to the marshmallow mixture. Using a sturdy spatula, stir vigorously until every single piece of cereal is thoroughly and evenly coated with the gooey marshmallow. Work quickly, as the mixture will start to cool and set. While the mixture is still warm, prepare your baking dish. Line a 7×7 or 8×8 inch square dish with parchment paper, leaving an overhang on the sides. This parchment paper liner will make it incredibly easy to lift the entire slab of treats out once cooled and ready for cutting.
Step Three: Press and Level the Mixture
Carefully transfer the marshmallow and cereal mixture into the parchment-lined dish. Using another piece of parchment paper or buttered hands (to prevent sticking), gently press the mixture down. Your goal is to create an even and level surface. **It’s crucial not to press too hard!** Over-compressing the mixture will result in dense, hard treats that are difficult to bite through. Apply just enough pressure to ensure everything is evenly distributed and the surface is smooth. A light, even pressure is perfect for maintaining that desirable soft and chewy texture.
Step Four: Allow to Cool and Set
Once the mixture is evenly pressed into the dish, set it aside to cool completely and firm up. This allows the treats to set properly, making them easier to cut and handle. For a quicker setting time, you can place the dish in the refrigerator for approximately 30 minutes. Be mindful not to leave them in the fridge for too long, as excessive cold can make them too hard.
Step Five: Melt the Chocolate Coating
While your Rice Krispies treats are cooling, prepare the chocolate coating. In a medium-sized microwave-safe bowl, combine the white chocolate chips and coconut oil. Microwave on high for 1 minute. Remove and stir the mixture thoroughly. Even if the chocolate doesn’t look fully melted, stirring helps to distribute the heat. Return to the microwave for another minute. Stir again until the chocolate is completely melted and beautifully smooth, with no lumps remaining. If necessary, microwave in 15-second intervals, stirring after each, until perfectly smooth.
Step Six: Dip, Decorate, and Chill
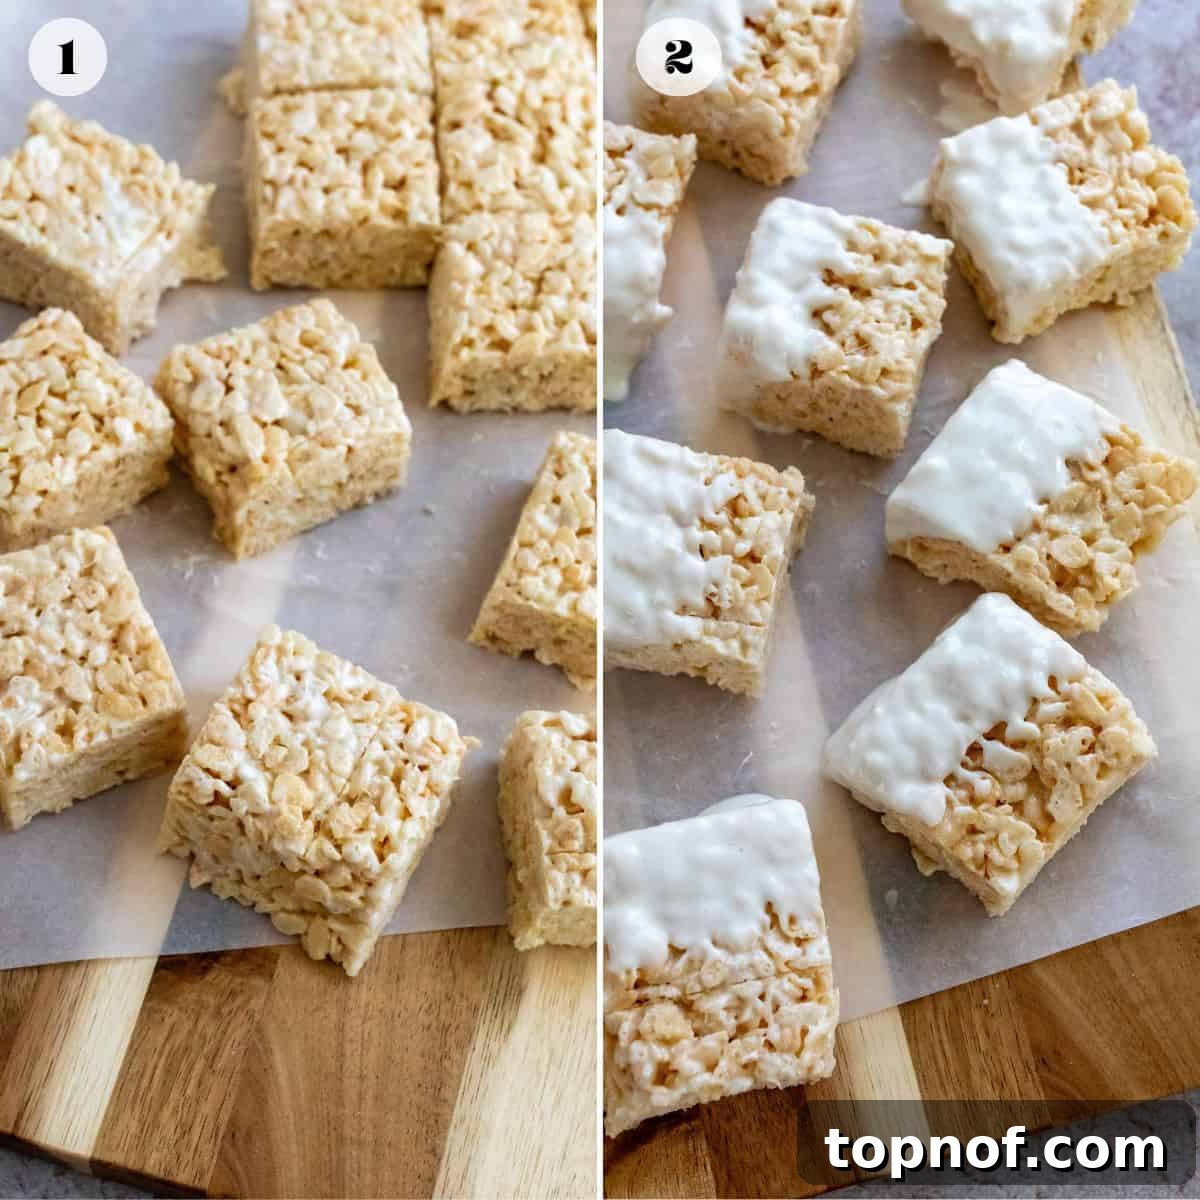
Now for the fun part! Once your Rice Krispies treats are set and cooled, cut them into individual squares or festive shapes using a sharp, buttered knife. Take each piece and dip one side into the melted white chocolate, allowing any excess chocolate to gently drip off. Place the chocolate-dipped Krispies onto a fresh sheet of parchment paper. Immediately, and while the chocolate is still wet, generously sprinkle with your chosen holiday sprinkles. This ensures the sprinkles adhere well. Once all the treats are dipped and decorated, allow the chocolate to set completely. You can place them back in the fridge for 10-15 minutes or simply leave them in a cool spot at room temperature until the chocolate hardens. Once set, they are ready to be enjoyed!
Serving and Storage Tips
These festive Christmas Rice Krispies treats are best enjoyed when fresh, but they also hold up beautifully for several days, making them excellent for make-ahead preparations. Here’s how to serve them and keep them at their best:
Serving Suggestions:
- Holiday Gatherings: Arrange them on a festive platter alongside other holiday cookies and desserts. Their vibrant colors will surely catch the eye.
- Edible Gifts: Package individual treats or small stacks in clear cellophane bags tied with festive ribbons for charming homemade gifts.
- Cookie Exchange: Bring a batch to a holiday cookie exchange for a unique and popular no-bake option.
- School Parties: Perfect for classroom parties, just ensure there are no nut allergies if you’ve added any.
- Family Activity: Make a batch together as a family and let everyone decorate their own. It’s a fun and delicious holiday tradition.
Storage Guidelines:
- Countertop Storage: Store any leftover Christmas Rice Krispies in an airtight container at room temperature for up to 4 days. This method generally keeps them the softest and chewiest.
- Refrigeration: For slightly longer storage or if your home is particularly warm, you can store them in an airtight container in the refrigerator for up to 7 days. However, be aware that refrigeration can make the treats a bit firmer. If storing in the fridge, allow them to come to room temperature for 10-15 minutes before serving for optimal softness.
- Freezing (Not Recommended): While technically possible, freezing Rice Krispies treats is generally not recommended as it can significantly alter their texture, making them overly chewy or hard when thawed. These treats are so quick to make that fresh batches are always preferable.
Remember, always keep them in an airtight container to prevent them from drying out and losing their delightful texture.
Frequently Asked Questions
Absolutely! While white chocolate offers a beautiful contrast for holiday sprinkles, feel free to use any meltable chocolate chip you prefer. Milk chocolate, dark chocolate, or even semi-sweet chocolate chips will work perfectly. The choice simply depends on your flavor preference and how much you want your sprinkles to stand out visually.
Yes, these treats are fantastic for making ahead! They will retain their delightful soft and chewy texture for several days when stored properly. You can prepare them 1-3 days in advance of your event, store them in an airtight container at room temperature, and they’ll be ready to serve when you need them. This makes them an ideal dessert for busy holiday schedules.
There are a couple of common reasons. Firstly, you might have pressed the mixture into the dish too firmly. Gentle pressure is key to maintaining a light, airy, and chewy texture. Secondly, overcooking the marshmallows can make them seize and harden. Melt them over medium-low heat, stirring constantly, until just smooth. Lastly, storing them in the refrigerator for too long can also cause them to become very firm. If refrigerated, let them sit at room temperature for a bit before serving.
The sky’s the limit when it comes to sprinkles! For Christmas, traditional red and green nonpareils, sanding sugar, edible glitter, or snowflake shapes are popular. You can also mix different types for a custom look. Just ensure they are fresh and visually appealing for that extra festive touch.
Expert Tips for the Best Rice Krispies
Achieving the perfect batch of Christmas Rice Krispies treats is simple when you keep a few key tips in mind. These small details can make a big difference in the final texture, flavor, and overall enjoyment of your festive dessert:
- Don’t Push Down Too Tightly: This is arguably the most crucial tip for soft, chewy treats. When pressing the marshmallow-cereal mixture into your prepared dish, use a very light, gentle hand. Over-compacting the mixture will squeeze out all the air, resulting in dense, rock-hard treats that are less enjoyable to eat and can be tough on the teeth. Think of it as gently coaxing the mixture into an even layer rather than forcefully flattening it. A buttered piece of parchment paper or buttered hands can help achieve this without sticking.
- Avoid Over-Chilling: While a quick chill in the fridge can help set your treats faster, don’t leave them in there for too long. If the Rice Krispies get too cold, they will become excessively firm and lose their signature chewiness. Aim for about 15-30 minutes in the refrigerator, just enough to help them set and allow the chocolate to harden. For longer storage, room temperature in an airtight container is usually best to maintain softness. If they do get too cold, let them sit out for 10-15 minutes before serving.
- Prevent Chocolate Seizing: When melting your chocolate for the coating, it’s vital to keep any liquid away from it. Even a single drop of water can cause melted chocolate chips to “seize” – meaning they will instantly become thick, grainy, and unusable. Ensure your bowl, utensils, and hands are completely dry. If you’re melting chocolate over a double boiler, be careful that no steam or water splashes into the chocolate.
- Fresh Marshmallows Make a Difference: Always use fresh marshmallows for the best results. Older, stale marshmallows can be harder to melt smoothly and may affect the final texture of your treats.
- Grease Everything: Marshmallow mixture is incredibly sticky! Lightly butter your pot, spatula, and even your hands if you plan on touching the mixture directly. This will make the process much smoother and cleaner.
- Work Quickly: Once the marshmallow base is melted and the cereal is added, the mixture will start to cool and set quite rapidly. Work efficiently to mix the cereal, press it into the dish, and cut your shapes before it becomes too firm to handle.
Other Festive Treats To Try
The holiday season is a wonderful time to explore a variety of delicious desserts. If you loved the simplicity and festive charm of these Christmas Rice Krispies, you might also enjoy these other delightful treats that are perfect for sharing with family and friends. Each offers a unique flavor and texture to complement your holiday spread:
More Sweet Inspirations
Dessert
Nutella Puff Pastries
Dessert
Apple Cinnamon Cake
Dessert
Healthy Buckeye Bars
Dessert
No Bake Peanut Butter Pie
We hope these recipes inspire you to get baking and create wonderful memories this holiday season! If you enjoyed making these Christmas Rice Krispies or any other recipe on our site, please let us know by leaving a comment and rating below. Your feedback helps us grow and share more delicious content. For even more fun and feel-good recipes, be sure to follow us on Instagram and Pinterest. Thank you for being a part of our culinary journey!
Christmas Rice Krispies
Save Recipe
Saved Recipe
Pin Recipe
Rate Recipe
Print Recipe
Equipment
-
8×8 square dish
-
Parchment paper
-
Large mixing pot
-
Microwave-safe bowl
-
Spatula
Ingredients
- 6 Tbsp Butter
- 1 tsp Vanilla extract
- 1 10 oz bag Mini marshmallows
- 5½ -6 cup Rice Krispie cereal , *less results in a softer chewier bar
- 1¼ cup White chocolate chips
- 1½ tsp Coconut oil, *see notes for alternatives
- ¼ cup Holiday sprinkles of choice
Instructions
-
Measure out the rice cereal and set it aside in a large bowl. In a large 4 qt or larger pot, add the butter, vanilla extract, and marshmallows. Cook on medium to low heat, stirring often until the marshmallows melt completely into a smooth mixture.
-
Once the marshmallows have melted, remove the pot from heat. Add the rice cereal and stir thoroughly until everything is evenly coated. Line an 7×7 or 8×8 inch size dish with parchment paper, leaving an overhang on the sides.
-
Transfer the mixture into the prepared dish and gently press it around to ensure it is even and level. Avoid pushing too hard, as this can result in dense, hard treats. Just a light, even pressure is perfect.
-
Set the mixture aside to cool and firm up in the dish. You can place it in the refrigerator for up to 30 minutes for faster setting, but don’t over-chill.
-
In a medium-sized microwave-safe bowl, combine the white chocolate chips and coconut oil. Microwave for 1 minute, stir the mixture, then microwave for another minute. Stir until everything is completely melted and smooth.
-
Cut the cooled Rice Krispies into desired shapes or squares. Dip each treat into the melted chocolate, gently shaking off any excess. Place the dipped treats on a fresh sheet of parchment paper and immediately sprinkle with holiday sprinkles. Let them cool in the fridge or a cool place until the chocolate is set. Enjoy your festive treats!
Notes
*Feel free to use milk chocolate or dark chocolate chips if desired for a different flavor profile.
*Canola oil or avocado oil can be used in place of coconut oil if needed.
Store leftovers in an airtight container on the counter for up to 4 days, or in the fridge for up to 7 days for maximum freshness.
Nutrition
Nutrition information is automatically calculated, so should only be used as an approximation.
Additional Info
Like this recipe? Leave a comment below!