
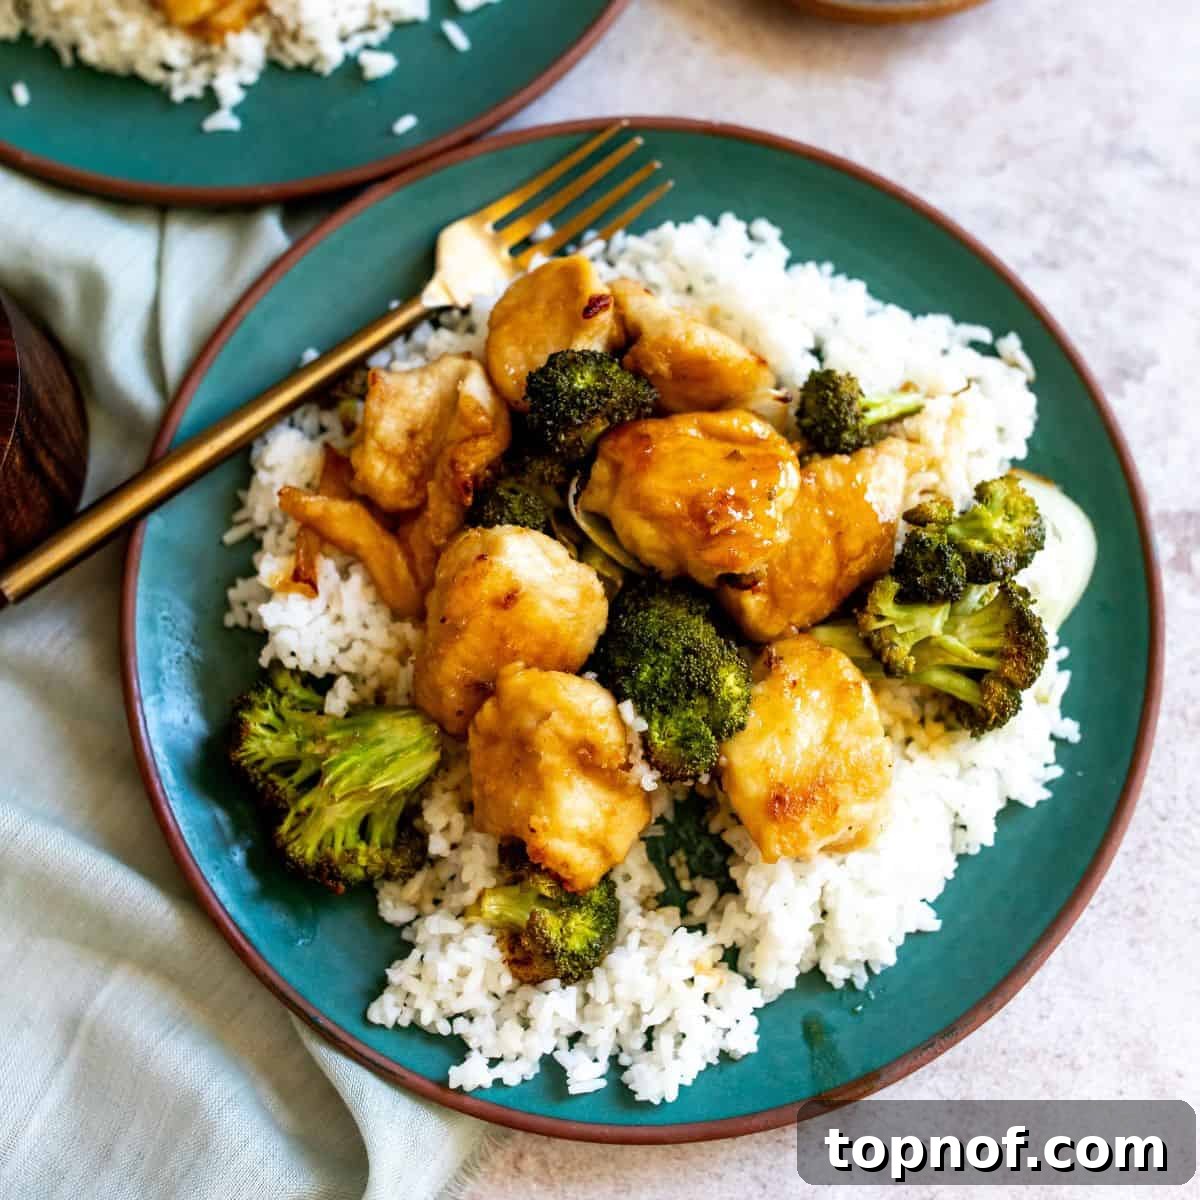
Prepare to fall in love with this incredibly easy and utterly scrumptious Sheet Pan Honey Butter Chicken. This recipe delivers tender chicken pieces, coated in a rich, addictively sweet and savory honey butter sauce, all cooked to perfection on a single sheet pan. Imagine a dish that tastes like your favorite restaurant takeout but is healthier, more affordable, and ready on your table in just 30 minutes! It’s the ultimate hassle-free meal that doesn’t compromise on flavor, making it a perfect choice for busy weeknights or when you simply crave something truly satisfying with minimal fuss.
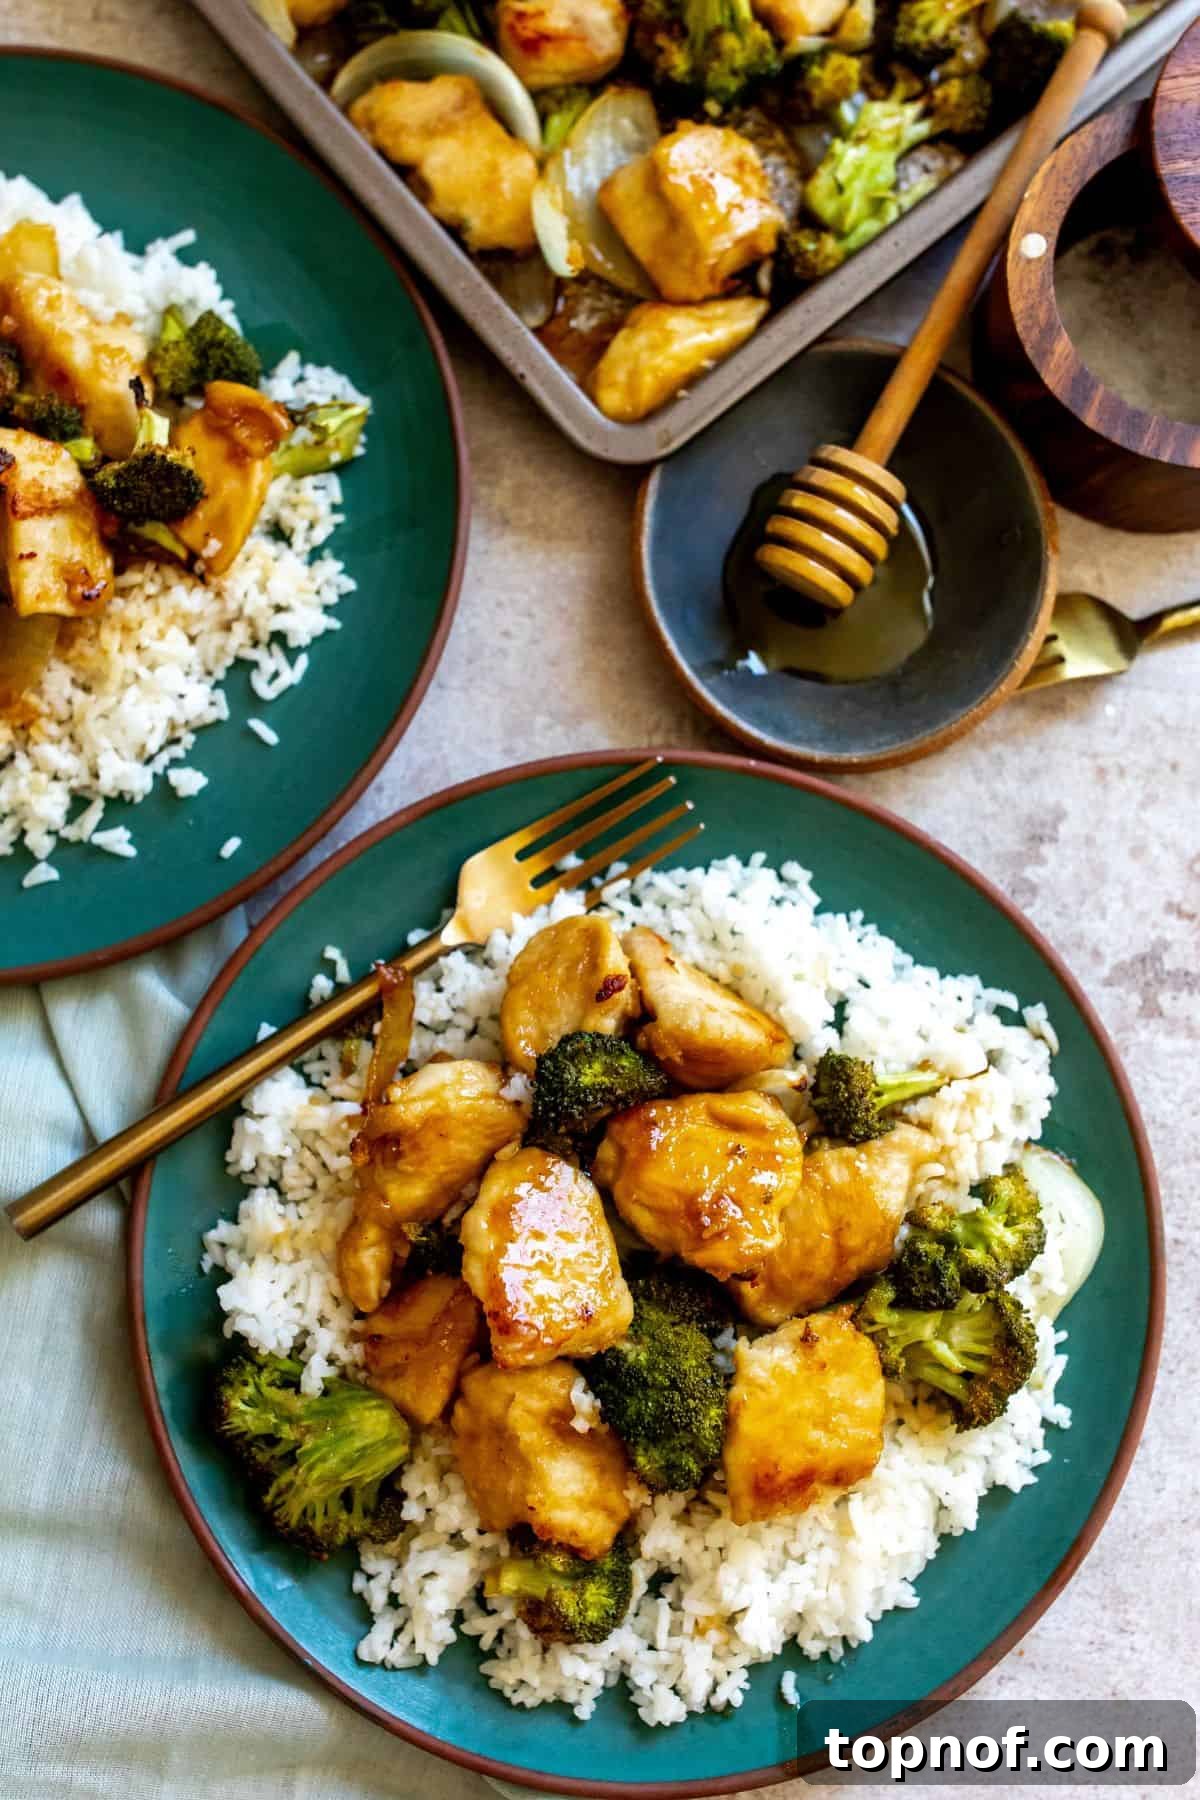
Table of Contents
- Why You’ll Adore This Honey Butter Chicken
- Essential Ingredients for Success
- Recipe Variations & Substitutions
- Step-by-Step Guide to Perfect Honey Butter Chicken
- Frequently Asked Questions
- Pro Tips for the Best Results
- Delicious Recipe Pairings
- More Easy Chicken Recipes to Explore
- Sheet Pan Honey Butter Chicken: The Full Recipe
Why You’ll Adore This Honey Butter Chicken: A Weeknight Hero
Sheet pan meals hold a special place in the hearts of home cooks everywhere, and for good reason. They are the epitome of convenience, offering straightforward preparation and incredibly easy cleanup – a winning combination in any busy kitchen. This Sheet Pan Honey Butter Chicken exemplifies these benefits, taking the stress out of meal prep while delivering an explosion of flavor that’s sure to become a new family favorite.
What truly sets this recipe apart is its unique ability to create a delightful crispy coating on the chicken. This isn’t just any ordinary chicken dish; the strategic use of flour combined with simple seasonings creates a texture that rivals your favorite takeout, all without the need for deep-frying. You get that satisfying crunch on the outside, while the inside remains tender and juicy. The best part? You have the added peace of mind that comes from knowing exactly what high-quality, nutritious ingredients went into your meal. It’s significantly healthier and more budget-friendly than ordering in, giving you complete control over the components of your dinner.
Beyond its incredible taste and ease, this recipe is remarkably versatile. You can effortlessly adjust the vegetables to suit your preferences or what you have on hand, ensuring a fresh and exciting meal every time. It’s also an excellent way to introduce new flavors to your family, thanks to the universally appealing sweet and savory honey butter glaze that makes every bite irresistible. If you’re looking to shake up your weekly menu with something both simple and sensationally delicious, this quick 30-minute honey butter chicken is your answer. For another tangy twist, consider trying our Lemon Butter Sheet Pan Chicken, or explore the bold flavors of our Buffalo Chicken Bowls for another easy weeknight option.
Essential Ingredients for Success
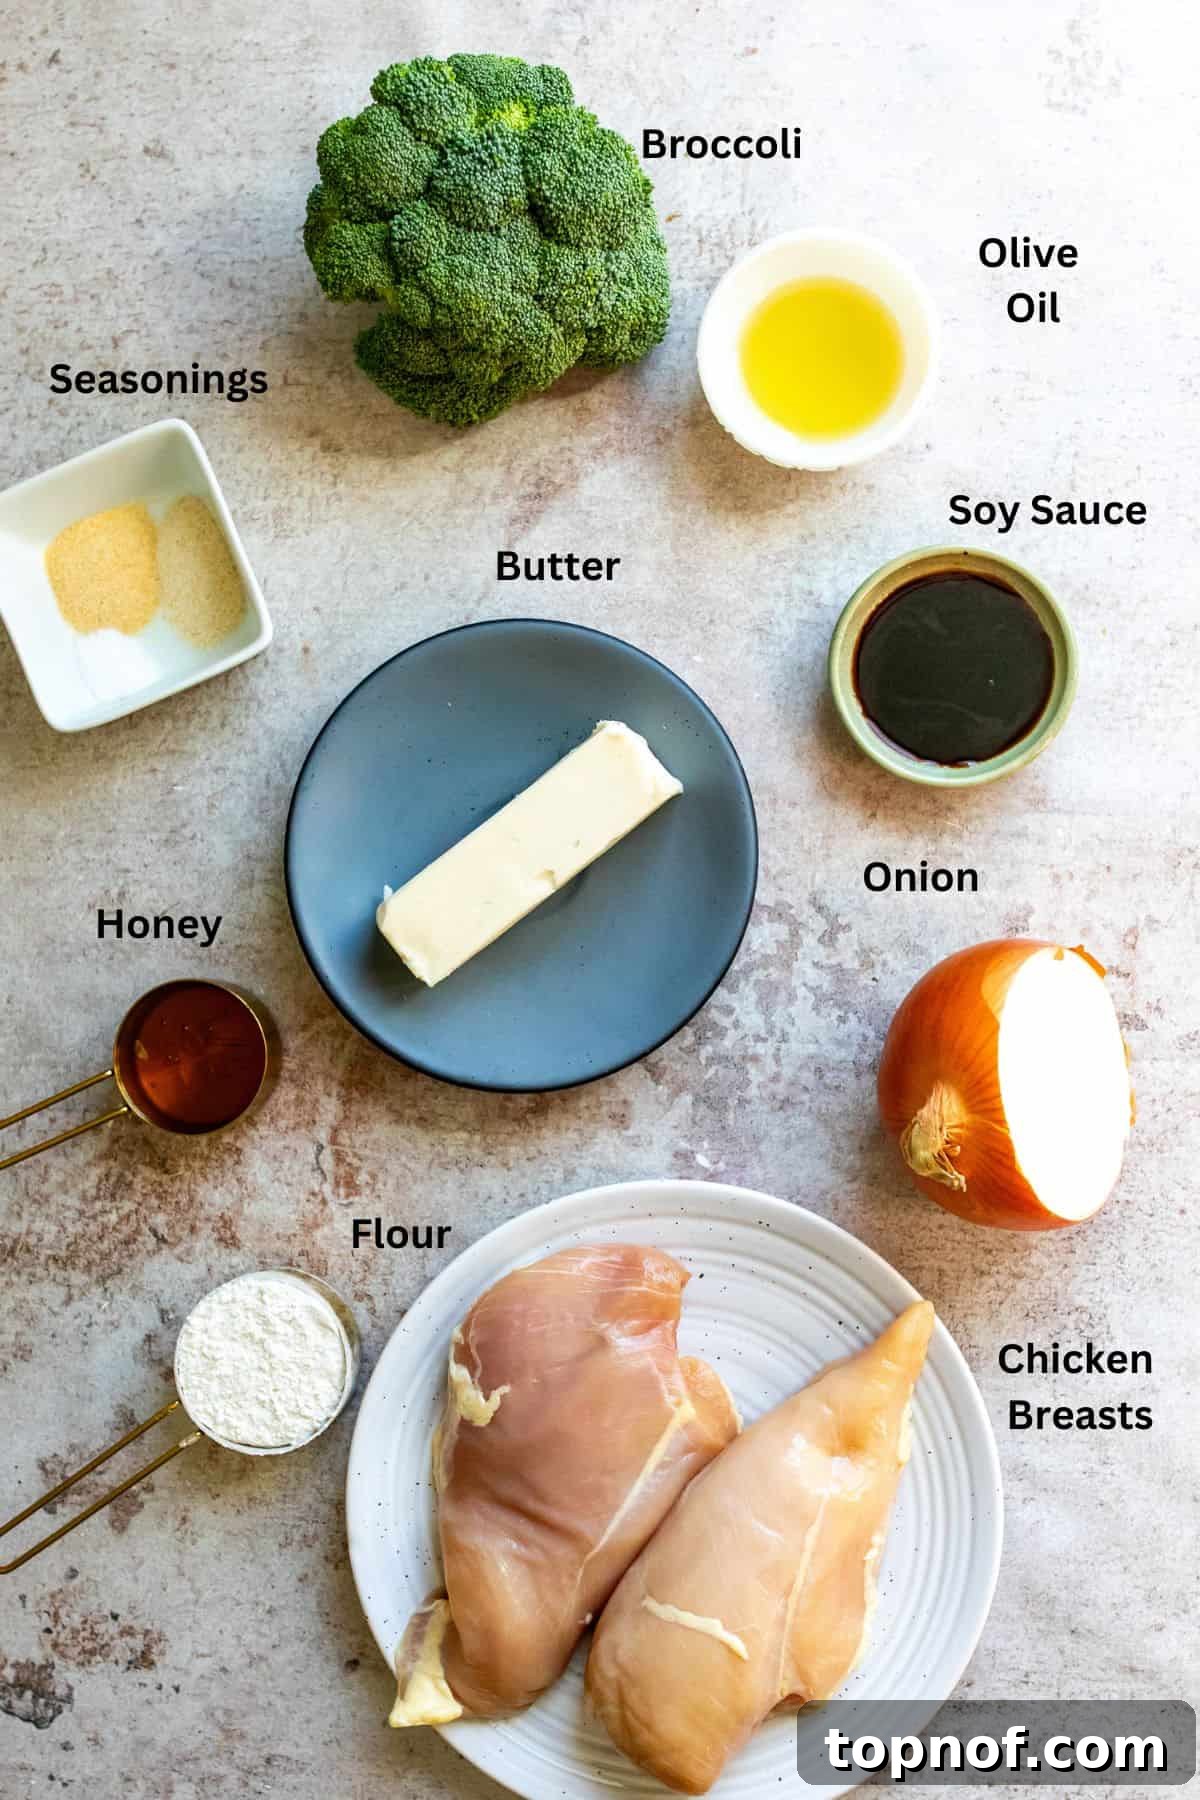
Crafting the perfect Honey Butter Chicken relies on a few simple, yet powerful, ingredients that come together to create a symphony of flavors. Each component plays a vital role in achieving the dish’s signature taste and texture. Here’s a closer look at what you’ll need to gather:
- Chicken Breasts or Thighs: The foundation of our meal. Boneless and skinless chicken breasts offer a lean, mild-flavored canvas that readily absorbs the sauce. Alternatively, boneless and skinless chicken thighs provide a richer flavor and often remain even more tender during baking. For this recipe, regardless of your choice, ensure they are cut into uniform 1-inch cubes. This consistency is crucial for even cooking, guaranteeing that every piece is cooked through without any drying out.
- Seasonings: A harmonious blend of aromatic spices elevates the chicken’s natural flavor before it’s even coated. You’ll need garlic powder, onion powder, salt, and black pepper. These seasonings are mixed with the flour to create a flavorful crust that contributes significantly to the overall depth of the dish.
- All-Purpose Flour: This is a key component for achieving that coveted crispy exterior. A light dusting of all-purpose flour on the chicken pieces helps to create a delicate, golden-brown crust when baked in the hot oven. This step mimics the texture often found in fried chicken, but with a much lighter and healthier approach. For a gluten-free alternative, a high-quality, 1:1 gluten-free flour blend works perfectly without compromising on texture.
- Soy Sauce: The umami powerhouse in our honey butter sauce! Soy sauce is essential for bringing all the sweet and savory flavors together, adding a crucial depth and complexity that balances the sweetness of the honey. We highly recommend using a low-sodium variety to better control the overall saltiness of your dish, allowing the other flavors to shine.
- Honey: The natural star of the sweet component. Honey provides a beautiful, natural sweetness and a sticky glaze that caramelizes wonderfully in the oven. This caramelization creates that irresistible golden-brown finish on the chicken and helps the sauce cling perfectly to every ingredient. Its distinct floral or earthy notes are integral to the “honey butter” profile.
- Butter: The other half of the dynamic duo for our incredible sauce. Butter adds richness, depth, and a luxurious mouthfeel. It also aids in the caramelization process and helps the glaze adhere beautifully to both the chicken and vegetables, ensuring every single bite is packed with savory-sweet goodness.
- Olive Oil: Used to lightly coat the sheet pan, preventing any sticking and promoting efficient roasting for both the chicken and the accompanying vegetables. A good quality olive oil can also add a subtle fruity note.
- Broccoli Florets: Our primary vegetable choice for this dish. Broccoli roasts wonderfully alongside the chicken, absorbing the delicious honey butter sauce and adding a fresh, slightly crisp counterpoint to the rich chicken. It provides essential nutrients and a pleasant texture contrast.
- Yellow Onion: When sliced into large, substantial cubes, yellow onion adds a sweet and pungent flavor that softens and caramelizes as it roasts, complementing the other ingredients beautifully. Cutting them larger helps prevent them from burning before the chicken is fully cooked.
These carefully selected ingredients, while simple, are the secret to creating a harmonious and unforgettable meal. The full list of precise measurements and quantities can be found in the comprehensive recipe card below, ensuring you have everything you need for success.
Recipe Variations & Substitutions for Every Palate
One of the best aspects of sheet pan meals, and this Honey Butter Chicken in particular, is their incredible adaptability. This recipe is wonderfully forgiving and can be easily customized to fit your dietary needs, personal preferences, or simply to make the most of what you have on hand. Don’t be afraid to get creative and make it truly your own!
- Chicken Options: While boneless, skinless chicken breasts are a popular choice for their lean protein content and quick cooking time, boneless, skinless chicken thighs are an excellent alternative. Thighs tend to stay juicier and offer a richer flavor, which can be a delightful addition to the honey butter sauce. Just ensure consistent 1-inch cubing for even cooking, regardless of the cut you select. Cubing also ensures more surface area for that delicious crispy coating.
- Sweetener Swaps: If you find yourself without honey, pure maple syrup makes a fantastic substitute. It offers a similar sticky sweetness and will caramelize beautifully, providing a slightly different but equally delicious flavor profile. For those looking for another option, agave nectar could also work in a pinch, though it tends to be less viscous.
- Butter Alternatives: For individuals with dairy sensitivities, allergies, or those following a plant-based diet, fear not! High-quality plant-based butter (vegan butter) or ghee (clarified butter, which is often suitable for lactose-intolerant individuals) can be used interchangeably with traditional dairy butter to achieve the same rich, buttery flavor and smooth texture in the sauce.
- Gluten-Free Soy Sauce: To make this recipe completely gluten-free, a very simple swap is all it takes. Substitute regular soy sauce with tamari, which is a widely available gluten-free soy sauce alternative. Alternatively, coconut aminos offer another excellent gluten-free and soy-free option that provides a similar umami depth, perfect for those with soy allergies or who prefer to avoid soy.
- Expanded Vegetable Medley: While broccoli is a fantastic choice for its texture and ability to soak up the sauce, feel free to experiment with a wider array of fresh vegetables. Sliced bell peppers (any color for a vibrant touch), tender zucchini rounds, crisp green beans, hearty Brussels sprouts (halved), or even cauliflower florets would be delicious additions or substitutions. Remember that some vegetables release more moisture than others, which can affect crispiness. For crispiest results, stick with broccoli or cauliflower. If using softer, high-water-content vegetables like mushrooms or zucchini, consider adding them slightly later in the cooking process (e.g., halfway through the initial bake) to prevent them from becoming overly soggy.
- Spice It Up: For those who enjoy a little heat, a pinch of red pepper flakes (or more, to taste!) added to the flour seasoning blend or directly to the honey butter sauce can provide a pleasant kick that beautifully contrasts the sweetness. A dash of Sriracha or your favorite hot sauce stirred into the sauce before the final glaze can also work wonders.
- Fresh Herb Finish: A sprinkle of fresh, finely chopped parsley, cilantro, or even chives after the dish comes out of the oven can brighten the flavors and add a beautiful pop of color and freshness.
These variations ensure that your Honey Butter Chicken can be a flexible and exciting staple in your meal rotation, always fresh and tailored precisely to your taste, dietary needs, and the contents of your pantry.
Step-by-Step Guide to Perfect Honey Butter Chicken
Creating this irresistible Sheet Pan Honey Butter Chicken is incredibly simple, designed for efficiency and maximum flavor payoff. Follow these straightforward steps to achieve a perfectly cooked, golden-glazed meal with minimal effort and maximum deliciousness:
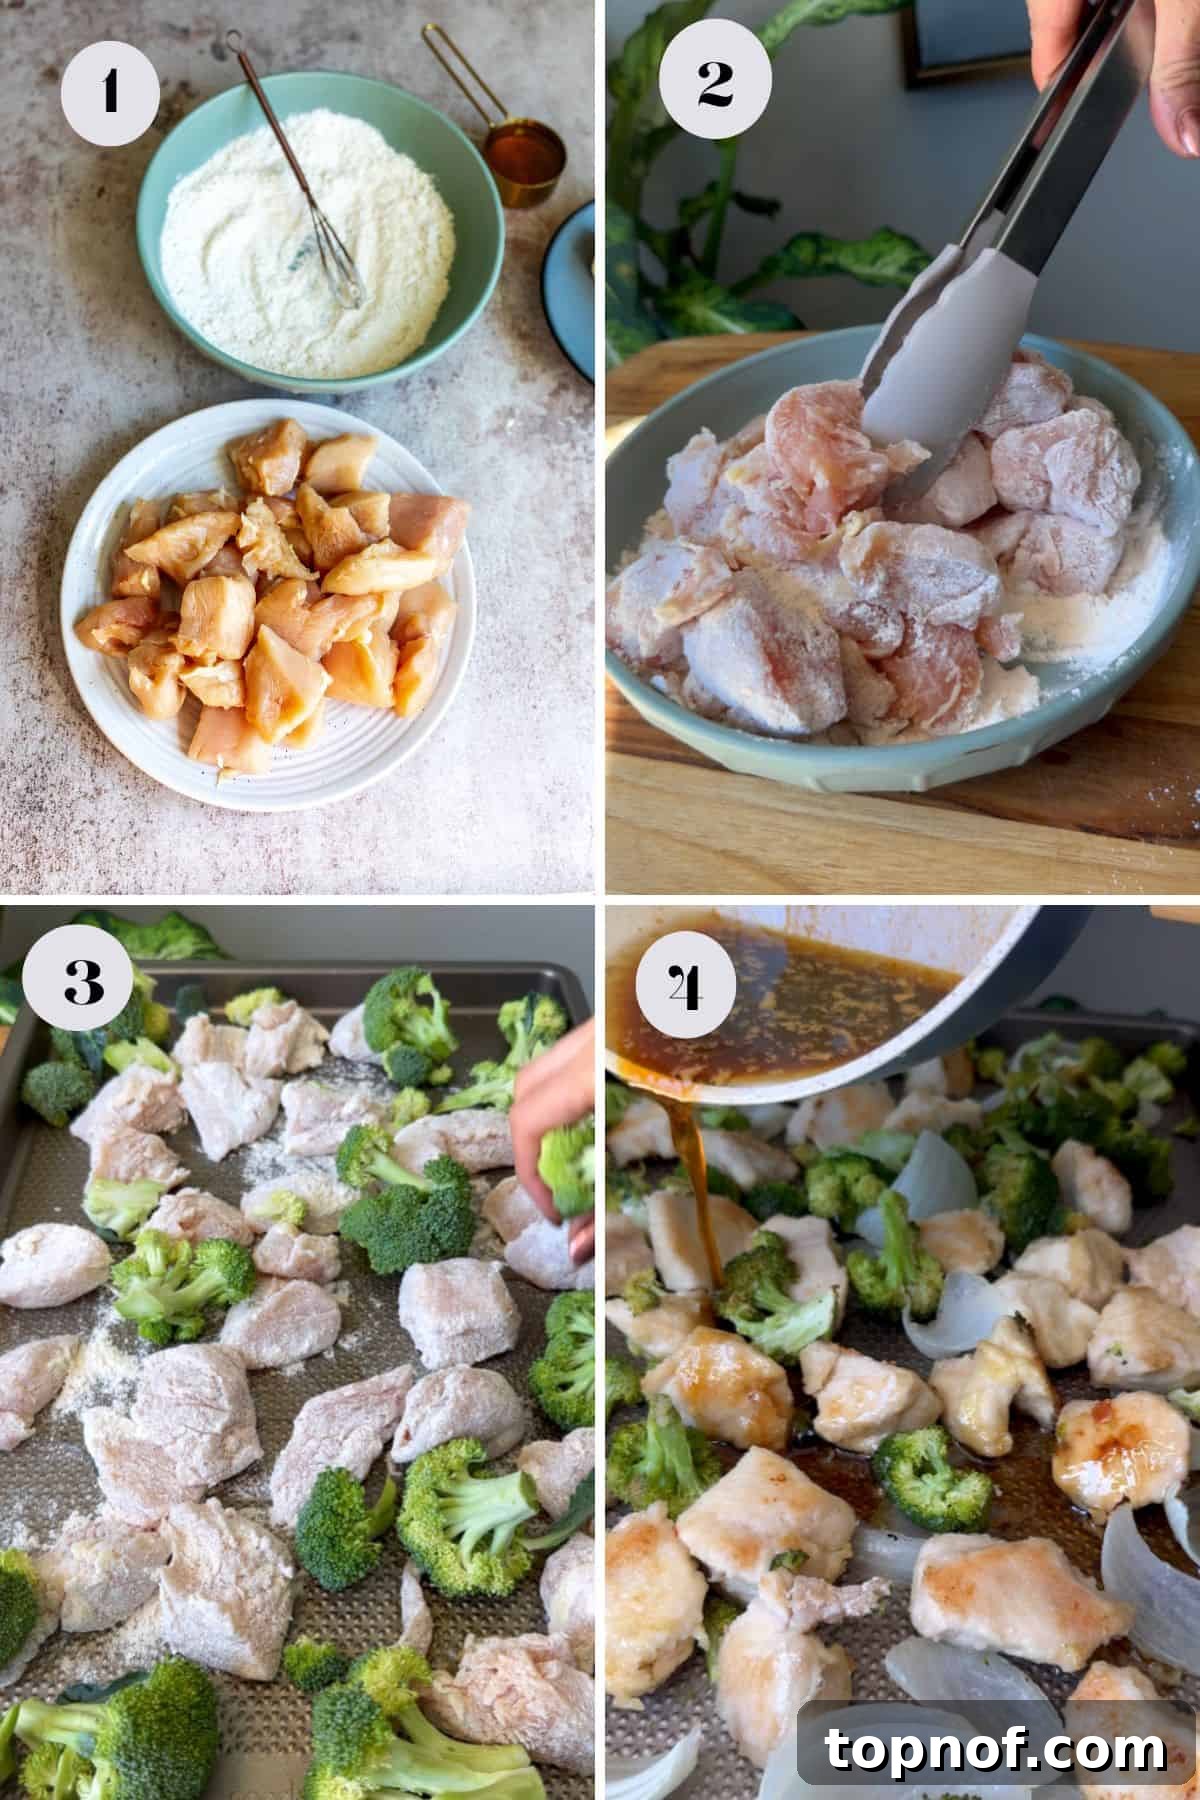
- Preheat Your Oven and Prepare Your Chicken: Begin by preheating your oven to a robust 400°F (200°C). This high temperature is crucial for achieving that desirable crispiness. While the oven heats, take your boneless, skinless chicken breasts or thighs and thoroughly pat them dry with paper towels. This crucial step helps the flour coating adhere better and promotes a crispier exterior during baking. Once dry, cut the chicken into uniform 1-inch cubes. Consistency in size is paramount here for even cooking, ensuring every piece is perfectly tender and cooked through at the same rate. In a large mixing bowl, combine the all-purpose flour with your chosen seasonings: garlic powder, onion powder, salt, and black pepper. Whisk these together until they are well combined and evenly distributed.
- Coat the Chicken and Arrange the Sheet Pan: Add the cubed chicken to the bowl with the flour and seasoning mixture. Toss the chicken thoroughly, ensuring every single piece is evenly coated all over. This creates the foundation for our crispy crust. Set the coated chicken aside for a moment. Next, prepare your accompanying vegetables: chop the broccoli into bite-sized florets and the yellow onion into large, roughly 1-inch cubes. The larger onion pieces are specifically chosen so they soften and caramelize without burning before the chicken is fully cooked. Lightly coat a large sheet pan with olive oil or cooking spray. Distribute the seasoned chicken, broccoli florets, and onion cubes evenly across the sheet pan, making sure that no pieces are overlapping too much. This allows for optimal air circulation and proper roasting, preventing the ingredients from steaming. Place the prepared sheet pan into the preheated oven and cook for an initial 16 minutes.
- Whip Up the Irresistible Honey Butter Sauce: While your chicken and vegetables are roasting beautifully in the oven, it’s time to prepare the star of the show: the incredibly flavorful honey butter sauce. In a small saucepan, melt the butter over low heat. It’s important to keep the heat low to prevent the butter from browning too quickly or scorching. Once the butter is fully melted, stir in the honey and soy sauce. Whisk gently but thoroughly until all the ingredients are fully incorporated and the sauce is smooth and glossy. Remove the saucepan from the heat and set it aside. Remember to keep your oven on, as the sheet pan will be going back in shortly!
- Glaze and Finish Roasting to Perfection: After the initial 16 minutes of roasting, carefully pull the sheet pan from the oven. The chicken should be partially cooked and the vegetables slightly tender. Pour the prepared honey butter sauce evenly over the chicken and vegetables on the pan. Using tongs or a sturdy spatula, gently toss everything together, ensuring every piece is beautifully coated in the sticky, flavorful glaze. This step is where the magic happens, infusing every component with the sweet and savory goodness. Return the sheet pan to the oven for another 4-5 minutes. Continue cooking until the chicken is thoroughly cooked through, reaching an internal temperature of 165°F (74°C). The sauce should be caramelized and slightly thickened, clinging beautifully to the chicken and vegetables.
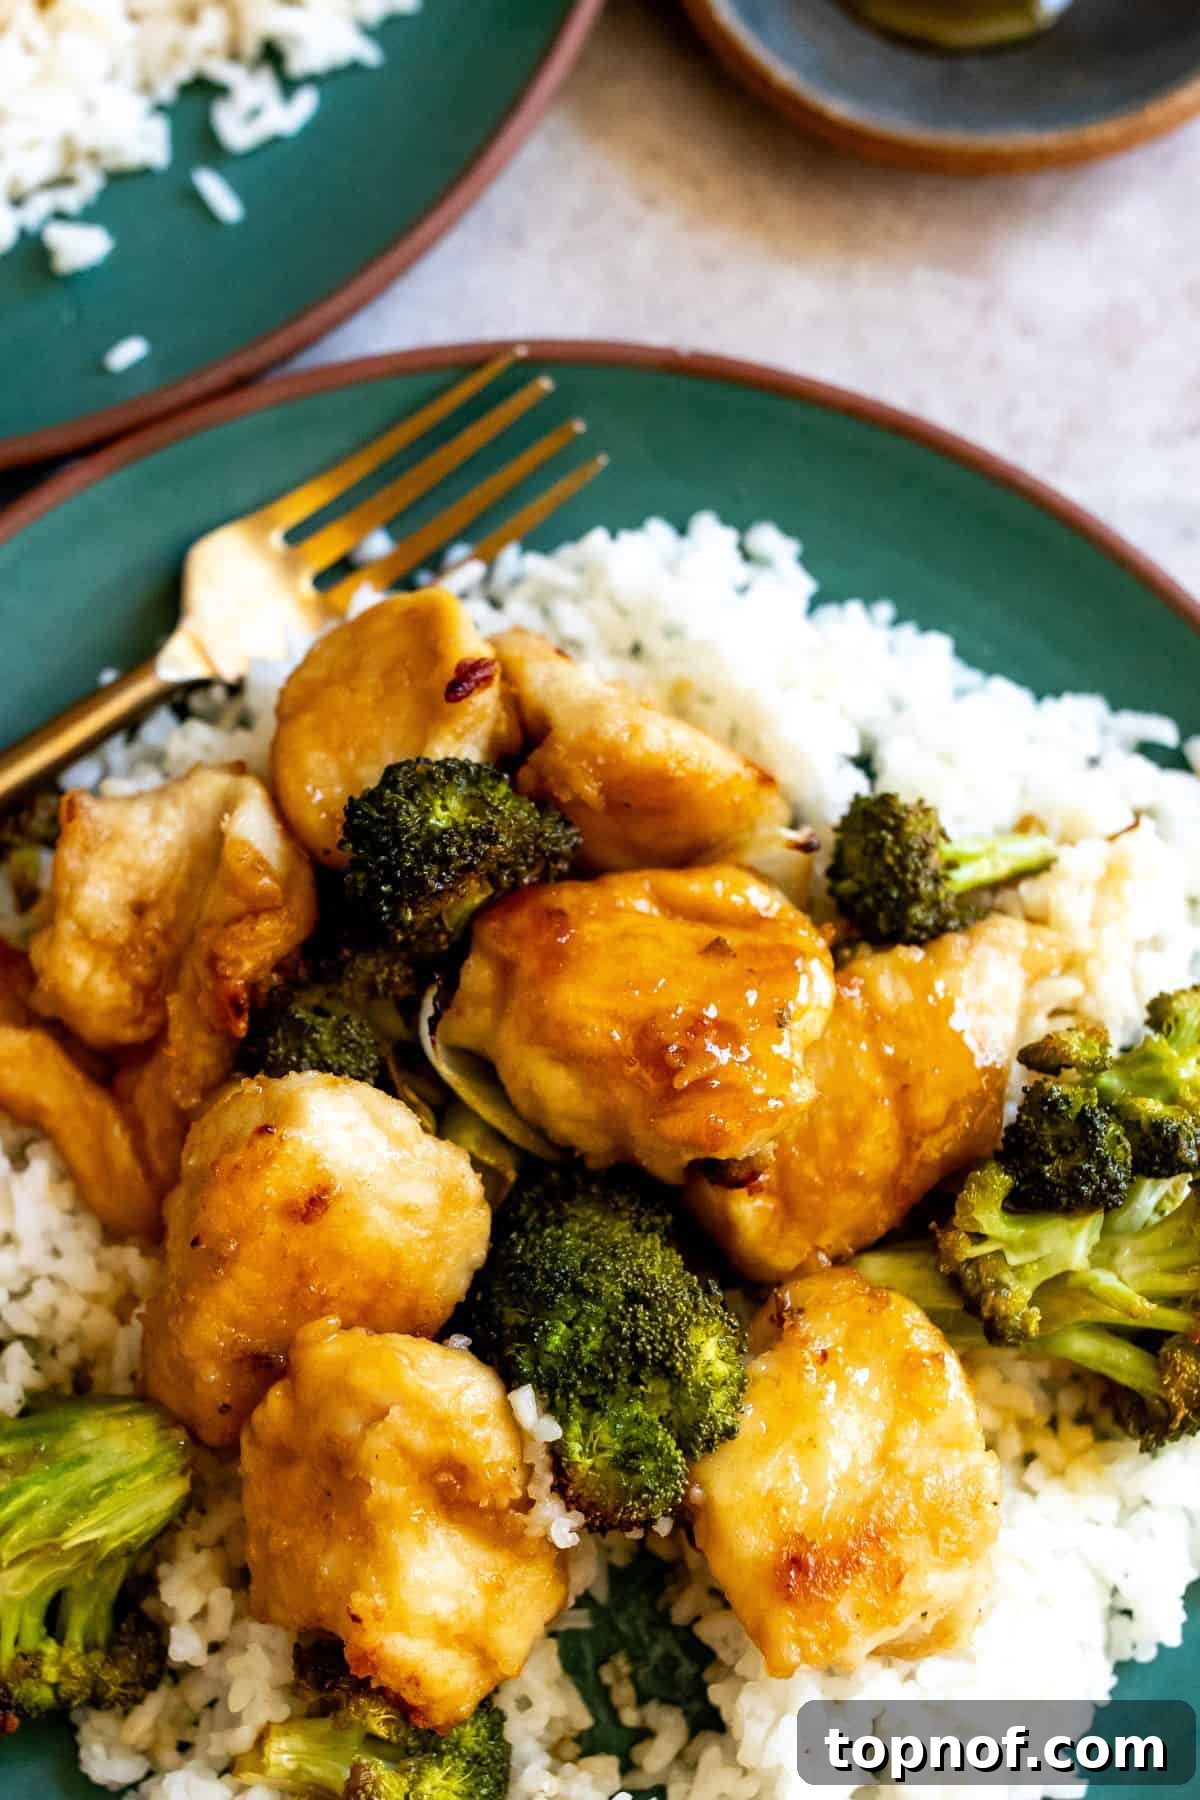
- Serve Immediately and Savor: Once cooked to perfection, remove the Sheet Pan Honey Butter Chicken from the oven. Let it rest for just a minute or two before serving, allowing the juices to redistribute for maximum tenderness. This dish is incredibly versatile and can be enjoyed in many delightful ways: serve it as is for a satisfying high-protein, high-fiber meal, or pair it with your favorite grain like fluffy steamed white rice, nutty brown rice, or protein-rich quinoa. It also makes a fantastic, flavorful topping for a fresh green salad. Enjoy your homemade, restaurant-quality meal that took so little effort to create!
Any delicious leftovers can be stored in an airtight container in the refrigerator for up to 4 days, making this a fantastic option for meal prepping and enjoying healthy, flavorful lunches throughout the week. For longer storage, this dish freezes wonderfully for up to 2 months; simply thaw and reheat gently for another quick meal.
Frequently Asked Questions About Honey Butter Chicken
Here are some common questions you might have when preparing this delightful Sheet Pan Honey Butter Chicken, along with helpful answers to ensure your success:
Does this honey butter chicken need the flour coating?
While the flour coating is highly recommended for achieving that desirable crispy, “takeout-style” exterior, it is not strictly necessary. You can absolutely skip the flour and just season the chicken with the spices before roasting. However, be aware that without the flour, the chicken’s texture will be softer and the sauce may be a little less adhesive, resulting in a slightly different, though still delicious, outcome. The flour contributes significantly to the unique texture that makes this recipe so special and helps the sauce cling perfectly.
Can I make honey butter chicken gluten-free?
Yes, absolutely! Making this honey butter chicken gluten-free is very simple and requires just two easy substitutions. For the flour, replace the all-purpose flour with a 1:1 gluten-free all-purpose flour blend. Ensure it’s a blend specifically designed for baking and cooking, as some single-ingredient flours (like rice flour) might not yield the same coating or texture. For the soy sauce, use tamari, which is a gluten-free soy sauce alternative, or coconut aminos, another excellent gluten-free, soy-free option. With these simple swaps, you can enjoy a delicious and entirely gluten-free meal!
Can I use frozen chicken for this recipe?
While fresh chicken is always preferred for optimal texture and even cooking results, you can use frozen boneless, skinless chicken breasts or thighs. The most important step when using frozen chicken is to ensure it is fully thawed before proceeding with the recipe. Pat the thawed chicken very, very dry with paper towels to remove any excess moisture. This is crucial for the flour coating to adhere properly and for the chicken to crisp up nicely in the oven. Never cook chicken from frozen in this recipe, as it will lead to uneven cooking, a watery sauce, and a less desirable texture.
How can I make the chicken extra crispy?
To achieve maximum crispiness, there are a few extra steps and considerations you can take. First, as mentioned, ensure your chicken is *very* dry before coating it in flour; moisture is the enemy of crispiness. Second, make sure your oven is fully preheated to the specified 400°F (200°C) – a hot oven creates an immediate searing effect. Third, avoid overcrowding the sheet pan at all costs. Give each piece of chicken and vegetable enough space so that air can circulate freely around them; this promotes roasting and browning rather than steaming. If necessary, use two sheet pans instead of one. Finally, resist the urge to open the oven frequently, as this causes temperature drops, extends cooking time, and can hinder the crisping process.
Can I prepare this meal ahead of time?
You can do some light prep work ahead of time. You can cut the chicken and chop the vegetables a day in advance and store them separately in airtight containers in the refrigerator. You can also whisk together the dry seasonings and measure out the sauce ingredients. However, we recommend coating the chicken in flour and combining everything on the sheet pan just before baking, as the flour can get gummy if left coated for too long before cooking.
Pro Tips for the Best Honey Butter Chicken
Achieving culinary perfection with this Sheet Pan Honey Butter Chicken is simple with these expert tips designed to enhance flavor, texture, and overall ease of preparation. Follow these guidelines for consistently delicious results:
- Ensure Even Chicken Cuts: This is a fundamental step for uniform cooking. Take the extra minute or two to cut your chicken breasts or thighs into roughly 1-inch cubes of equal size. If pieces are too varied in size, some will cook faster than others, leading to either dry, overcooked spots or undercooked areas. Precision here guarantees every bite is perfectly tender, juicy, and safely cooked through.
- Optimal Pan Distribution is Key: Overcrowding the sheet pan is a common mistake that leads to steaming rather than roasting. For deliciously crispy chicken and perfectly tender-crisp vegetables, make sure to distribute all ingredients in a single layer with a little space between each piece. This allows for optimal air circulation, which is essential for browning and crisping. If your pan looks too full, it’s always better to use a second sheet pan to ensure everything cooks evenly and gets beautifully golden-brown.
- Watch Your Honey Butter Sauce Carefully: The honey butter sauce, while simple to make, requires a watchful eye. When melting butter and combining it with honey and soy sauce, always keep the heat on low. Honey and butter can burn quite easily if the heat is too high or if left unattended. Stir constantly until melted and thoroughly combined, then remove the saucepan from the heat immediately. If you need to step away for a moment, simply take the saucepan off the burner to prevent any scorching.
- Embrace a Variety of Seasonal Veggies: While broccoli is a fantastic pairing for this dish, don’t limit yourself! This recipe is wonderfully versatile and works beautifully with a variety of fresh, in-season vegetables. Consider adding colorful bell peppers (red, yellow, orange), tender zucchini, hearty cauliflower florets, or even sliced mushrooms. Remember that broccoli and cauliflower tend to yield the crispiest results as they release less moisture during roasting compared to high-water-content veggies like zucchini or tomatoes.
- Handle Frozen Vegetables Separately: If you’re opting to use frozen vegetables, it’s crucial to cook them separately according to their package instructions. Adding frozen vegetables directly to the sheet pan with the chicken will release a significant amount of moisture as they thaw and cook, making your chicken soggy and preventing it from crisping up properly. For the best outcome and a crispy chicken, always stick to fresh vegetables for the sheet pan or cook any frozen veggies on their own.
- Don’t Skimp on Patting Dry: We mentioned it in the initial steps, but it bears repeating because it’s so vital: thoroughly patting your chicken dry before coating is absolutely crucial. Excess moisture on the chicken surface creates steam in the oven, which actively hinders the browning process and prevents that desirable crispy coating from forming. Use plenty of paper towels until the chicken feels dry to the touch.
- Utilize Parchment Paper or Foil: For even easier cleanup, which is one of the main appeals of sheet pan meals, generously line your sheet pan with parchment paper or aluminum foil before adding ingredients. This not only makes washing up a breeze but can also help prevent sticking, especially with the sticky honey butter sauce.
- Confirm Doneness with a Thermometer: Always use a meat thermometer to ensure your chicken is cooked to a safe internal temperature of 165°F (74°C). This is the most reliable way to guarantee doneness without the risk of overcooking, which can lead to dry chicken. Insert the thermometer into the thickest part of a chicken piece.
By diligently following these expert tips, you’ll consistently achieve a delicious and perfectly cooked Sheet Pan Honey Butter Chicken that will impress every time, making it a reliable and cherished recipe in your cooking repertoire!
Delicious Recipe Pairings
This versatile Sheet Pan Honey Butter Chicken, complete with its roasted vegetables, is a satisfying meal on its own. However, it also pairs wonderfully with a variety of sides to round out your dinner and enhance the overall dining experience. Here are some delightful suggestions to complement its irresistible sweet and savory flavors:
- Classic Rice: A bed of fluffy white or brown rice is a timeless and perfect companion. The rice soaks up any extra honey butter sauce, creating an incredibly flavorful and satisfying bite. Basmati or jasmine rice would add a lovely aroma.
- Quinoa or Other Grains: For a nutrient-dense and gluten-free alternative, serve the chicken over cooked quinoa, couscous, or farro. These grains add a different texture, a nutty flavor, and extra fiber, making the meal even more wholesome.
- Fresh Green Salads: To add a refreshing contrast and a burst of freshness, pair this rich dish with a light, crisp salad. A vibrant Kale Salad with Lemon Honey Dressing or a zesty Lemon Caesar Salad would cut through the richness beautifully, offering a refreshing counterpoint.
- Roasted Asparagus: If you’re looking for another vegetable side that roasts well, tender roasted asparagus spears would be a fantastic addition. Their slightly earthy and bitter notes would offer a wonderful contrast to the sweet sauce.
- Simple Steamed Greens: A quick side of simply steamed spinach, green beans, or even Swiss chard can add a fresh, healthy component without overpowering the main dish. A squeeze of lemon juice on them would be a nice touch.
- Creamy Mashed Potatoes or Sweet Potatoes: For a more comforting and hearty meal, serve it alongside a generous portion of creamy mashed potatoes or a sweet potato mash. These smooth sides would perfectly absorb the delectable honey butter sauce, creating an incredibly satisfying and indulgent experience.
- Garlic Bread or Dinner Rolls: Don’t underestimate the power of a warm, crusty piece of garlic bread or soft dinner rolls to sop up every last drop of that amazing sauce.
Whether you choose to enjoy it as is for a satisfying high-protein, high-fiber meal or with one of these delicious pairings, your Sheet Pan Honey Butter Chicken is sure to be a hit at your dinner table!
More Easy Chicken Recipes to Explore
If you’ve enjoyed the simplicity, convenience, and deliciousness of this Sheet Pan Honey Butter Chicken, you’re in for a treat! We love creating easy, flavorful chicken dishes that make weeknight cooking a breeze and keep your meal rotation exciting. Here are some other fantastic chicken recipes from our collection that are sure to become family favorites:
Discover More Delicious & Easy Chicken Dinners
Dinner
Honey Garlic Lemon Chicken
A zesty and sweet combination that perfectly balances the rich flavor of chicken with bright lemon and savory garlic. This recipe is another simple weeknight wonder that’s bursting with vibrant flavors.
Dinner
Blackened Chicken Bowls
For those who love a bit of spice, these flavorful blackened chicken bowls are packed with bold, smoky seasonings and often served with a refreshing cilantro lime dressing. Ideal for a customizable, hearty meal that feels gourmet.
Dinner
Teriyaki Chicken Bowl
A classic favorite, this teriyaki chicken bowl features succulent chicken glazed in a rich, savory-sweet sauce, typically served over rice with your choice of fresh vegetables. A perfect homemade alternative to takeout that’s both satisfying and simple.
Salads
Cajun Chicken Salad
For a lighter, yet incredibly flavorful meal, this Cajun chicken salad offers perfectly seasoned, spicy chicken atop a bed of crisp fresh greens and vibrant veggies, often with a creamy dressing. A satisfying option for lunch or dinner.
We hope you enjoy trying these and many more recipes designed to make you feel good from the inside out. If you loved this Sheet Pan Honey Butter Chicken recipe, please let us know! Don’t forget to follow us on Instagram & Pinterest for daily inspiration and more delicious, easy-to-make meals. Thanks for being here and happy cooking!
Sheet Pan Honey Butter Chicken
Effortless, utterly delicious, and ready in just 30 minutes! This Sheet Pan Honey Butter Chicken features tender chicken and vibrant vegetables coated in an irresistible, sweet and savory buttery honey sauce, perfect for a quick and satisfying weeknight meal.
Author: Bailey Rhatigan
Prep time: 10 minutes
Cook time: 20 minutes
Total time: 30 minutes
Servings: 4
Course: Dinner, Main Course
Cuisine: American
Keywords: 30 minute meal, sheet pan, honey butter, easy chicken, weeknight dinner, quick chicken recipe
Rate Recipe
Print Recipe
Equipment
- Large sheet pan
- Sharp knives
- Small saucepan
- Large mixing bowl
- Tongs or spatula
Ingredients
- For the Chicken & Veggies:
- 1 lb boneless, skinless chicken breasts or thighs, cut into 1-inch cubes (*see notes)
- ⅓ cup all-purpose flour (*use gluten-free all-purpose flour if needed)
- ½ tsp salt
- ½ tsp black pepper
- ½ tsp onion powder
- ½ tsp garlic powder
- ½ tsp olive oil (for coating the pan)
- 2 cups broccoli florets (fresh)
- ½ cup yellow onion, sliced into large cubes
- For the Honey Butter Sauce:
- 4 Tbsp unsalted butter (*plant-based butter or ghee will also work)
- ⅓ cup honey
- 1⅓ Tbsp low-sodium soy sauce (*use tamari or coconut aminos if gluten-free)
Instructions
- Preheat Oven & Prepare Chicken: Preheat your oven to 400ºF (200°C). Pat the chicken dry with paper towels and cut it into uniform 1-inch cubes for even cooking. In a large bowl, whisk together the flour, salt, black pepper, onion powder, and garlic powder until well combined.
- Coat Chicken & Arrange Pan: Add the cubed chicken to the flour mixture and toss well until all pieces are evenly coated. Chop broccoli into bite-sized florets and yellow onion into large cubes (approximately 1-inch to prevent burning). Lightly coat a large sheet pan with olive oil. Arrange the coated chicken, broccoli, and onions in a single layer on the prepared sheet pan, ensuring pieces are not overlapping. Place the sheet pan in the preheated oven and bake for 16 minutes.
- Prepare Honey Butter Sauce: While the chicken and vegetables are baking, melt the butter in a small saucepan over low heat. Once melted, stir in the honey and soy sauce until well combined and smooth. Remove the saucepan from the heat and set it aside. Keep the oven on for the next step!
- Glaze & Finish Baking: After the initial 16 minutes, carefully remove the sheet pan from the oven. Pour the prepared honey butter sauce evenly over the chicken and vegetables. Using tongs or a spatula, gently toss everything together to ensure all ingredients are thoroughly coated in the delicious glaze. Return the pan to the oven and bake for an additional 4-5 minutes, or until the chicken is fully cooked through (reaching an internal temperature of 165ºF / 74°C) and the sauce is beautifully caramelized and sticky.
- Serve & Enjoy: Remove the Sheet Pan Honey Butter Chicken from the oven. Let it rest for a minute or two, then serve immediately. This meal is wonderful on its own, or served over a bed of steamed rice, quinoa, or alongside a fresh green salad.
Notes
- Chicken Cut: Boneless, skinless chicken thighs can be used interchangeably with chicken breasts for a richer flavor. Ensure they are cut into uniform 1-inch pieces.
- Gluten-Free Option: To make this recipe gluten-free, substitute the all-purpose flour with a 1:1 gluten-free all-purpose flour blend. For the soy sauce, use tamari or coconut aminos.
- Dairy-Free Option: Plant-based butter or ghee are excellent dairy-free substitutes for traditional butter in the sauce.
- Storage: Store any delicious leftovers in an airtight container in the refrigerator for up to 4 days. For longer preservation, this dish freezes wonderfully for up to 2 months. Thaw completely and reheat gently.
- Nutritional Information: Please note, the nutritional information provided below is an approximation and does NOT include additional servings like rice or other optional pairings. It only accounts for the chicken with vegetables and sauce. If serving with 1 cup of cooked white rice, please add approximately 230 calories to your calculation.
Nutrition Facts (per serving)
Nutrition information is automatically calculated and provided for estimation purposes only. Individual results may vary.
- Serving Size: Approximately 1 cup
- Calories: 289kcal
- Carbohydrates: 36g
- Protein: 28g
- Fat: 4g
- Saturated Fat: 1g
- Polyunsaturated Fat: 1g
- Monounsaturated Fat: 1g
- Trans Fat: 0.01g
- Cholesterol: 74mg
- Sodium: 790mg
- Potassium: 632mg
- Fiber: 2g
- Sugar: 25g
- Vitamin A: 344IU
- Vitamin C: 42mg
- Calcium: 51mg
- Iron: 2mg