
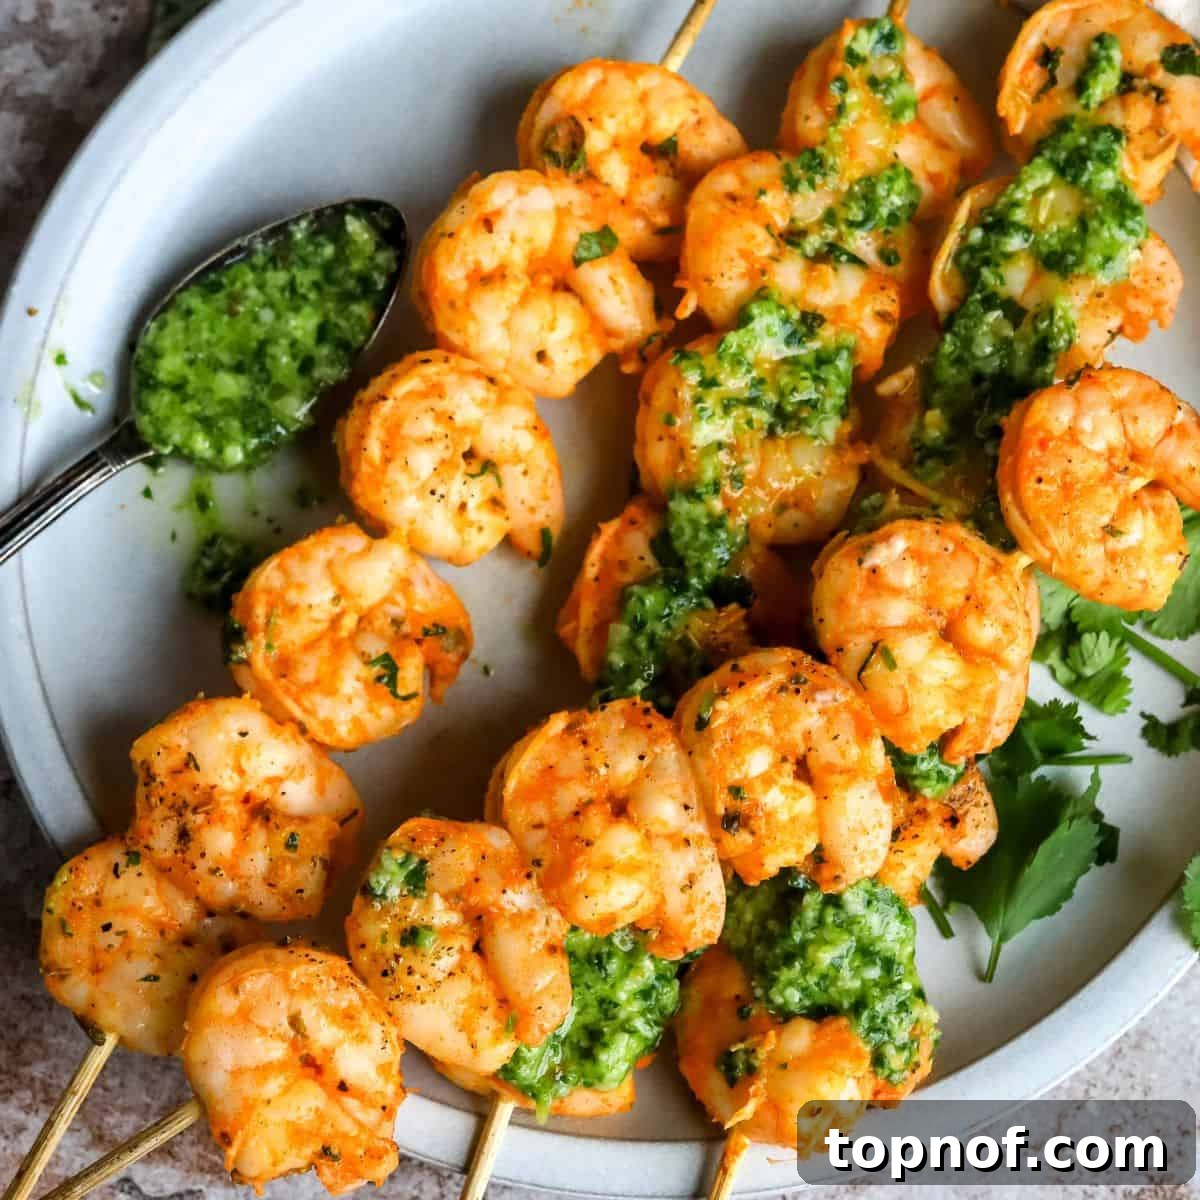
Embark on a culinary journey to create the most succulent and flavorful oven-baked shrimp skewers, a dish that effortlessly combines convenience with gourmet taste. These quick and easy skewers are not just a meal; they’re an experience, delivering perfectly cooked shrimp that are juicy on the inside with a delightful, slightly crisp exterior. Infused with a light yet potent marinade, they’re ready to tantalize your taste buds in mere minutes. Forget the hassle of outdoor grilling; enjoy that incredible “grilled” flavor any time of year, right from your oven!
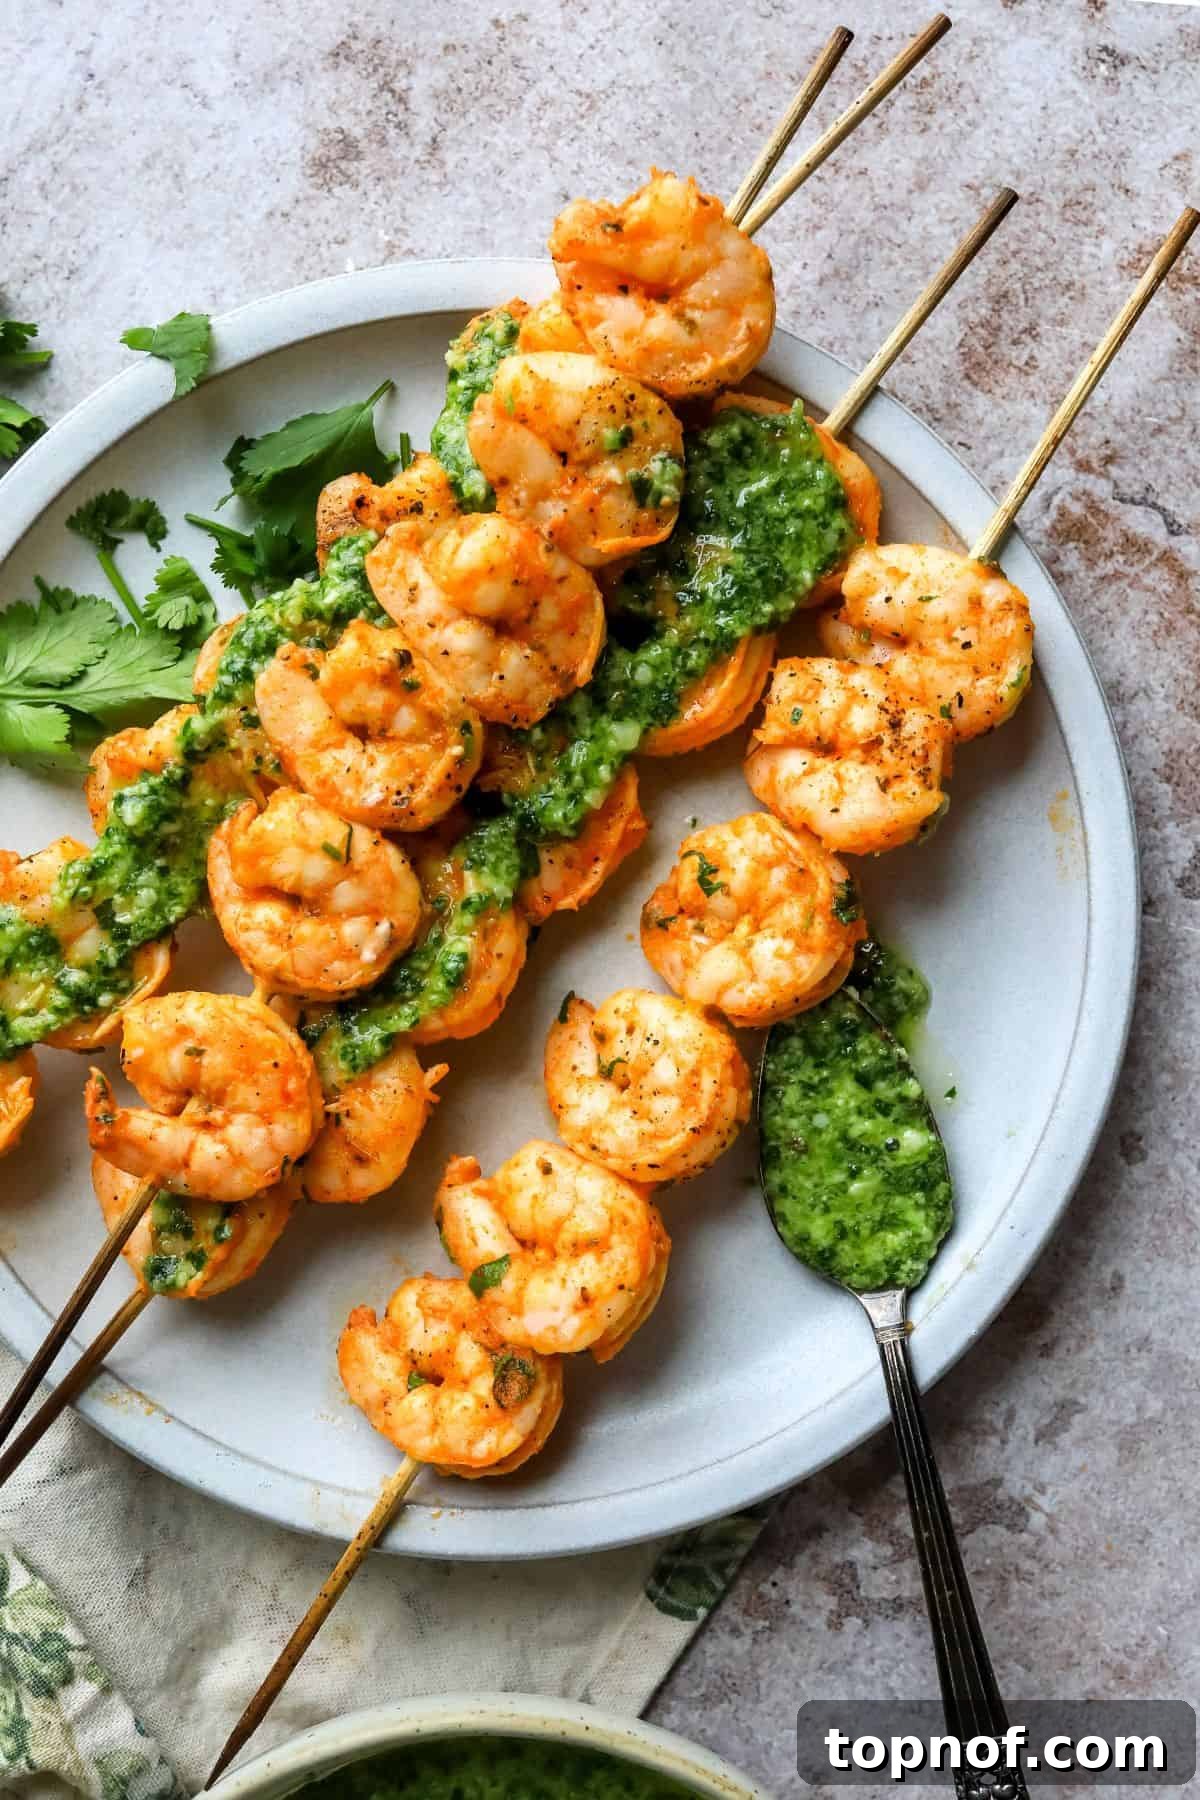
Why Oven Baked Shrimp Skewers Are a Must-Try Recipe
In the quest for easy, healthy, and incredibly tasty meals, oven-baked shrimp skewers stand out as a clear winner. This recipe is designed to simplify your cooking routine without compromising on flavor or nutritional value. Here’s why these delightful shrimp skewers deserve a permanent spot in your recipe repertoire:
- Unbelievably Simple and Quick: If you’re looking for a foolproof dish that comes together in minutes, this is it. Oven-baked shrimp skewers eliminate the guesswork and stress often associated with cooking seafood. From prep to plate, you’re looking at a minimal time commitment, making it perfect for busy weeknights.
- Versatile Serving Options: These shrimp skewers are incredibly adaptable. Serve them as a light and refreshing main course over a crisp Simple Green Salad, alongside fluffy rice for a more substantial meal, or even as an elegant, protein-packed appetizer for your next gathering. Their versatility makes them suitable for virtually any occasion.
- A Healthy and Low-Calorie Choice: Shrimp is an excellent source of lean protein, making this meal ideal for a variety of dietary needs and health-conscious eaters. It’s naturally low in calories and fat, yet incredibly satisfying, serving as a fantastic snack or a high-protein addition to any dish. It’s also gluten-free and dairy-free, catering to common dietary restrictions.
- Achieve a Perfectly Crispy Texture with a Juicy Interior: The beauty of baking shrimp in the oven lies in its ability to create a delightful contrast. The exterior of the shrimp develops a lovely crispness, while the inside remains tender, succulent, and bursting with natural flavor. This method ensures every bite is a textural delight.
- Endless Flavor Enhancements with Dipping Sauces: While these skewers are fantastic on their own, they truly shine when paired with a complementary sauce. Drizzle them with my vibrant Pesto Dressing or my zesty Lemon Herb Tahini Dressing for an added layer of flavor. The possibilities for sauces and dipping options are virtually limitless, allowing you to customize your experience every time.
- No Grill? No Problem! Enjoy “Grilled” Flavor Year-Round: One of the biggest advantages of this recipe is that it provides that beloved grilled taste and texture without needing an outdoor grill. This means you can enjoy delicious, perfectly cooked shrimp skewers regardless of the weather, making it a reliable meal for any season.
Essential Ingredients for Perfect Shrimp Skewers
Crafting delicious oven-baked shrimp skewers begins with a selection of fresh, high-quality ingredients. While the full list with precise measurements is conveniently located in the recipe card at the bottom of this post, here are some key insights into the core components that make this dish truly exceptional:
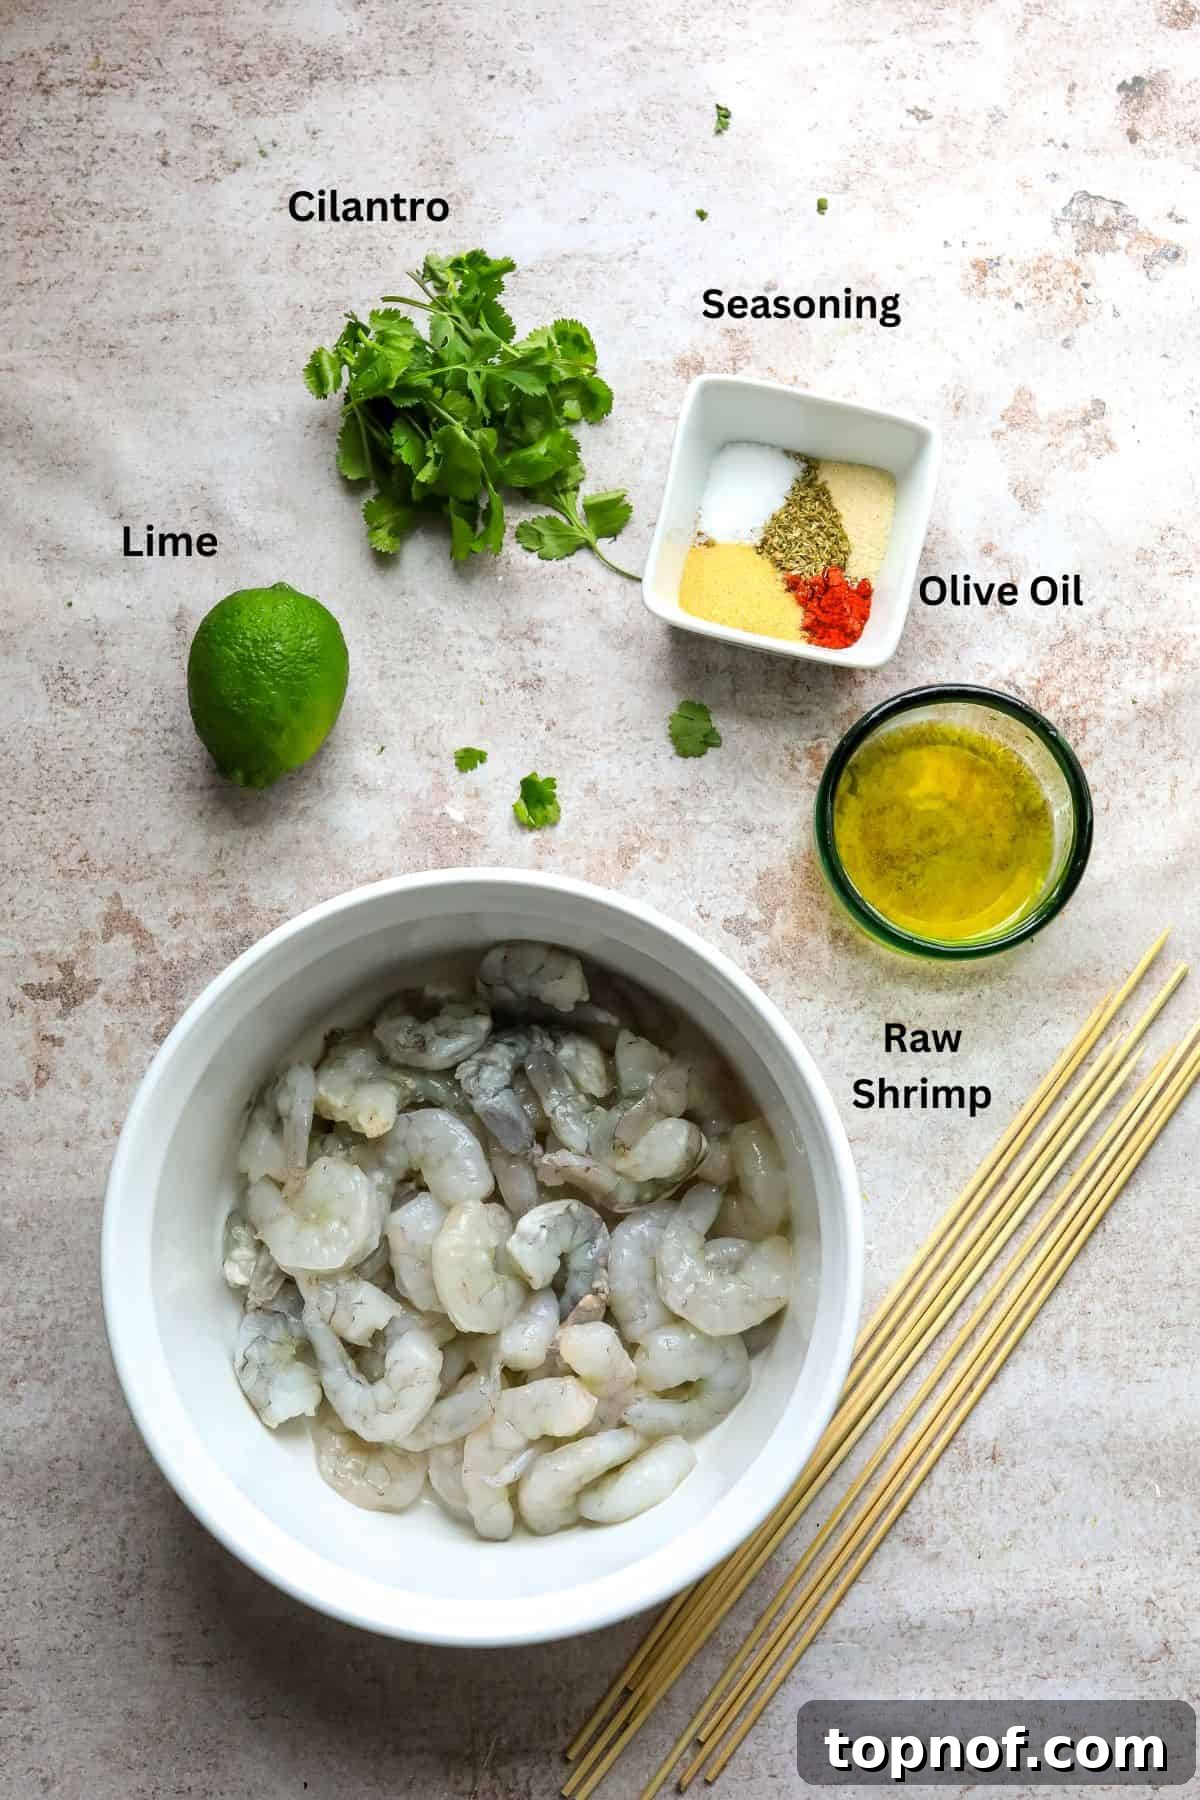
Shrimp: The Star of the Show
For this recipe, both frozen, thawed shrimp and fresh shrimp work wonderfully. The key is to ensure they are peeled and deveined. When choosing shrimp, aim for large or jumbo varieties, as they tend to stay juicier and are easier to thread onto skewers. If using frozen shrimp, make sure to thaw them completely before starting. The best way to thaw shrimp is to place them in the refrigerator overnight, or for a quicker method, submerge the sealed bag of shrimp in cold water for about 15-20 minutes.
Olive Oil: The Flavor Carrier and Moisture Keeper
A high-quality, neutral-flavored olive oil is essential here. It not only helps the seasonings adhere to the shrimp but also contributes to the succulent texture by locking in moisture during the cooking process. Extra virgin olive oil is a great choice for its flavor profile, but any good quality neutral oil will do.
Signature Seasonings: The Heart of the Flavor
This carefully balanced blend of spices is what truly makes these shrimp skewers stand out. You’ll need a combination of:
- Salt and Pepper: The foundational seasonings to enhance all other flavors.
- Italian Seasoning Blend: A versatile mix of herbs like oregano, basil, rosemary, and thyme, adding an aromatic depth. If you don’t have a pre-made blend, a pinch of dried oregano and basil will work in a pinch.
- Garlic Powder and Onion Powder: These provide a concentrated, savory flavor without the moisture or texture of fresh garlic and onion, ensuring a smooth marinade.
- Paprika: Adds a beautiful reddish hue and a subtle, sweet, peppery warmth, enhancing the overall appearance and taste.
Fresh Lime Juice: The Brightening Element
A squeeze of fresh lime juice is not just for flavor; it plays a crucial role in tenderizing the shrimp and adding a bright, zesty note that cuts through the richness of the other ingredients. Lemon juice can be used as an equally delicious alternative if lime isn’t available.
Fresh Cilantro (Optional Garnish): While not essential for cooking, a sprinkle of freshly chopped cilantro at the end adds a burst of freshness and a vibrant color. If cilantro isn’t your preference, fresh parsley makes an excellent substitute.
Creative Variations & Smart Substitutions
One of the joys of cooking is the ability to customize a recipe to suit your preferences or what you have on hand. These oven-baked shrimp skewers are incredibly versatile, allowing for numerous delicious variations:
- Shrimp Choice: Feel free to use any size or type of shrimp you prefer, from small salad shrimp to colossal prawns. The most important thing is to ensure they are fully thawed, peeled, and thoroughly cleaned. Adjust cooking times slightly for smaller or larger shrimp; smaller shrimp will cook faster.
- Alternative Oils: While olive oil is recommended, any neutral-flavored oil can be used for the marinade. Avocado oil, grapeseed oil, or even a light vegetable oil will work well to coat the shrimp, help the seasonings adhere, and keep them moist during baking.
- Herb Substitutions: If cilantro isn’t your favorite, or if you simply don’t have any on hand, fresh parsley is a fantastic alternative for a bright, herbaceous garnish. You can also experiment with other fresh herbs like dill or chives for different flavor profiles.
- Spice It Up: For those who love a bit of heat, consider adding a pinch of cayenne pepper, red pepper flakes, or a dash of your favorite hot sauce to the marinade. Smoked paprika can also be used in place of regular paprika for a deeper, smoky flavor.
- Vibrant Veggie Skewers: Transform these into a complete meal by adding colorful vegetables to your skewers. Bell peppers (any color), zucchini, cherry tomatoes, red onion wedges, or mushrooms are excellent choices. Cut them into similar-sized pieces to ensure even cooking and thread them alternately with the shrimp.
- Different Marinade Profiles: Explore beyond the Italian seasoning blend. Try a lemon-herb marinade with fresh rosemary and thyme, a spicy Cajun blend, an Asian-inspired marinade with soy sauce and ginger, or even a smoky barbecue rub for a different twist.
Step-by-Step Guide to Perfectly Baked Shrimp Skewers
Get ready to create a masterpiece! Gather your kitchen essentials, put on your apron, and let’s dive into the simple steps to prepare these irresistible oven-baked shrimp skewers.
Step One: Prepare Your Oven and Baking Sheet
Begin by preheating your oven to a precise 400°F (200°C). This ensures your oven is at the optimal temperature for quick and even cooking when the shrimp go in. While the oven preheats, prepare a standard baking sheet by lining it with parchment paper. This simple step is a game-changer for easy cleanup and prevents the shrimp from sticking to the pan.
Step Two: Dry and Season the Shrimp
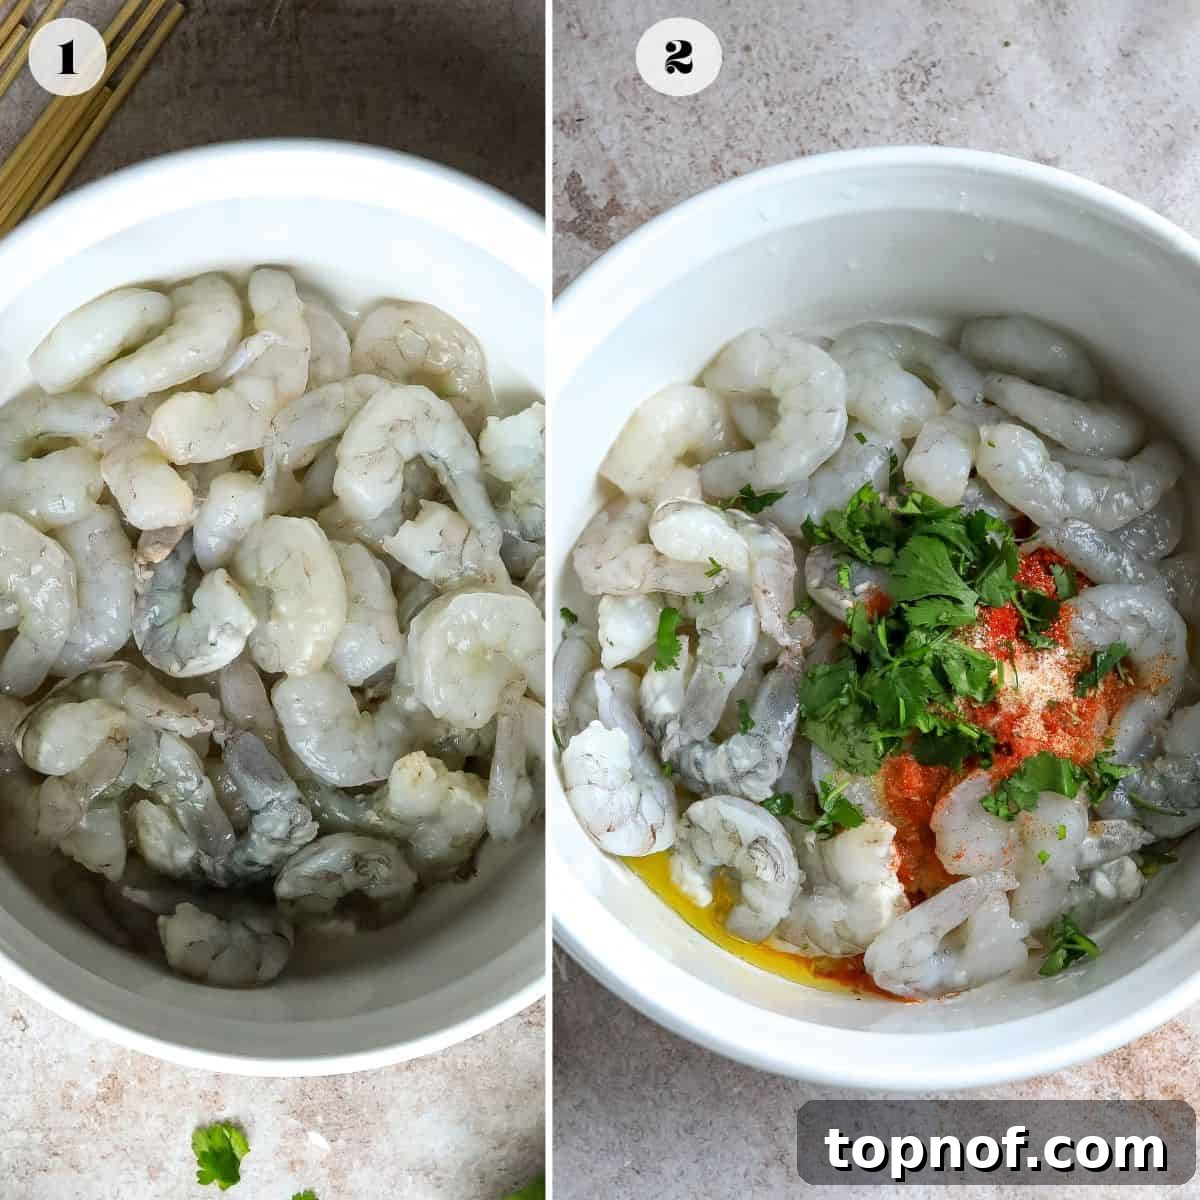
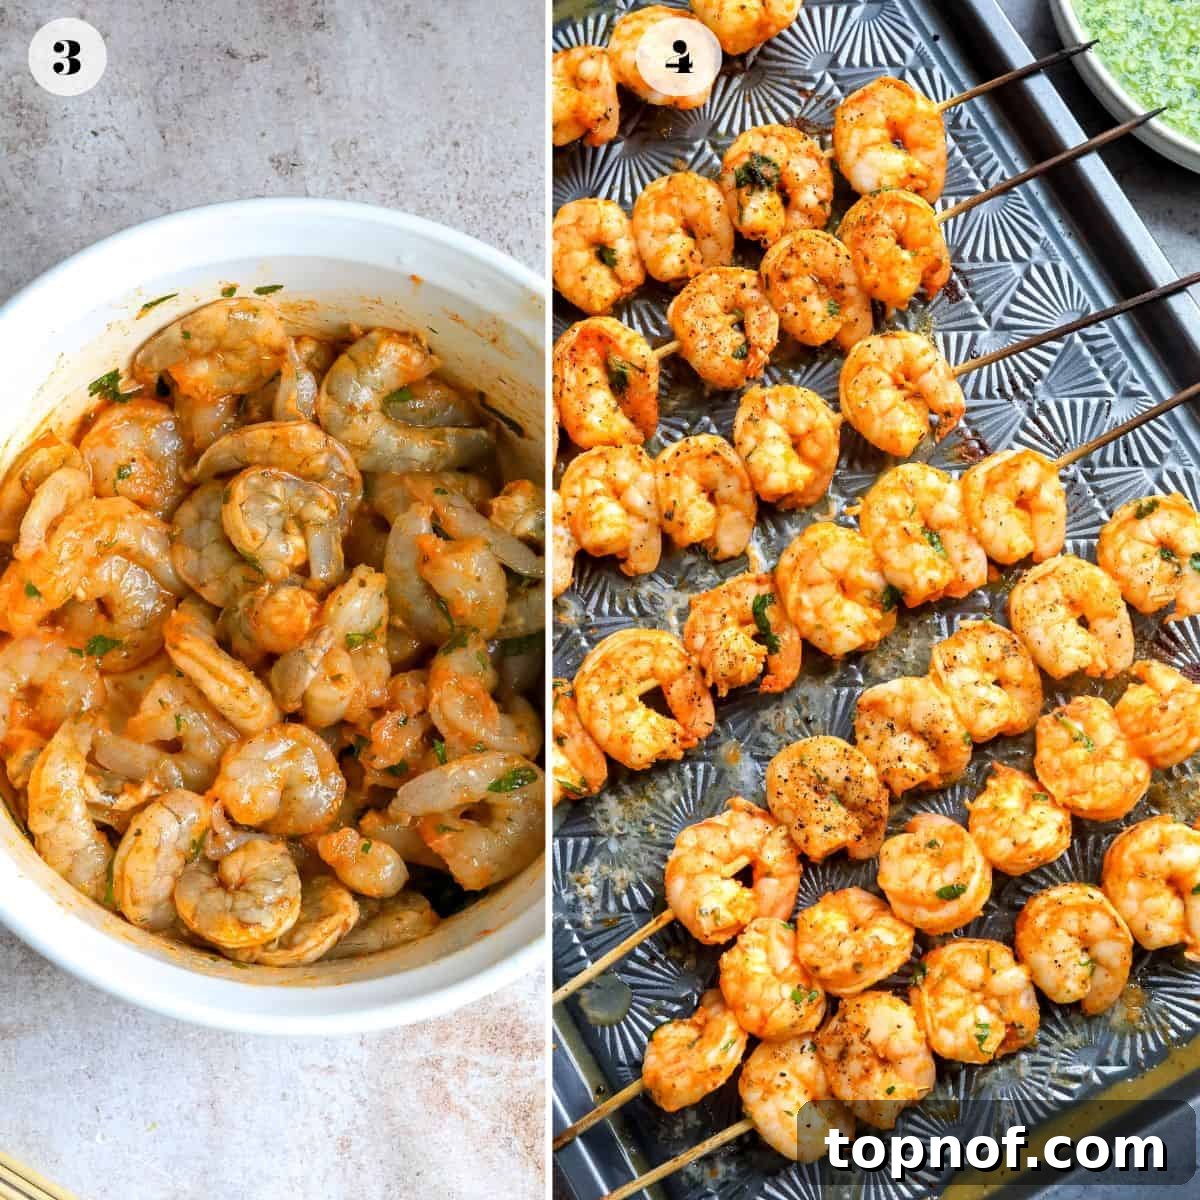
Carefully pat your thawed shrimp completely dry using paper towels. This crucial step allows the seasonings and marinade to adhere properly to the shrimp, rather than sliding off. Transfer the dried shrimp to a large mixing bowl. Now, add all your chosen seasonings—salt, pepper, Italian seasoning blend, garlic powder, onion powder, paprika—along with the fresh citrus juice (lime or lemon) and olive oil. Toss everything gently to ensure each shrimp is thoroughly coated.
Step Three: Allow for a Quick Marinade
Let the seasoned shrimp sit in the bowl for just a few minutes. This brief resting period allows the flavors to meld and the shrimp to absorb some of the marinade. Remember, shrimp cook very quickly, and delicate seafood like this doesn’t need a long marination period; over-marinating with citrus can begin to “cook” the shrimp and alter its texture, making it mushy or tough.
Thread and Bake for Perfection
Step Four: Thread the Shrimp onto Skewers
Now, it’s time to assemble your skewers. Begin threading the marinated shrimp onto your chosen skewers (whether wood or metal), starting from the sharp end. Aim for about 5-6 shrimp per skewer, leaving a small space between each one. This allows for even cooking and ensures every side of the shrimp gets exposure to the heat. Repeat this process until all shrimp are used, typically yielding 4 to 5 well-loaded skewers.
Step Five: Bake and Broil to Crispy Perfection
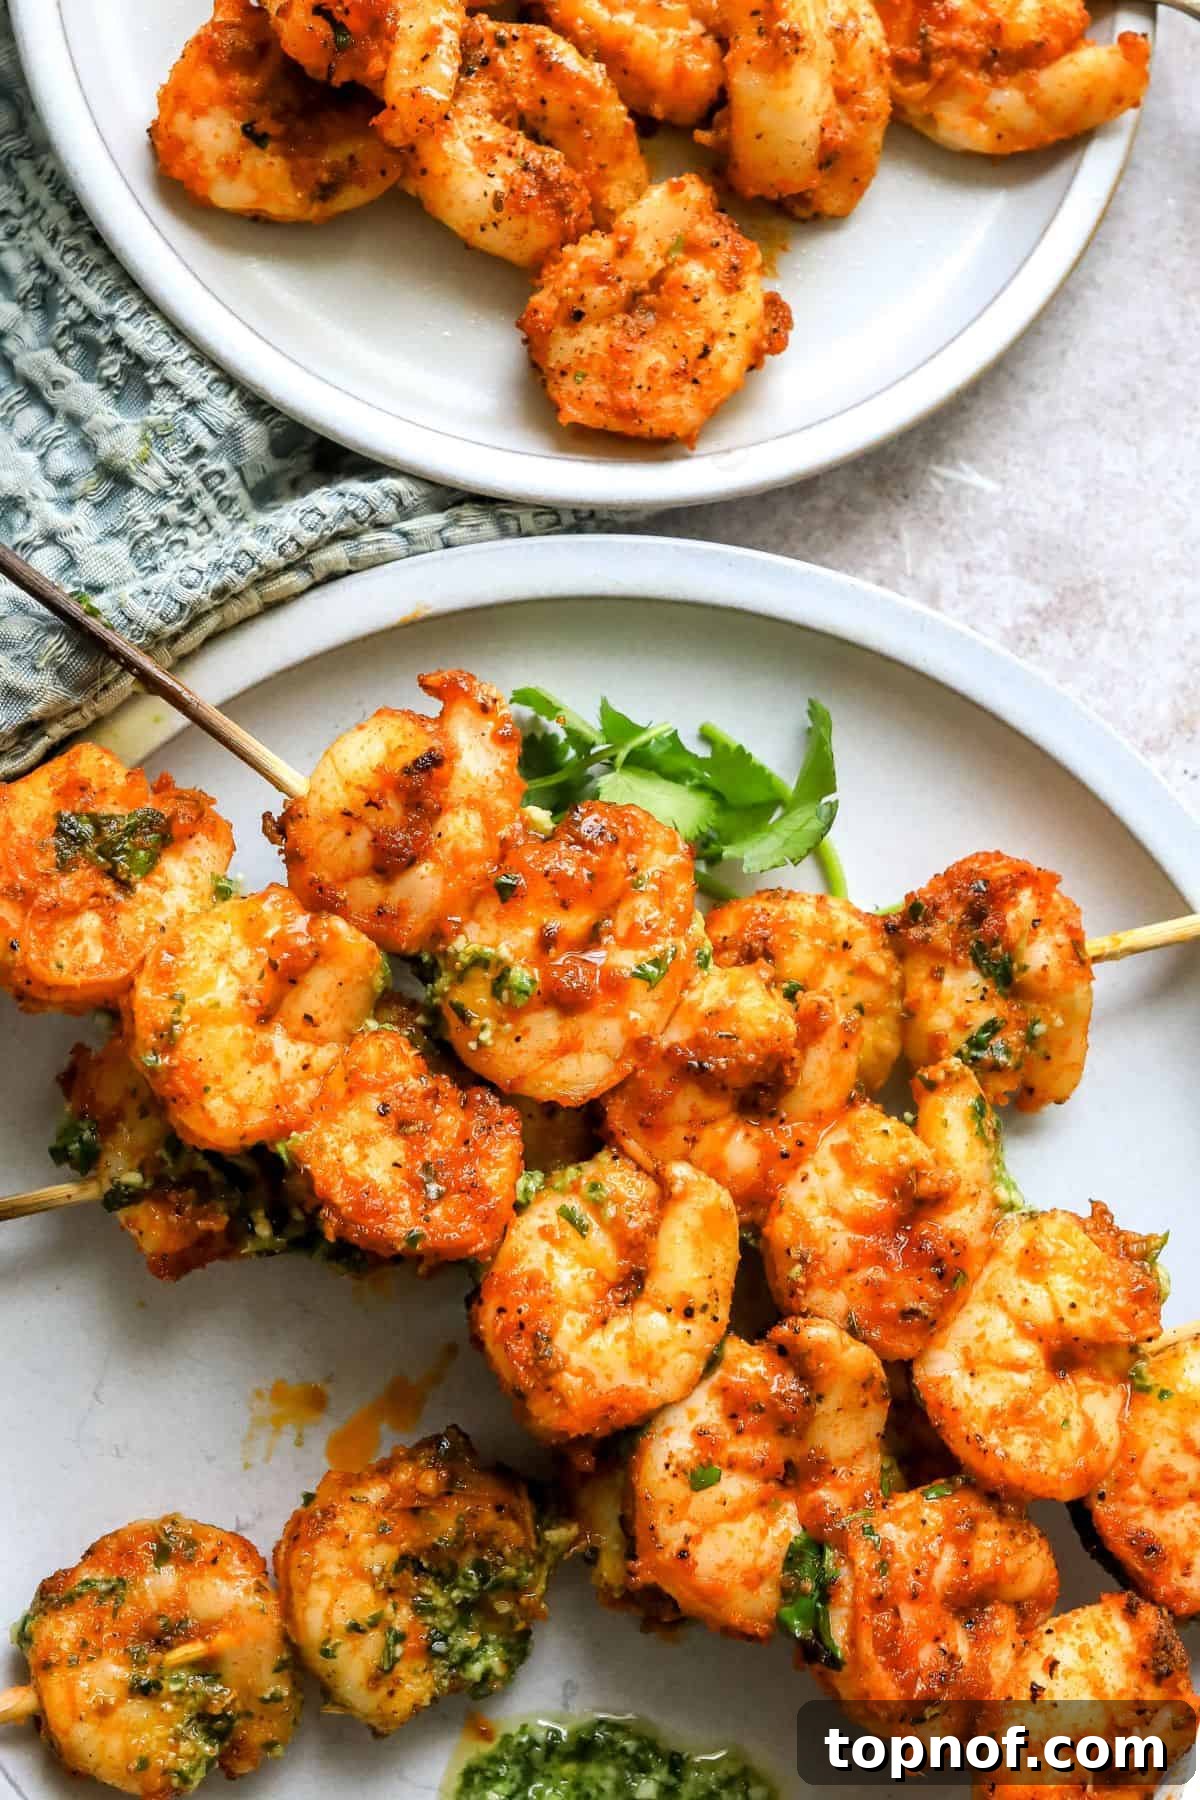
Arrange the prepared shrimp skewers in a single layer on your parchment-lined baking sheet. Place the baking sheet into the preheated 400°F oven and bake for approximately 4 minutes. After this initial bake, carefully switch your oven to the “broil high” setting. Broil the shrimp for another 1-2 minutes, keeping a very close eye on them, as broiler temperatures can vary and shrimp can go from perfectly cooked to overcooked very quickly. The broil step is key to achieving that desirable crispy exterior. Once done, pull the shrimp out of the oven and let them rest for a minute or two. The shrimp should appear light pink and opaque when perfectly cooked. For an extra boost of flavor, spoon any delicious drippings accumulated on the baking sheet back over the shrimp.
Step Six: Serve and Savor
Your oven-baked shrimp skewers are now ready to be enjoyed! Serve them immediately, either as they are or enhance their flavor profile with one of my recommended sauces. Popular choices include the rich and creamy Creamy Pesto Dressing, the bright Lemon Honey Dressing, or the savory Tahini Herb Dressing. These sauces add another dimension of taste, making your meal even more memorable.
Expert Tips for the Best Oven Baked Shrimp Skewers
Achieving perfectly cooked, flavorful shrimp skewers is easier than you think, especially with these insider tips:
- Mind the Marination Time: Shrimp is delicate and cooks quickly, even chemically, when exposed to acids like lime juice. Marinate the shrimp for only a few minutes – typically 10-15 minutes is sufficient to infuse flavor without altering the texture. Over-marinating can result in a rubbery texture or cause the shrimp to cook much quicker than anticipated.
- Pre-Soak Wooden Skewers: If you opt for wooden or bamboo skewers, it’s crucial to soak them in water for at least 30 minutes prior to threading. This prevents them from burning, charring, or splintering in the hot oven, ensuring your presentation remains pristine.
- Customize Your Seasonings: The beauty of this recipe lies in its adaptability. Don’t hesitate to adjust the seasonings to match your personal taste preferences. Craving more heat? Add a pinch of red pepper flakes. Prefer a stronger citrus note? A bit more lime or lemon juice will do the trick. You can make the recipe spicier, more herbaceous, or milder as desired.
- Ensure Even Cooking: When threading the shrimp onto the skewers, try to arrange them with a slight gap between each piece. Overcrowding can lead to uneven cooking, as steam can get trapped and prevent proper browning. Evenly spaced shrimp cook more consistently and develop a better texture.
- How to Check for Doneness: Perfectly cooked shrimp will turn opaque and pink. They will also curl into a loose “C” shape. If the shrimp forms a tight “O” shape, it’s likely overcooked. Remove them from the oven as soon as they reach that beautiful pink color to maintain their tender, juicy texture.
- Make Ahead (Partially): You can prepare and marinate the shrimp in advance, but for the best texture, it’s advisable to thread them onto the skewers just before cooking. This prevents the shrimp from becoming mushy or excessively infused with the marinade’s acid. If marinating ahead, keep it to a maximum of 30 minutes in the refrigerator.
- Storing Leftovers: Should you have any delicious leftovers, store the cooked shrimp skewers in an airtight container in the refrigerator. They will remain fresh and tasty for up to 3 days. For best results, gently reheat them in the oven or a skillet to avoid overcooking.
Absolutely! The flavor possibilities are truly endless. While our Italian seasoning blend provides a fantastic base, feel free to experiment with other seasoning profiles. You could opt for a smoky paprika and cumin blend, a zesty lemon-pepper seasoning, or even a spicy Cajun rub. Don’t be afraid to play around with different herbs and spices to discover your favorite combinations.
Yes, these oven-baked shrimp skewers are an excellent choice for a healthy meal! Shrimp is a fantastic source of lean protein, low in calories, and packed with essential nutrients like selenium, vitamin B12, and phosphorus. This recipe is also naturally gluten-free and dairy-free, making it suitable for a wide range of healthy diets and lifestyles.
You can use either wooden (bamboo) or metal skewers. If using wooden skewers, remember to soak them in water for at least 30 minutes before threading to prevent them from burning in the oven. Metal skewers are reusable and do not require soaking, making them a convenient option.
Shrimp cooks very quickly, so visual cues are key. Perfectly cooked shrimp will turn opaque and pink throughout, and their tails will curl into a loose “C” shape. If they curl into a tight “O” shape, they are likely overcooked and may be rubbery. Always err on the side of slightly undercooking, as they will continue to cook a little bit after being removed from the heat.
Delightful Pairings: What To Serve With Shrimp Skewers
These versatile oven-baked shrimp skewers are a fantastic foundation for a complete and satisfying meal. Their light, flavorful profile makes them an excellent companion to a myriad of side dishes, allowing you to create anything from a light lunch to a hearty dinner. Here are some inspiring ideas to elevate your shrimp skewer experience:
- Fresh and Vibrant Salads: For a refreshing and healthy meal, pair your skewers with a crisp salad. Consider a sophisticated Strawberry Goat Cheese Salad for a sweet and savory contrast, a crunchy Asian Cabbage Salad with Peanut Ginger Dressing for an exotic twist, or a nutrient-packed Kale Crunch Salad. For something more substantial, my Kale & Lentil Salad offers a fiber-rich option.
- Hearty Grains: Simple cooked rice (white, brown, or wild), quinoa, or couscous can provide a wonderful base for the shrimp, soaking up all the delicious drippings and marinade flavors.
- Roasted or Grilled Vegetables: Enhance your meal with a medley of roasted or grilled vegetables. Options like tender Roasted Golden Beets, asparagus, broccoli, or bell peppers would complement the shrimp beautifully. A refreshing Spicy Cucumber Salad also offers a cool and zesty counterpoint.
- Light Pasta Dishes: Toss some cooked whole wheat pasta with a drizzle of olive oil, fresh herbs, and cherry tomatoes for a quick and light pasta side.
- Warm Bread or Flatbread: Serve with some warm crusty bread or pita to sop up any leftover sauce or drippings – truly a delightful finish to any meal.
Whether you’re looking for a light and healthy option or a more filling family dinner, these shrimp skewers provide endless possibilities for creating a balanced and delicious plate.
More Irresistible Shrimp Recipes We Love
If you’re a fan of the incredible versatility and flavor of shrimp, you’ll be thrilled to explore these other fantastic shrimp recipes that are perfect for any occasion:
Appetizers
Easy Citrus Shrimp Ceviche
Dinner
Easy Coconut Shrimp Curry
Lunch
Buffalo Shrimp Lettuce Cups
Dinner
Honey Sriracha Shrimp
If you absolutely loved creating and tasting this recipe, please let me know your thoughts! I adore hearing from you. Also, be sure to follow me on Instagram & Pinterest for even more fun and inspiring recipes designed to make you feel good from the inside out. Thank you so much for being here and happy cooking!
★★★★★
Oven Baked Shrimp Skewers: Quick, Juicy, and Flavorful
Bailey Rhatigan
20 minutes
10 minutes
30 minutes
4
Pin Recipe
Rate Recipe
Print Recipe
Equipment
-
4-6 skewers (wood or metal, remember to soak wooden ones!)
-
Large mixing bowl
-
Cooking sheet
-
Parchment paper
Ingredients
- 1.25 lb large shrimp , peeled & cleaned, thawed if frozen
- 2 Tbsp extra virgin olive oil
- 1 tsp garlic powder
- 1 tsp onion powder
- ½ tsp paprika
- ½ tsp salt
- ½ tsp pepper
- ½ tsp Italian seasoning , *see notes for alternatives
- 2 Tbsp fresh lime juice , or lemon juice!
- 2 Tbsp fresh cilantro, chopped , for garnish, or parsley!
Optional Sauce
- ¼ cup Creamy Pesto Dressing (or other desired sauce)
Instructions
-
Preheat your oven to 400°F (200°C). Prepare a baking sheet by lining it with parchment paper; this ensures easy cleanup and prevents sticking.
-
Pat the thawed, peeled, and cleaned shrimp thoroughly dry with paper towels. This step is essential to help the seasonings and marinade adhere properly. Transfer the dried shrimp to a large mixing bowl. Add all the seasonings (garlic powder, onion powder, paprika, salt, pepper, Italian seasoning), fresh citrus juice (lime or lemon), and olive oil to the bowl. Toss gently until all the shrimp are evenly coated.
-
Allow the seasoned shrimp to sit for just a few minutes, approximately 10-15 minutes. It’s crucial not to over-marinate shrimp, especially with acidic ingredients, as this can affect their texture and cause them to become tough or mushy.
-
If using wooden skewers, remember to soak them in water for at least 30 minutes to prevent burning. Thread the marinated shrimp onto your skewers, starting from the sharp end. Aim for 5-6 shrimp per skewer, ensuring there’s a small space between each shrimp for even cooking. Continue until you have 4 to 5 skewers prepared.
-
Place the shrimp skewers in a single layer on your prepared baking sheet. Bake in the preheated oven for about 4 minutes. Then, carefully set your oven to broil on high and cook for another 1-2 minutes. Watch them closely during broiling to prevent burning! The shrimp should turn opaque and light pink. Remove from the oven and let them rest for a moment. Spoon any flavorful drippings from the baking sheet back over the shrimp for an extra burst of taste.
-
Serve your perfectly baked shrimp skewers immediately. Enjoy them as is, or with one of my recommended sauces: Creamy Pesto Dressing, Lemon Honey Dressing, or Tahini Herb Dressing. Garnish with fresh chopped cilantro or parsley if desired.
Notes & Expert Tips
- Don’t Over-Marinate. Shrimp is delicate! Marinate for just a few minutes (10-15 min max) to infuse flavor. Over-marinating, especially with citrus, can chemically “cook” the shrimp and change its texture, making it tough or mushy.
- Soak Wooden Skewers. If you’re using wooden or bamboo skewers, immerse them in water for at least 30 minutes before threading. This crucial step prevents them from burning and charring in the hot oven.
- Customize Seasonings. This recipe is very flexible! Adjust the spices to suit your personal taste. You can add a pinch of cayenne for heat, more garlic powder for an intense flavor, or swap paprika for smoked paprika for a deeper profile.
- Make Ahead. You can prepare and marinate the shrimp ahead of time (following the short marinating period). However, for the best results and texture, it’s always best to thread the shrimp onto the skewers right before you plan to cook them.
- Checking for Doneness. Perfectly cooked shrimp will be opaque and pink, curling into a loose ‘C’ shape. If they form a tight ‘O’ shape, they’re likely overcooked. Remove them promptly to keep them tender and juicy.
- Storing Leftovers. Place any leftover shrimp skewers in an airtight container and refrigerate for up to 3 days. To reheat, warm gently in a pan or oven to prevent overcooking.
Nutrition
Calories: 170kcal |
Carbohydrates: 3g |
Protein: 20g |
Fat: 8g |
Saturated Fat: 1g |
Polyunsaturated Fat: 1g |
Monounsaturated Fat: 5g |
Trans Fat: 0.01g |
Cholesterol: 179mg |
Sodium: 1094mg |
Potassium: 192mg |
Fiber: 0.4g |
Sugar: 0.2g |
Vitamin A: 297IU |
Vitamin C: 3mg |
Calcium: 86mg |
Iron: 1mg
Nutrition information is automatically calculated, so should only be used as an approximation. Individual results may vary.
Additional Recipe Information
Bailey Rhatigan
20 minutes
10 minutes
30 minutes
Appetizer, Main Dish
American, Mediterranean
4
170
Oven Baked Shrimp Skewers, Easy Shrimp, Quick Seafood, Healthy Dinner
Enjoyed this recipe? Please leave a comment and a rating below!
Your feedback helps others discover delicious meals.