
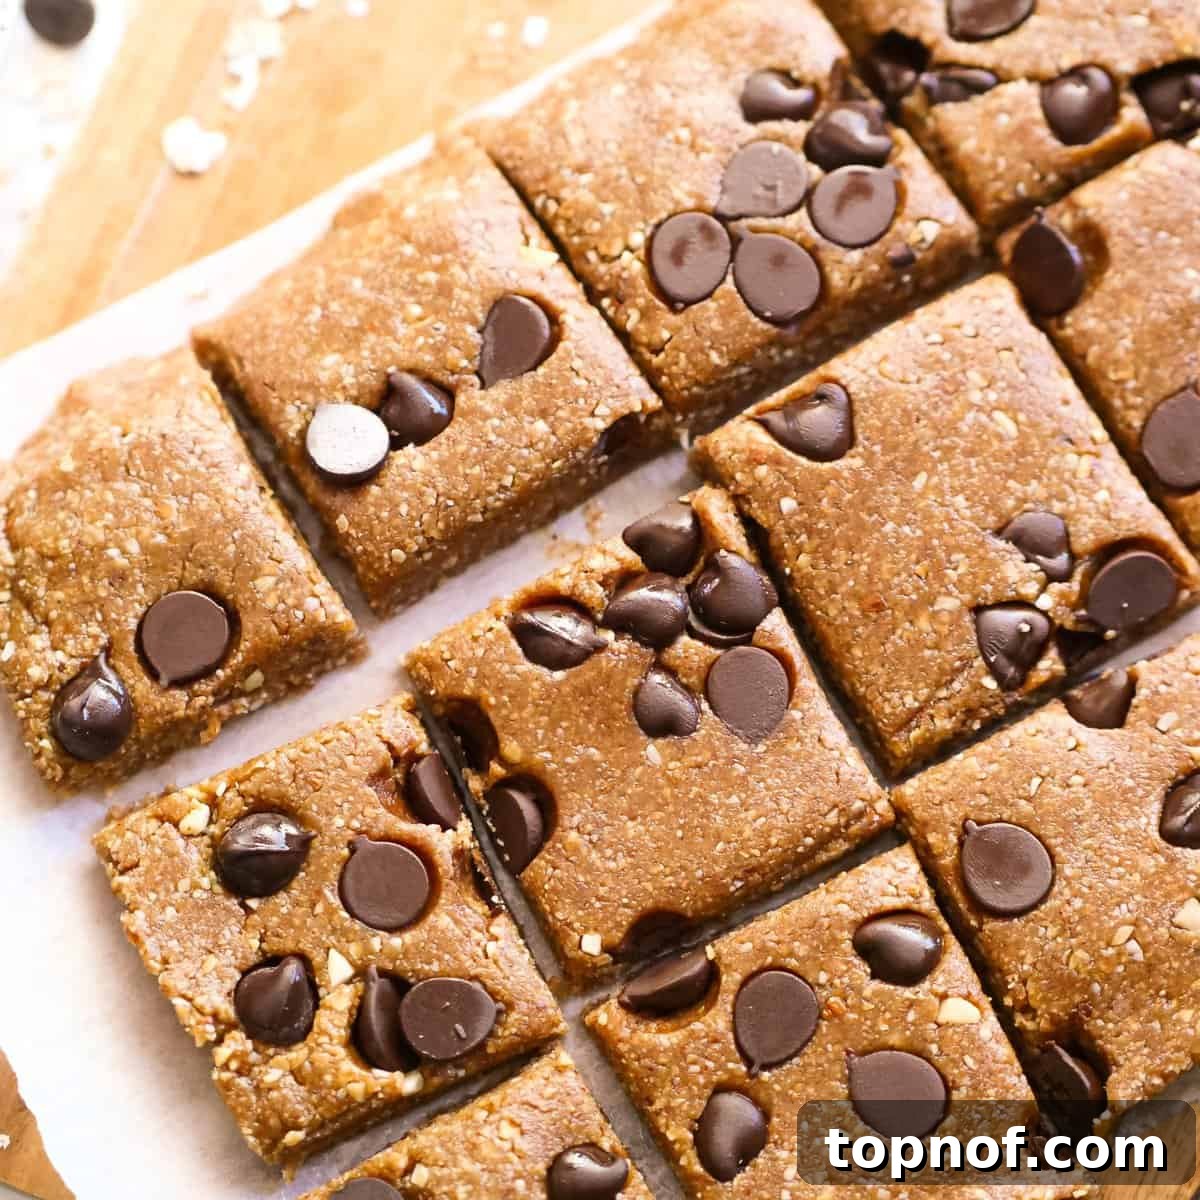
Say goodbye to processed snacks and hello to homemade goodness! These dairy-free granola bars are a game-changer for anyone looking for a quick, healthy, and utterly delicious treat. Requiring no baking, they are perfect for hot summer days when turning on the oven is the last thing you want to do. Naturally sweetened with pure maple syrup, these bars offer a delightful blend of textures and flavors that the entire family will adore. They’re not just tasty; they’re also incredibly versatile, allowing for easy customization to fit any dietary preference or craving. Get ready to elevate your snack game with these irresistible, melt-in-your-mouth granola bars.
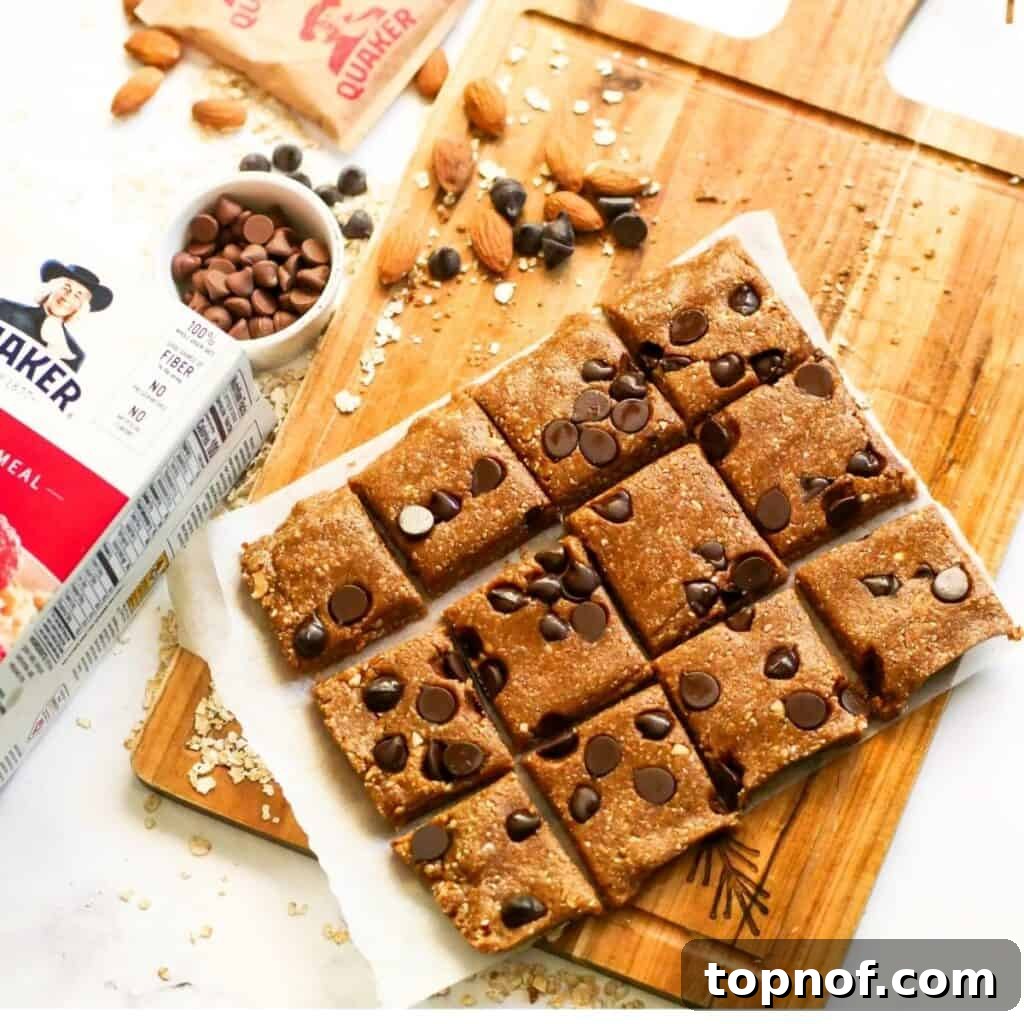
Table of Contents
- Why These Dairy-Free Granola Bars Are a Must-Try
- The Simple Ingredients You’ll Need
- How to Make the Perfect No-Bake Granola Bars
- FAQs and Expert Tips for Granola Bar Success
- Health Benefits of Homemade Granola Bars
- Serving and Storage Suggestions
- More Delicious Recipes to Explore
Why These Dairy-Free Granola Bars Are a Must-Try
In today’s fast-paced world, finding snacks that are both convenient and align with health goals can be a challenge. This recipe for no-bake dairy-free granola bars effortlessly solves that dilemma. What makes them an absolute must-try? For starters, they are incredibly allergy-friendly. With a few simple tweaks, you can easily make them vegan and gluten-free, catering to a wide range of dietary needs without compromising on taste or texture. This versatility makes them an ideal choice for households with diverse eating preferences.
As summer temperatures rise, the thought of firing up the oven becomes less appealing. That’s where these no-bake wonders truly shine! They are the ultimate refreshing treat, providing a delightful escape from the heat while satisfying your sweet cravings. Imagine a wholesome snack that requires minimal effort, keeps your kitchen cool, and still delivers maximum flavor. This recipe uses Quaker Original Instant Oatmeal, a fantastic base that not only adds a rich, comforting texture but also significantly boosts the fiber content of each bar. Oats are a powerhouse of nutrition, providing essential whole grains that contribute to a balanced diet. If you happen to have a few instant oat packets lingering in your pantry, this recipe is the perfect opportunity to transform them into something truly special and nutritious. Oats are celebrated for their versatility, seamlessly integrating into various recipes to enhance their nutritional profile, and these granola bars are no exception.
Beyond their adaptability and ease of preparation, these granola bars offer a peace of mind that comes from knowing exactly what goes into your food. Free from artificial preservatives and excessive sugars often found in store-bought alternatives, these homemade bars are a testament to simple, wholesome eating. They provide sustained energy, making them an excellent choice for a pre-workout boost, a satisfying mid-day snack, or even a quick breakfast on those busy mornings. The natural sweetness from maple syrup combined with the hearty oats and nuts creates a harmonious balance that will keep you coming back for more.
The Simple Ingredients You’ll Need
Crafting these delectable no-bake dairy-free granola bars requires a handful of common pantry staples. The beauty of this recipe lies in its simplicity and the ability of each ingredient to contribute significantly to the final taste and texture. You’ll need:
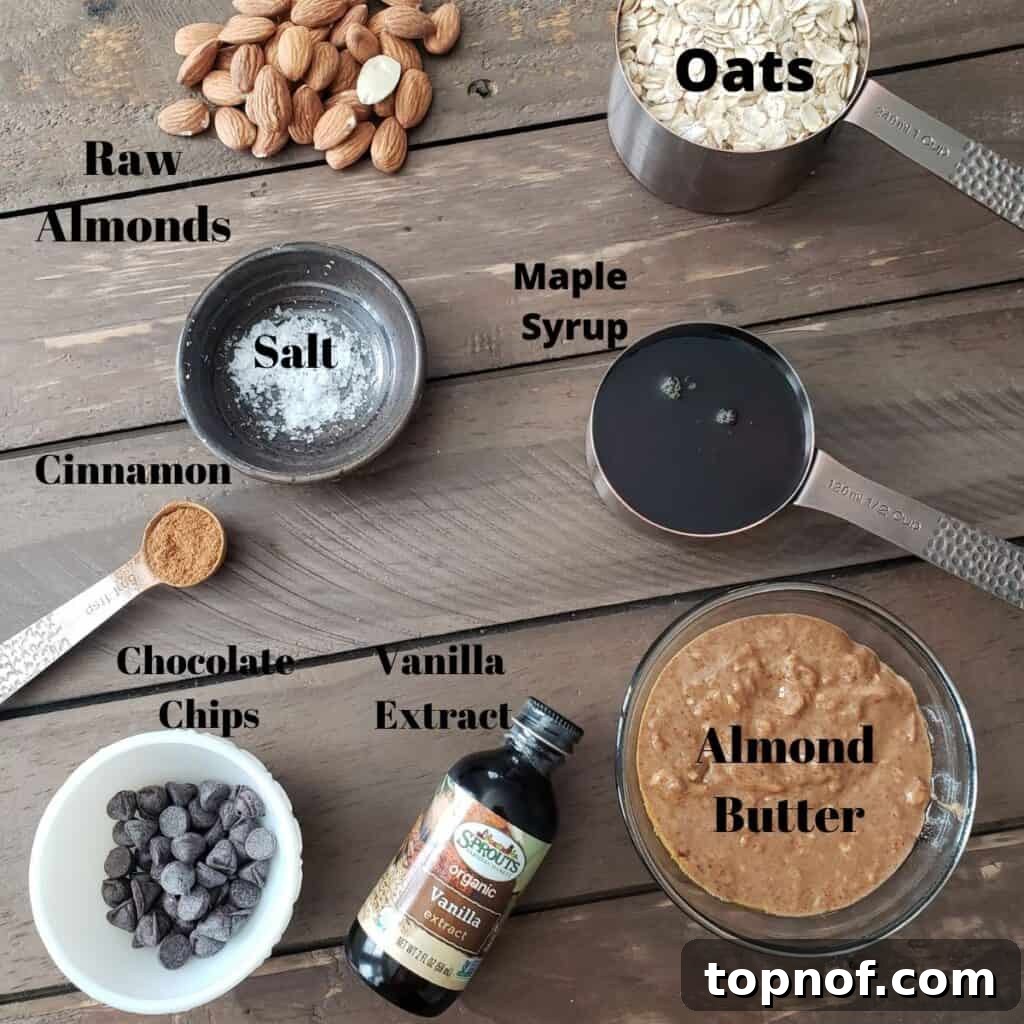
- Old Fashioned Oats or Instant Oats: The foundation of our granola bars, providing fiber and structure. You can adjust the quantity for a firmer or softer bar.
- Maple Syrup: Our natural sweetener, offering a distinct, rich flavor and helping to bind the ingredients.
- Almond Butter: Adds healthy fats, protein, and a creamy texture, acting as a crucial binder.
- Almonds: For a delightful crunch and added nutritional benefits.
- Dark Chocolate Chips: The perfect touch of indulgence, complementing the sweet and salty notes.
- Cinnamon: A warm spice that enhances the overall flavor profile.
- Vanilla Extract: Adds depth and a hint of classic sweetness.
- Sea Salt: A pinch to balance the sweetness and bring out all the flavors.
Each ingredient is carefully selected to contribute to the bars’ incredible taste and wholesome goodness. Feel free to use organic ingredients for an even cleaner snack!
How to Make the Perfect No-Bake Granola Bars
Making these no-bake granola bars is incredibly straightforward, perfect for even novice bakers. The key to success lies in proper mixing and firm pressing. Follow these simple steps to create your batch of irresistible treats:
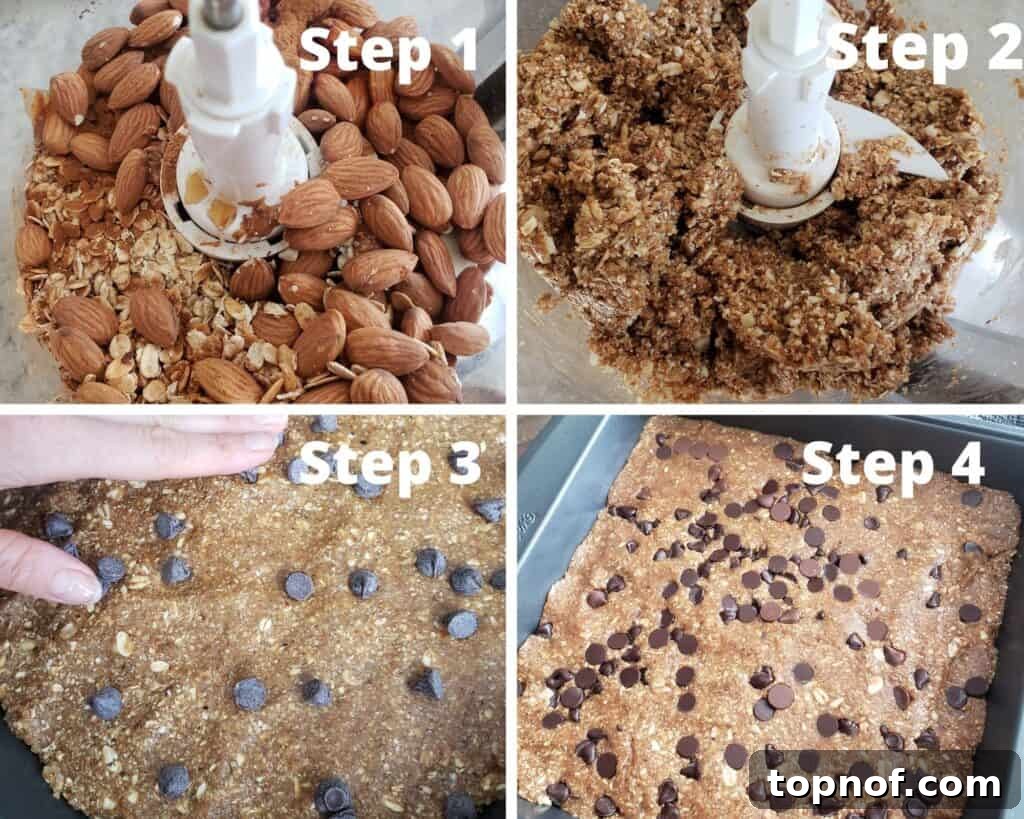
- Prepare Your Mixture: Combine all ingredients except the chocolate chips into a high-powered blender or a food processor. Process for several minutes until the mixture is thick and crumbly but holds together when pressed between your fingers. You might need to pause and scrape down the sides with a spatula a few times to ensure everything is evenly incorporated. The goal is a cohesive, slightly sticky dough.
- Incorporate Chocolate Chips: Once the base mixture is perfectly blended, add the dark chocolate chips. Pulse gently a few times – just enough to distribute them without pulverizing them. This keeps the chocolate chips largely intact, offering delightful pockets of melted chocolate when you bite into the bars.
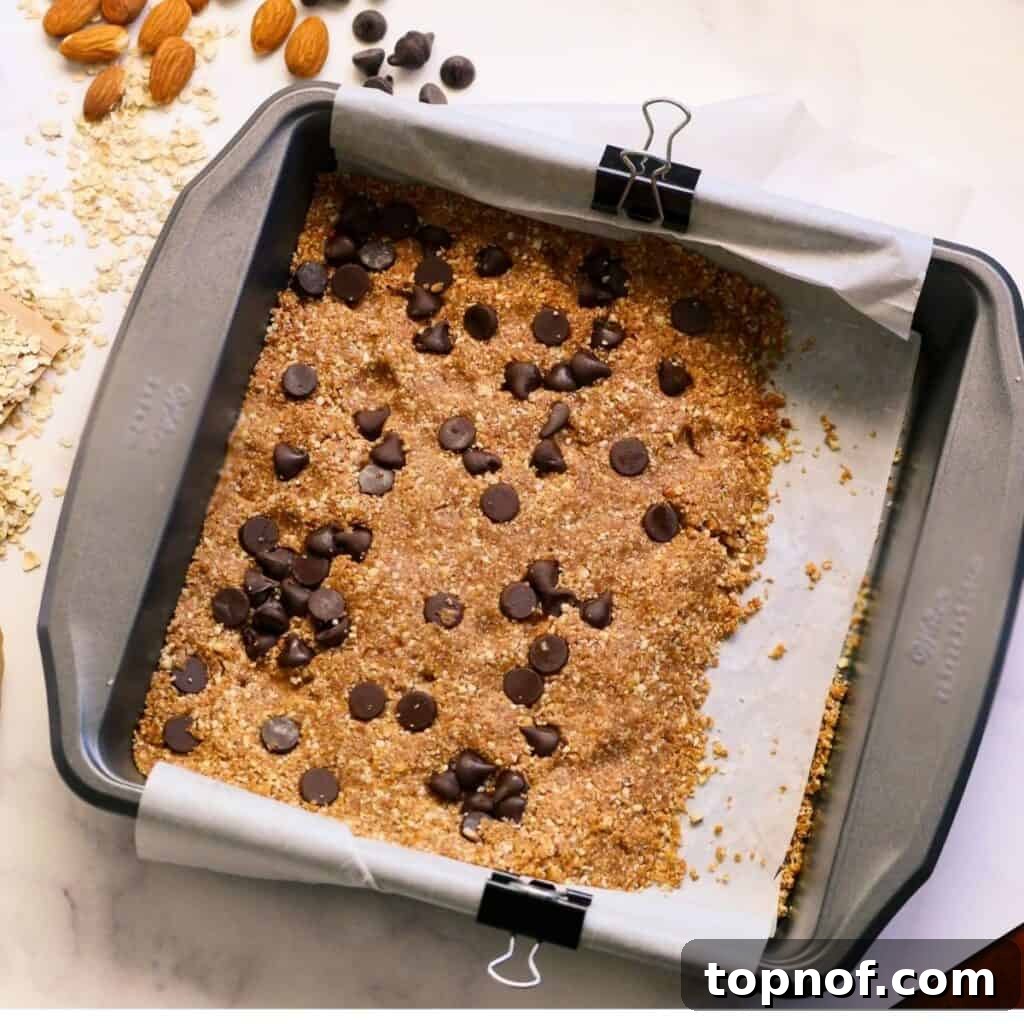
- Press into a Pan: Line an 8×8 inch square baking dish or a bread loaf pan with parchment paper, leaving an overhang on the sides for easy removal. Transfer the granola bar mixture into the prepared pan. This step is critical: press the mixture down very firmly and evenly into the pan. Use the back of a spoon, your hands, or another piece of parchment paper to ensure it’s tightly packed. This firm pressing is what helps the bars hold their shape beautifully. Don’t worry if you don’t fill the entire tray; focus on forming a compact square or rectangle.
- Chill to Perfection: Once pressed, place the pan in the refrigerator for at least one hour. Chilling allows the ingredients to solidify and bind together, making the bars easy to slice without crumbling.
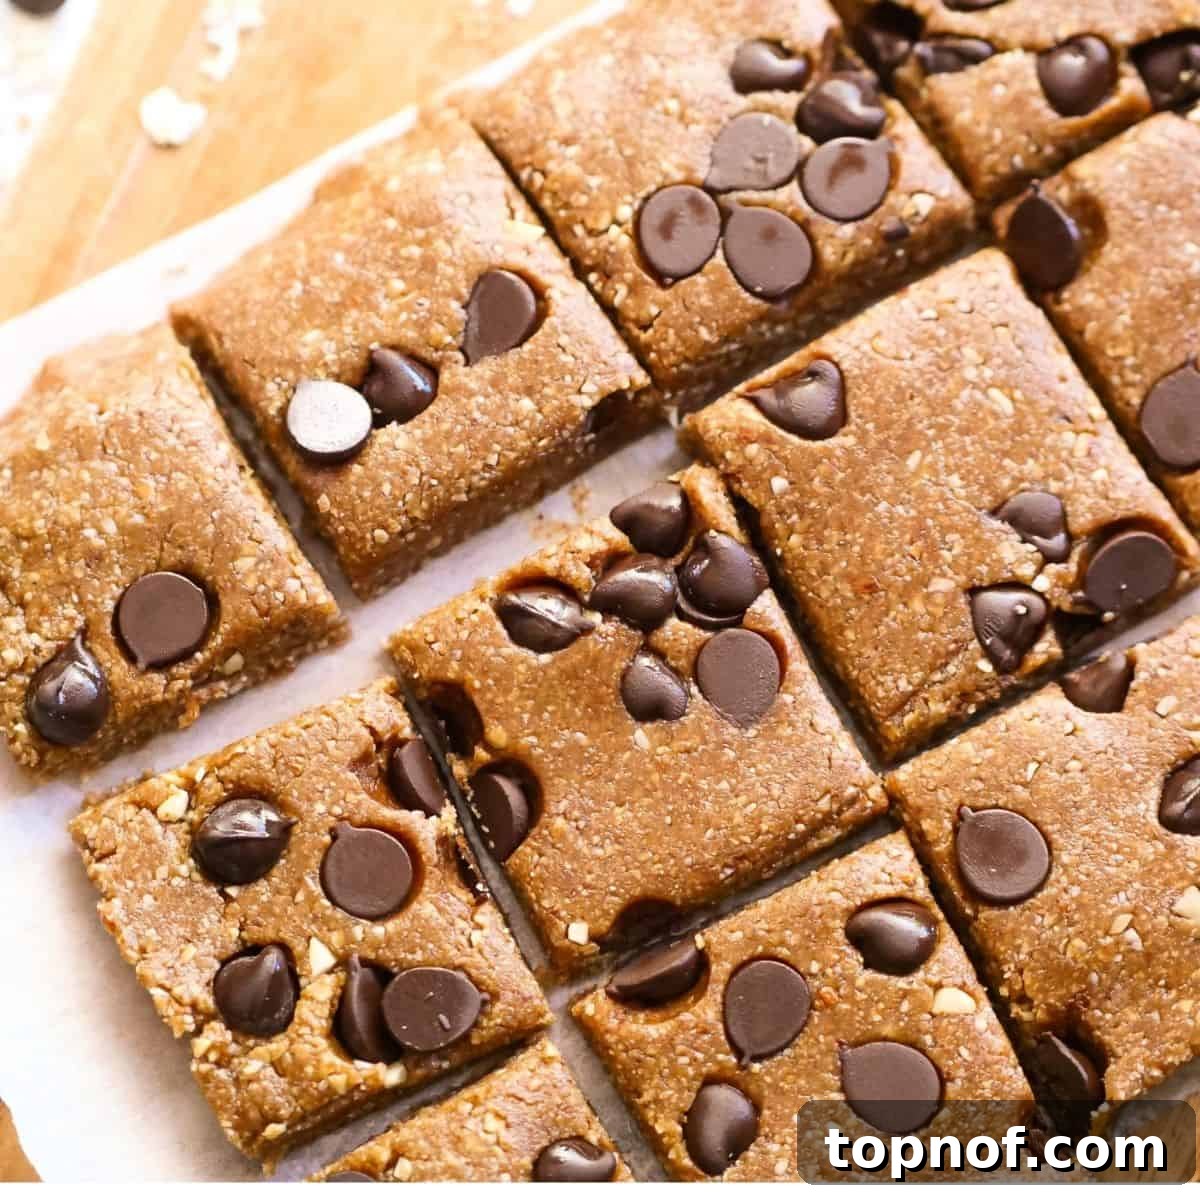
- Slice and Enjoy: After an hour of chilling, remove the pan from the fridge. Use the parchment paper overhang to lift the entire slab of granola from the pan. Place it on a cutting board and slice into your desired shapes. I personally love cutting them into small squares for easier, bite-sized enjoyment!
- Dried fruits like raisins, cranberries, or chopped apricots.
- Shredded coconut for tropical flavor.
- Seeds such as chia seeds, flax seeds, or hemp seeds for an extra nutritional boost.
- A pinch of nutmeg or allspice for a different warm spice profile.
- Rich in Fiber: Oats, the primary ingredient, are an excellent source of dietary fiber, particularly soluble fiber known as beta-glucan. This type of fiber is beneficial for heart health, can help lower cholesterol levels, and aids in maintaining stable blood sugar. Fiber also promotes digestive health and contributes to a feeling of fullness, which can help with weight management.
- Sustained Energy: The combination of complex carbohydrates from oats, healthy fats from almond butter and almonds, and natural sugars from maple syrup provides a balanced energy release. This means you’ll feel energized for longer, avoiding the sugar crashes associated with many processed snacks.
- Healthy Fats: Almond butter and whole almonds are fantastic sources of monounsaturated and polyunsaturated fats. These “good fats” are crucial for brain health, hormone production, and nutrient absorption. They also contribute to satiety and can help reduce the risk of heart disease.
- Plant-Based Protein: Almonds and almond butter also contribute a good amount of plant-based protein, essential for muscle repair, growth, and overall body function. For those following a vegan diet, these bars are a tasty way to boost protein intake.
- Antioxidants and Micronutrients: Dark chocolate chips, in moderation, offer antioxidants which combat free radicals in the body. Nuts are also rich in vitamins and minerals like Vitamin E, magnesium, and manganese, supporting various bodily functions.
- Controlled Ingredients: By making your own granola bars, you have complete control over the ingredients. This allows you to avoid artificial flavors, preservatives, and high fructose corn syrup often found in commercial products, ensuring a cleaner and healthier snack.
- On-the-Go Snack: Their primary purpose! Grab one as you head out the door for a quick energy boost during a busy day.
- Breakfast Companion: Pair with a cup of coffee or a smoothie for a wholesome and satisfying start to your morning.
- Pre or Post-Workout Fuel: The blend of carbs, fats, and protein makes them an excellent choice for fueling your exercise or aiding in recovery.
- Lunchbox Treat: A much healthier alternative to store-bought options for kids and adults alike.
- Healthy Dessert: Satisfy your sweet tooth guilt-free after a meal. The dark chocolate chips make them feel indulgent without being overly rich.
- Crumbled Topping: Break them into pieces and sprinkle over yogurt, oatmeal, or even ice cream for added texture and flavor.
- Refrigeration: For optimal freshness and to maintain their firm texture, store the granola bars in an airtight container in the refrigerator for up to 7 days. This prevents them from becoming too soft, especially in warmer climates.
- Freezing for Long-Term: If you’ve made a large batch or want to prepare ahead, these bars freeze beautifully. Individually wrap each bar in parchment paper, then place them in a freezer-safe bag or container. They can be frozen for up to 1-2 months. When ready to eat, simply let them thaw at room temperature for about 15-30 minutes, or enjoy them chilled straight from the freezer for a colder treat!
- Room Temperature (Short-Term): While refrigeration is recommended for texture and longevity, if you plan to consume them within 1-2 days, they can be kept in an airtight container at cool room temperature. However, they might soften slightly, especially if your home is warm.
- 2 cups Old Fashioned or Instant Oats * use 1½ cups if you prefer a softer texture
- ½ cup Maple Syrup
- ½ cup Almond Butter
- 1 cup Almonds
- ¼ cup Dark Chocolate Chips
- 2 tsp Cinnamon
- 1 tsp Vanilla Extract
- ⅛ tsp Sea Salt
- Place all ingredients except chocolate chips into a food processor or strong blender. Blend for a few minutes; you may need to open the lid and loosen the mixture with a spatula a few times. The mixture should be thick and crumbly but hold together when you squeeze it with your hand. Once well blended, add in chocolate chips and pulse together lightly to keep chips in their original form.
- Line an 8×8 inch pan or a bread loaf pan with parchment paper. Fill with the mixture and press down firmly until it is formed into a compact square or rectangle. Refer to the photos above for an example of how it should look.
- Refrigerate for at least one hour before cutting and enjoying. You can store the bars in the fridge for up to a week for convenient snacks.
- You can substitute honey for maple syrup if desired.
- Feel free to use peanut butter or cashew butter instead of almond butter.
- Walnuts work great as a substitute for almonds, offering a different flavor profile.
The result is a batch of perfectly textured granola bars, offering that sought-after salted maple flavor with a delightful “melt in your mouth” sensation. Whether you slice them into classic rectangles or playful squares, these bars are incredibly fun to enjoy. Remember, a food processor or strong blender is essential for achieving the right consistency, and firm pressing is your secret weapon for perfectly cohesive bars.
FAQs and Expert Tips for Granola Bar Success
Making these no-bake granola bars is straightforward, but a few expert tips can ensure they turn out perfect every time. Here are answers to common questions and advice for customizing your batch:
Can I substitute the nut butter?
Absolutely! While almond butter provides a wonderful flavor and consistency, you can easily substitute it with other nut butters. Peanut butter or cashew butter are excellent alternatives that will yield equally delicious results. Just ensure they are natural, creamy varieties for the best texture.
What about the nuts? Can I use different kinds?
Yes, feel free to get creative with your nuts! Instead of almonds, walnuts work wonderfully, adding a different depth of flavor and texture. You could also try pecans, cashews, or a mix of several nuts for a unique blend.
My bars are too sticky, what should I do?
If your mixture feels excessively sticky and difficult to handle or press, simply add a little more oats (start with an extra ¼ cup) and blend again until the desired consistency is achieved. The exact absorption can vary slightly depending on the type of oats and the humidity. These granola bars are designed to be foolproof, so don’t be afraid to adjust!
My bars are too dry and crumbly, how can I fix this?
If your mixture is too dry and won’t hold together, you might need a little more liquid binder. Add a tablespoon of maple syrup or a teaspoon of almond butter at a time, blending briefly after each addition, until the mixture can be squeezed and holds its shape.
How long do these no-bake granola bars last and how should I store them?
These homemade granola bars can be stored in an airtight container in the refrigerator for up to a week. For longer storage, you can individually wrap them and freeze for up to 1-2 months. Thaw at room temperature for a quick snack.
Can I add other ingredients or mix-ins?
Absolutely! This recipe is highly customizable. Consider adding:
Just be mindful of adding too many wet ingredients, as this might alter the bar’s consistency.
Why is firm pressing so important?
Firm pressing is the secret to achieving sturdy, non-crumbly granola bars. It compacts the ingredients, allowing the binders (maple syrup and nut butter) to work effectively and hold everything together. The firmer you press, the less likely your bars are to fall apart when sliced.
Health Benefits of Homemade Granola Bars
Beyond being incredibly delicious, these dairy-free granola bars are packed with nutritional goodness, making them a smart choice for your snacking needs. Let’s delve into some of the key health benefits:
These homemade granola bars are not just a treat for your taste buds but also a boost for your overall well-being, proving that healthy eating can be both easy and enjoyable.
Serving and Storage Suggestions
These versatile no-bake dairy-free granola bars are perfect for a variety of occasions and can be enjoyed in many ways. Here are some ideas for serving and practical tips for storing them to maintain their freshness and deliciousness:
Serving Ideas:
Storage Tips:
Proper storage ensures that every bar you enjoy is as fresh and delicious as the first, making meal prep and healthy snacking incredibly convenient.
More Delicious Recipes to Explore
Discover More Wholesome Treats
Breakfast
Single Serve Baked Oatmeal
Dessert
Chocolate Peanut Butter Oatmeal Bars
Breakfast
Easy Lemon Blueberry Breakfast Bread
Dessert
Healthy Buckeye Bars
If you’ve enjoyed making these dairy-free granola bars, I’d love to hear about it! Please leave a comment below with your feedback or any customizations you tried. For even more exciting recipes and healthy living inspiration, be sure to follow me on Instagram and Pinterest. Thank you for being a part of this community, where we focus on making you feel good from the inside out.
Dairy Free Granola Bars
Bailey Rhatigan
These dairy-free granola bars require no baking, making them perfect for warm days. They are delicious, naturally sweetened with maple syrup, and loved by the whole family.
8 mins
12 servings
Pin Recipe
Rate Recipe
Print Recipe
Ingredients
Instructions
Notes
Nutrition
Serving:
12servings
|
Calories:
220kcal
|
Fat:
13g
|
Saturated Fat:
2g
|
Sodium:
45mg
|
Fiber:
3g
|
Sugar:
10g
Nutrition information is automatically calculated, so should only be used as an approximation.
Additional Info
Bailey Rhatigan
8 minutes
Snack
American
12 servings
220
almond butter, dairy-free, granola bars, no-bake
Like this recipe? Leave a comment below!