
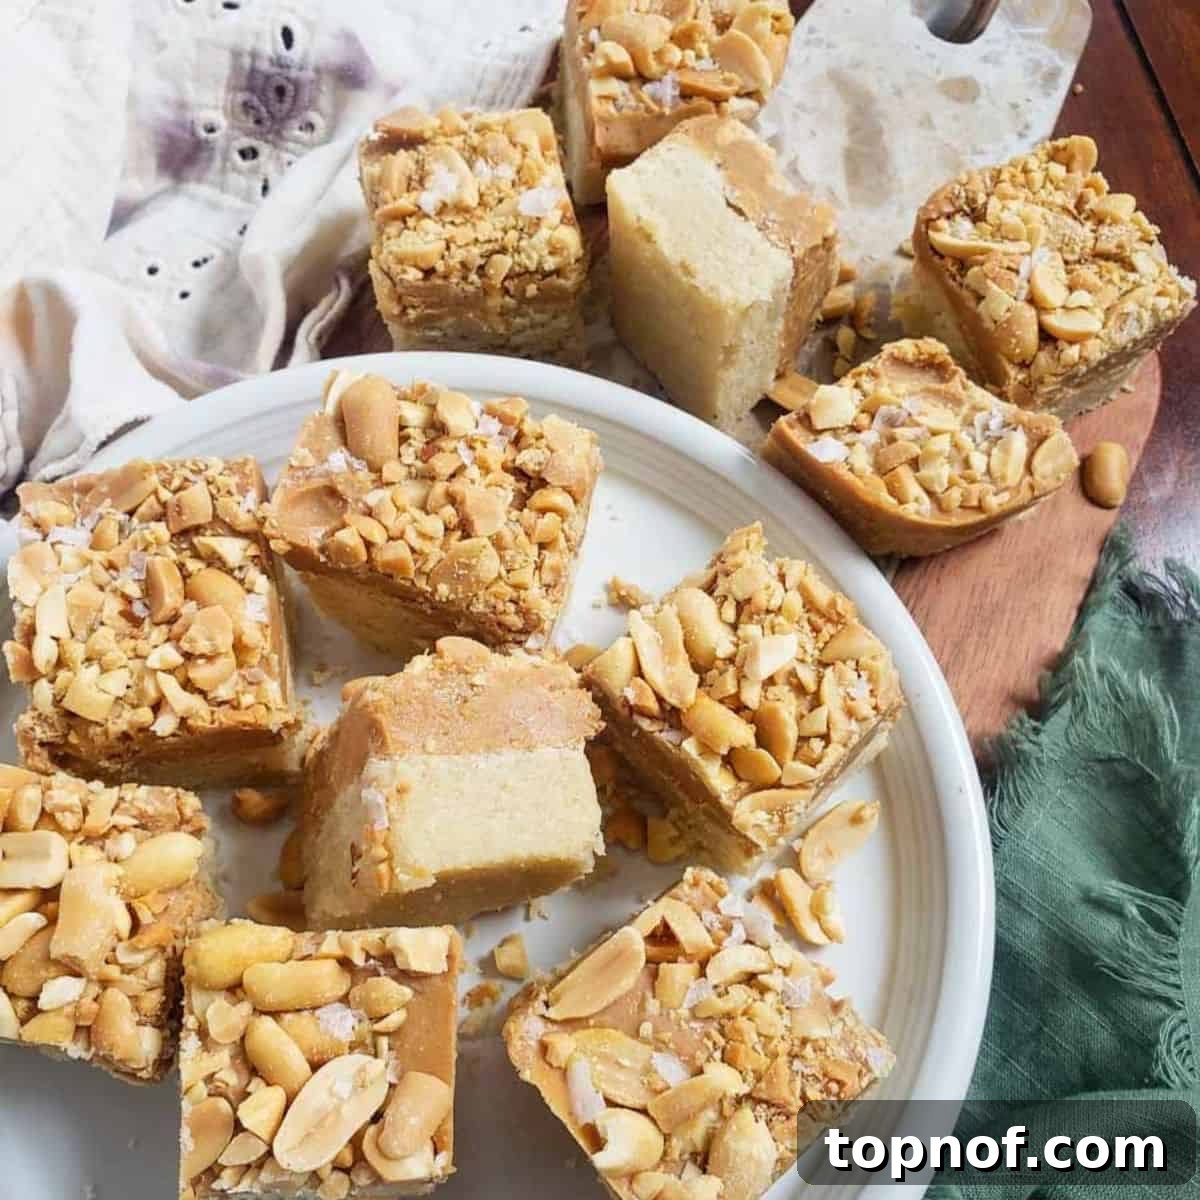
Prepare to fall absolutely in love with these incredibly **Vegan Peanut Butter Bars**! Imagine the delightful chewiness and irresistible flavor of a classic Payday candy bar, but reimagined into a wholesome, plant-based, and gluten-free treat that will utterly melt in your mouth. These bars are so unbelievably good, they’re destined to become a staple in your kitchen. Designed as a convenient freezer delight, they are perfect for effortless **meal prepping** – ensuring you always have a satisfying dessert or a quick, energy-boosting snack readily available throughout your week. While incredibly satisfying with traditional peanut butter, feel free to experiment with **almond butter** or any other nut or seed butter of your choice for a delicious variation that suits your preferences.
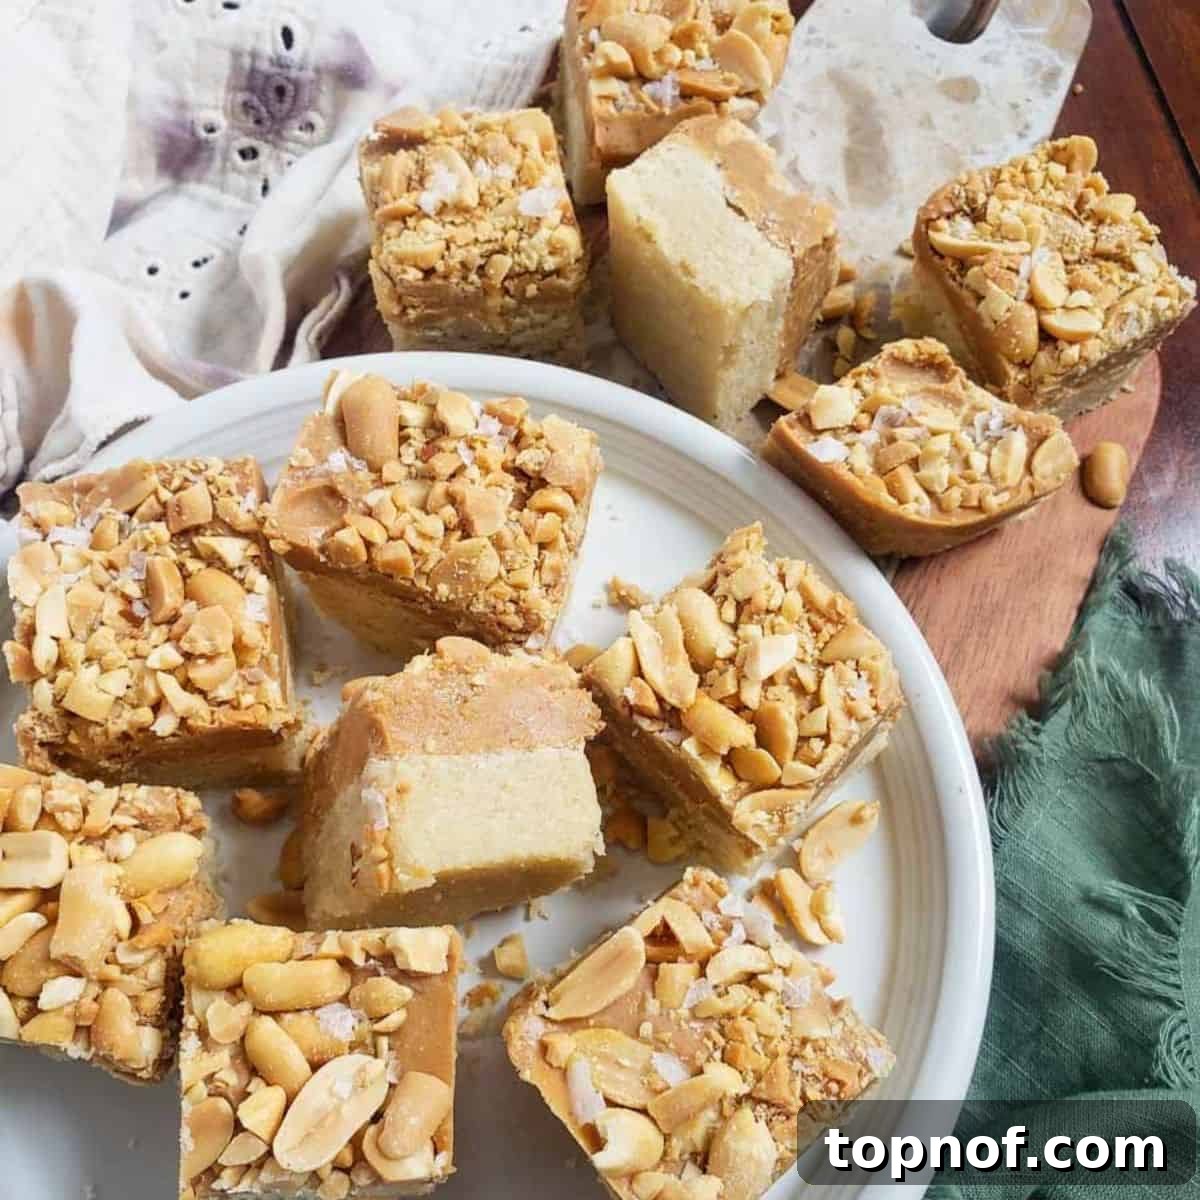
Why These Vegan Peanut Butter Bars Will Become Your New Obsession
Once you take your first bite of these extraordinary peanut butter bars, you’ll understand why they are so utterly **addictive**. Each decadent mouthful delivers a perfect harmony of flavors and textures, prompting an involuntary closing of the eyes to savor every moment. Beyond their undeniable deliciousness, there are countless compelling reasons why this recipe deserves a permanent spot in your culinary repertoire, making it much more than just another dessert:
- Irresistible Flavor & Texture Profile: These bars achieve a magical balance of sweet and salty, boasting a tender, crumbly, cake-like base crowned by a rich, creamy peanut butter fudge layer. The optional addition of chopped peanuts throughout or on top provides a delightful textural contrast and an extra burst of nutty flavor, creating a truly satisfying experience that rivals popular store-bought candy bars. They’re designed to deliver maximum indulgence with every single bite.
- Ultimate Convenience & Freezer-Friendly Goodness: This is the definition of a “grab-and-go” dessert or snack. Keep a batch stored in your freezer, and you’ll always have a delightful treat on hand for unexpected cravings, last-minute guests, or simply for busy days when you need a quick pick-me-up. They thaw quickly at room temperature, or you can enjoy them directly from the freezer for a firmer, chewier bite. Their exceptional freezer stability makes them ideal for weekly meal prep, saving you valuable time and effort in the kitchen.
- Dietary Inclusivity (100% Vegan & Gluten-Free): Cater to a wide range of dietary needs without sacrificing an ounce of flavor! These bars are proudly **100% plant-based** and completely **gluten-free**, making them a fantastic option for those with allergies, specific dietary restrictions, or simply anyone looking to incorporate more wholesome, plant-based goodness into their diet. They prove that healthy treats can be incredibly delicious and accessible to everyone.
- Effortlessly Easy to Make & Kid-Friendly: Don’t let their gourmet taste and layered appearance fool you – these bars are surprisingly simple to prepare. With straightforward steps and minimal specialized equipment, they are a fantastic project for beginner bakers, busy parents, or anyone seeking a quick and rewarding kitchen endeavor. You can even involve children in the process, making it a fun and educational family activity that results in a shared sweet reward.
- Highly Customizable for Every Palate: While phenomenal as is, these bars offer endless possibilities for personalization and customization. Get creative with your toppings! The original inspiration featured delightful Jordan Almonds, adding a touch of elegance perfect for spring festivities or any holiday celebration. But don’t stop there – consider mini vegan chocolate chips, shredded coconut, chopped pretzels for extra crunch, a drizzle of melted vegan white chocolate, or a generous sprinkle of flaky sea salt to truly make them your own signature treat.
Essential Ingredients for Your Perfect Vegan Peanut Butter Bars
Crafting these delectable vegan and gluten-free peanut butter bars requires a thoughtfully selected list of ingredients, each playing a crucial role in achieving their signature taste, texture, and dietary compliance. Here’s a closer look at what you’ll need to gather:
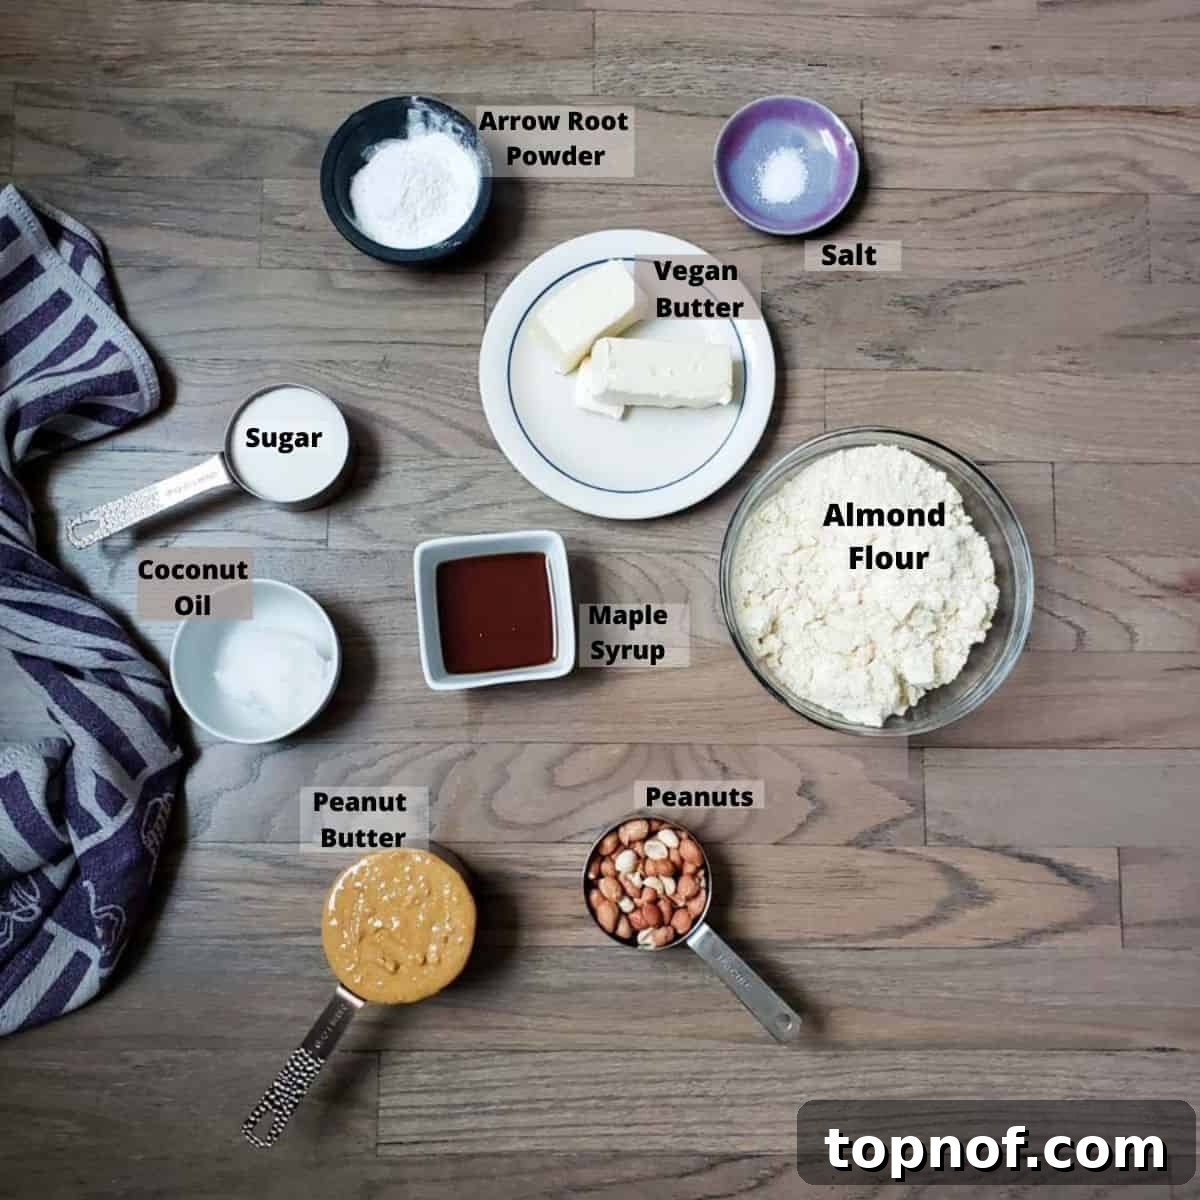
- Peanut Butter: As the star ingredient, a good quality creamy peanut butter is paramount. We highly recommend using a natural, unsweetened variety with minimal added oil for the purest, most intense peanut flavor. This also helps in controlling the overall sweetness of the bars. If you have peanut allergies or simply prefer a different profile, **cashew butter** or **almond butter** are excellent substitutes that will yield equally delicious results, each lending its own unique nutty nuance. For a completely nut-free option, **sunflower seed butter (SunButter)** is a fantastic choice.
- Almond Flour: This is our gluten-free hero for the base layer. Almond flour not only keeps these bars wonderfully light, tender, and celiac-friendly, but it also imparts a delicate, nutty flavor and contributes a good dose of protein and healthy fats. Unlike traditional wheat flour, it creates a unique, subtly crumbly texture that beautifully complements the rich, creamy fudge topping.
- Arrowroot Powder: Often hailed as a superior gluten-free alternative to cornstarch, arrowroot powder acts as a fantastic thickening and binding agent in our cake layer. Its role is crucial in creating a stable, slightly chewy, and perfectly textured base that holds up beautifully to the creamy peanut butter fudge, ensuring your bars maintain their structure and don’t crumble excessively.
- Maple Syrup: This natural liquid sweetener is a core component, especially in the fudge layer. Maple syrup not only provides essential sweetness but also contributes a unique depth of flavor and a distinct aroma that truly brings these bars to life, distinguishing them from other peanut butter treats. For those looking to significantly reduce sugar intake, you can successfully substitute maple syrup with other liquid sweeteners like monk fruit syrup or liquid stevia drops, though be aware that the distinct maple flavor will be altered or lost.
- Coconut Oil: This ingredient is absolutely essential for achieving the perfect texture of the peanut butter fudge layer, particularly when frozen. Coconut oil helps to soften the peanut butter just enough, preventing the fudge from becoming rock-hard and making it delightfully easy to bite into straight from the freezer. Use refined coconut oil if you prefer a neutral taste, or unrefined for a subtle tropical coconut aroma.
- Plant-Based Butter: A small but important amount of vegan butter is used in the cake layer to achieve a rich, moist crumb and a desirable buttery flavor. Brands like Earth Balance or Miyoko’s Kitchen are excellent choices, offering a taste and texture that perfectly mimics dairy butter in plant-based baking applications. Ensure it’s softened to room temperature for optimal mixing and smooth incorporation.
- Salt: A crucial pinch of fine sea salt is added to both layers. It’s absolutely vital for balancing the sweetness, enhancing all the other flavors, and preventing the bars from being overly cloying. It elevates the natural richness of the peanut butter and creates that irresistible sweet-and-salty dynamic that makes these bars so addictive.
- **Granulated Sugar:** For the cake layer, a touch of granulated sugar provides the necessary sweetness and contributes to the overall structure and a subtle golden hue during baking. Feel free to use organic cane sugar for a more natural approach if preferred.
- **Optional Peanuts (Chopped):** While entirely optional, adding whole or roughly chopped roasted peanuts to the fudge layer or as a topping provides an extra layer of delightful texture and a significant boost of nutty flavor, strongly reinforcing the beloved Payday-like appeal.
Step-by-Step Guide: Crafting Your Delicious Vegan Peanut Butter Bars
Creating these layered vegan peanut butter bars is a rewarding and relatively simple process, divided into two distinct stages: preparing the tender cake base and then crafting the luscious maple peanut butter fudge. Follow these detailed instructions meticulously for perfect results every time.
For the Tender, Gluten-Free Cake Layer:
- Prepare Your Pan: Begin by lining an 8×5 inch bread pan (or a similar rectangular baking dish) with parchment paper. It’s crucial to ensure the parchment paper extends beyond the edges of the pan, creating handy “handles.” These will be instrumental for easily lifting the entire slab of finished bars out later without any sticking.
- Combine Ingredients: In a large mixing bowl or the bowl of a stand mixer fitted with a paddle attachment, combine the softened plant-based butter, almond flour, arrowroot powder, and granulated sugar. Ensure the vegan butter is truly soft for optimal mixing.
- Mix to Form Dough: Using your mixer on medium speed, or a sturdy spatula if mixing by hand, mix the ingredients until a crumbly, yet cohesive dough forms. The mixture should be firm enough to press together without falling apart.
- Press into Pan: Transfer the prepared dough into the parchment-lined bread pan. Use your fingers or the back of a spoon to press the mixture down firmly and evenly across the entire bottom of the pan. Aim for a compact, smooth, and level surface.
- Bake the Base: Place the pan in a preheated oven at 350°F (175°C) and bake for approximately 20 minutes. The base should appear lightly golden around the edges and feel set in the center. This short bake time creates a wonderfully tender, slightly chewy, and cake-like base.
- Cool Completely: Once baked, carefully remove the pan from the oven. Let the cake layer cool completely on a wire rack at room temperature. For a quicker cool-down, you can transfer it to the freezer for about 15-20 minutes. A fully cooled and firm base is absolutely essential before proceeding to add the warm fudge layer.
For the Luxurious Maple Peanut Butter Fudge Layer:
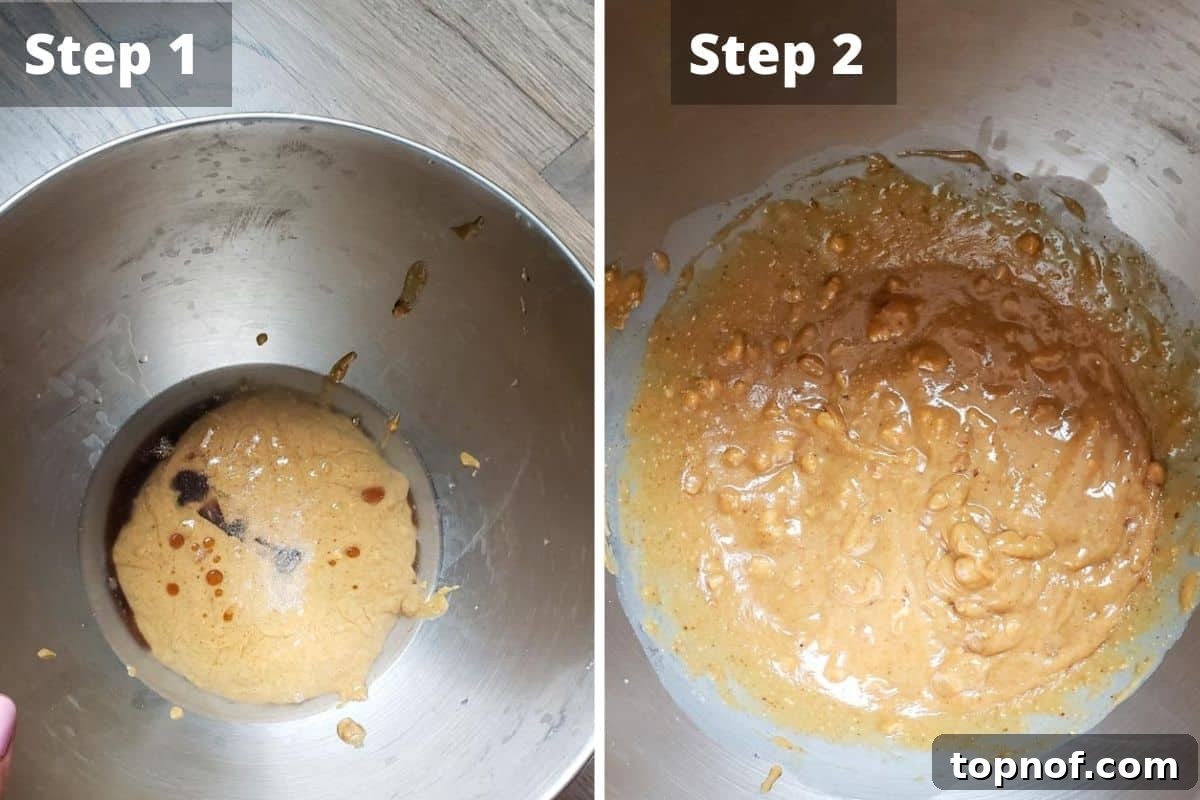
This is where the magic truly happens, creating that rich, melt-in-your-mouth texture that makes these bars so special.
- Melt Coconut Oil: Gently melt the coconut oil until it is completely liquid and clear. This can be done efficiently in a microwave in short 15-second bursts, stirring in between, or in a small saucepan over very low heat on the stovetop.
- Combine Fudge Ingredients: In a separate medium-sized mixing bowl, combine the creamy peanut butter, the freshly melted coconut oil, maple syrup, and a pinch of salt. If you’re incorporating optional chopped peanuts for extra crunch and flavor, stir them in at this stage.
- Mix Thoroughly: Using a whisk or spatula, stir all the fudge ingredients together until they are perfectly well combined and form a smooth, uniform, and slightly glossy mixture. Ensure there are no streaks of unmixed oil or syrup, as this will affect the final texture.
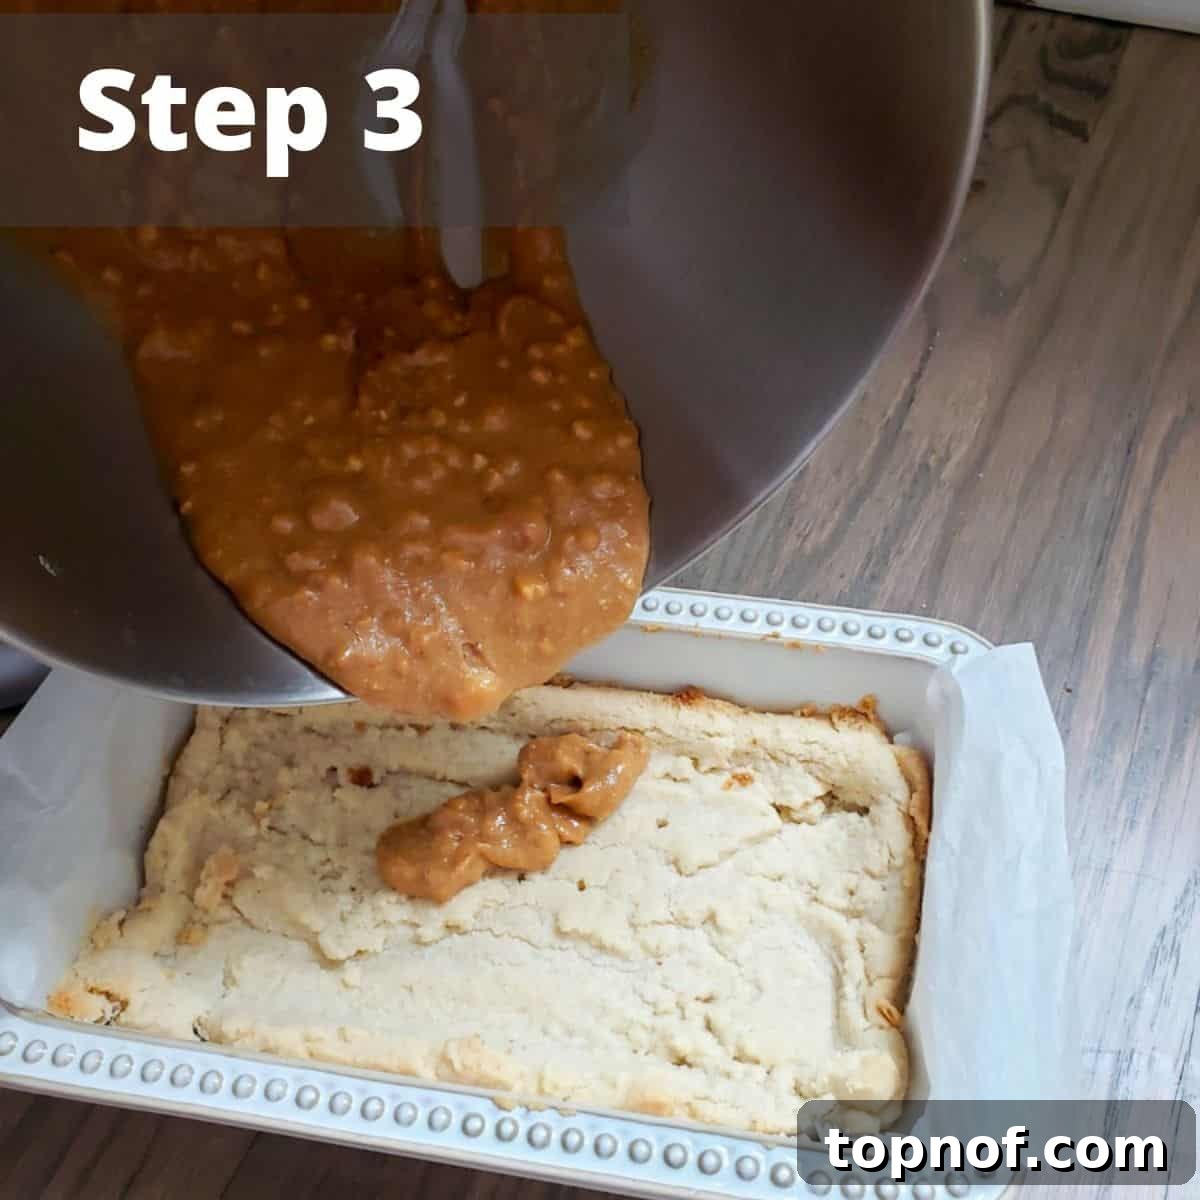
Assembly, Freezing, and Perfect Slicing:
- Layer the Fudge: Once your baked cake base is completely cooled and notably firm, carefully pour the maple peanut butter fudge mixture evenly over the top. Use a rubber spatula to gently spread it from edge to edge, ensuring a consistent and smooth top layer.
- Add Toppings (Optional): If you desire additional toppings, such as more crushed peanuts, vegan chocolate chips, shredded coconut, or a sprinkle of flaky sea salt, now is the time to gently scatter them over the still-soft fudge layer, pressing them in lightly to adhere.
- Freeze to Set: Carefully transfer the pan to the freezer, ensuring it lays perfectly flat. Allow it to freeze for approximately 30-45 minutes. The goal is for the fudge layer to be firm enough to slice easily without smearing, but not completely rock-solid (which can make cutting difficult).
- Slice and Serve: Once the fudge is adequately set, remove the pan from the freezer. Using the overhanging parchment paper “handles,” gently lift the entire slab out of the bread pan and place it on a sturdy cutting board. For the cleanest cuts, use a sharp knife that has been warmed under hot water and thoroughly wiped dry between each slice. Cut the slab into individual bars of your desired size.
- Store for Optimal Freshness: These delicious **vegan peanut butter bars** are best stored in an airtight freezer bag or a sealed container in the freezer. They will maintain their incredible freshness, flavor, and texture for up to 3 months. Enjoy them directly from the freezer for a firm, chewy bite, or let them thaw for just 2-5 minutes at room temperature for a slightly softer, creamier experience that melts in your mouth.
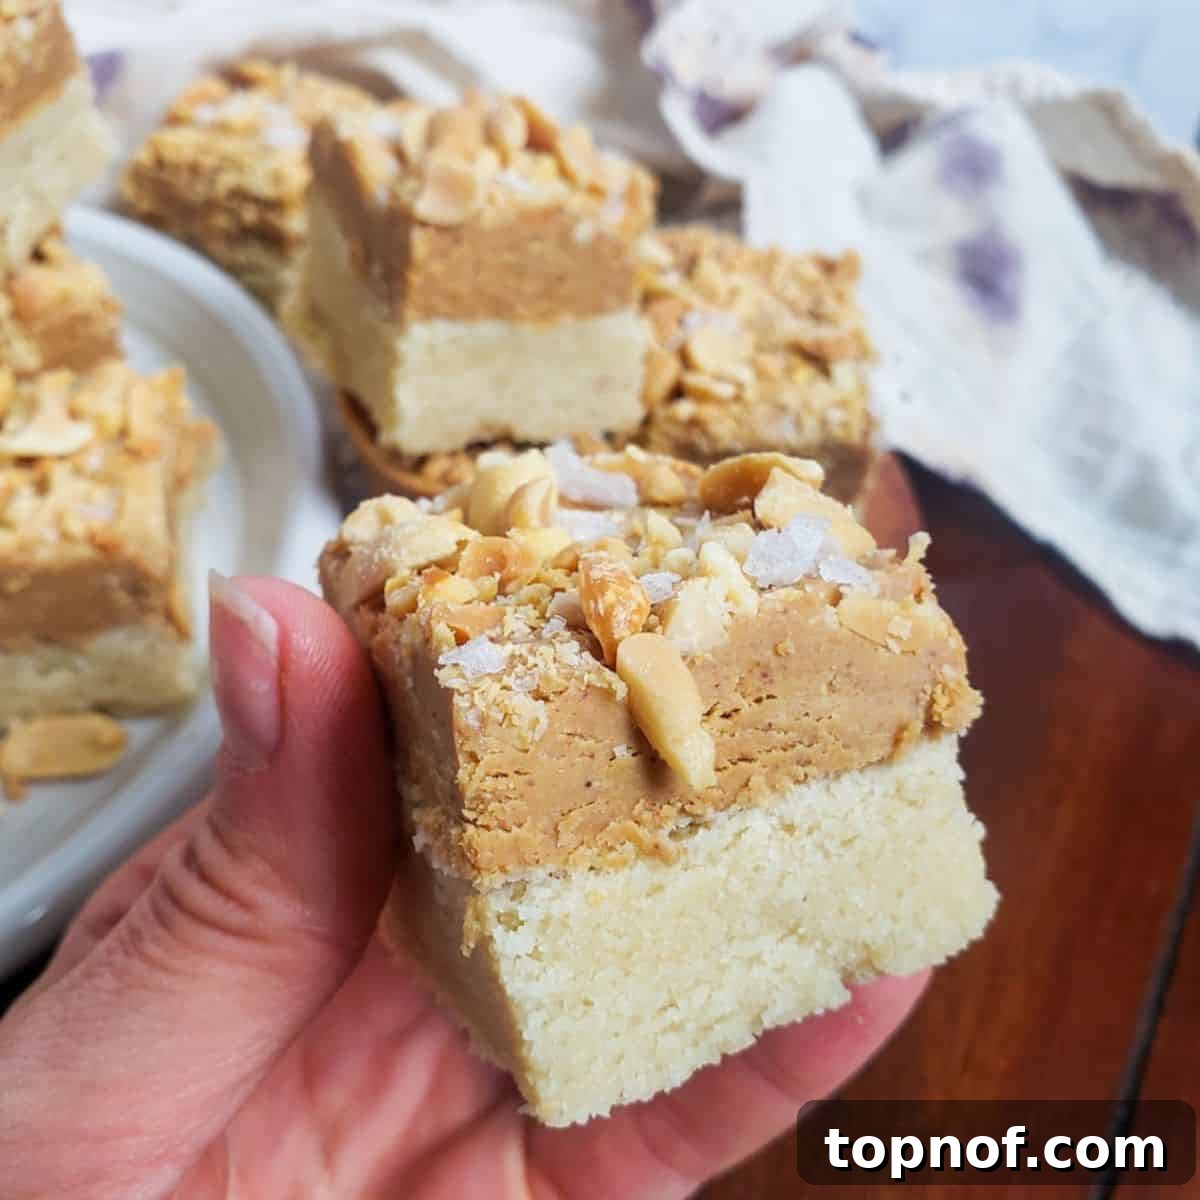
Expert Tips & Frequently Asked Questions for Perfect Bars
Absolutely! While peanut butter is the classic choice and delivers that nostalgic Payday flavor, this recipe is incredibly versatile. **Cashew butter** or **almond butter** are fantastic alternatives that offer a slightly different, yet equally delicious, flavor profile and richness. For a completely nut-free option, **sunflower seed butter (SunButter)** works wonderfully. Just ensure your chosen nut or seed butter is creamy and natural, without excessive added sugars or oils, to maintain the correct consistency and setting properties of the fudge layer.
Yes, you can substitute arrowroot powder with cornstarch in a 1:1 ratio if arrowroot is unavailable. However, it’s crucial to note that if you use cornstarch, your bars will **no longer be guaranteed gluten-free**, as most commercial cornstarch is processed in facilities that also handle gluten-containing grains, or may contain traces. Arrowroot is specifically chosen for its superior gluten-free properties and its ability to create a clear, smooth, and stable texture in the cake base.
Yes, they are! This recipe has been meticulously crafted to be **100% plant-based and entirely vegan-friendly**. Every ingredient, from the plant-based butter used in the base to the maple syrup in the fudge, is carefully selected to ensure no animal products are used. This makes them a wonderful and inclusive treat for anyone following a vegan lifestyle or those looking for delicious dairy-free, egg-free, and cholesterol-free dessert options.
Certainly! If you do not follow a vegan diet, you can absolutely substitute the plant-based butter with regular dairy butter in the cake layer. The measurements and preparation steps will remain exactly the same. This substitution will slightly alter the nutritional profile of the bars but will still result in equally delicious and satisfying peanut butter treats.
While you technically *can* attempt to make them without it, **parchment paper is highly recommended** for a seamless and frustration-free experience. It is absolutely crucial for easily lifting the entire slab of bars out of the pan in one neat piece once frozen, ensuring they retain their perfect shape and distinct layers. Without it, you might find the bars stick stubbornly to the pan, making removal and slicing much more challenging and potentially leading to less aesthetically pleasing results. It truly makes a significant difference in the overall ease and success of the recipe.
The possibilities for customization are virtually endless! Beyond the optional chopped peanuts, consider adding mini vegan chocolate chips (dark or “milk” chocolate style), shredded coconut (toasted or untoasted), a generous sprinkle of coarse sea salt for an extra flavor pop, crushed pretzels for a salty crunch, or even a drizzle of melted vegan chocolate or caramel sauce. For a festive touch, colorful sprinkles or holiday-themed candies (always ensure they are vegan!) can be a fun and vibrant addition.
When stored properly in an airtight container or a heavy-duty freezer bag, these vegan peanut butter bars will stay wonderfully fresh and incredibly delicious in the freezer for up to **3 months**. This makes them an excellent make-ahead dessert or snack to always have on hand, ready to satisfy your sweet cravings whenever they strike.
Discover More Delicious Plant-Based Treats You’ll Love
If you loved crafting and savoring these irresistible vegan peanut butter bars, be sure to explore some of our other fantastic plant-based recipes that are sure to satisfy your sweet tooth and expand your vegan baking repertoire:
- Decadent Vegan Peanut Butter Fudge
- Chewy Vegan Peanut Butter Cookies
- Classic Peanut Butter Rice Krispie Treats (Vegan Adaptation)
Rated 5 out of 5 stars by 4 voters.
Vegan Peanut Butter Bars
Bailey Rhatigan
Melt-in-your-mouth layered bars that keep perfectly in the freezer, offering a delightful plant-based and gluten-free treat anytime.
1 hr 10 mins
20 mins
14
Pin Recipe
Rate Recipe
Print Recipe
Ingredients
Cake Layer
- ½ cup vegan butter, softened
- 2 cup Almond Flour
- 4 tbsp Arrowroot Powder
- ½ cup Granulated Sugar
Maple Peanut Butter Layer
- 1 cup creamy peanut butter (natural recommended)
- ¼ cup melted coconut oil
- 2½ tbsp maple syrup
- Pinch of salt
- 1 cup peanuts, chopped (optional, for topping or mixing in)
Instructions
For The Cake Layer
-
1. Prepare Pan & Mix Base: Line an 8×5 inch bread pan with parchment paper, allowing the ends to hang over the sides for easy removal. In a mixer, combine vegan butter, almond flour, arrowroot powder, and granulated sugar until well mixed. Press this mixture firmly and evenly into the bottom of the prepared pan.
-
2. Bake & Cool: Bake the cake mixture in a preheated oven at 350ºF (175°C) for about 20 minutes, until lightly golden and set. Remove from oven and let it cool completely on the counter or in the freezer before proceeding.
For The Maple Peanut Butter Layer
-
3. Prepare Fudge Mixture: Melt the coconut oil until it’s completely liquid. In a large bowl, whisk together the peanut butter, melted coconut oil, maple syrup, and a pinch of salt until smooth and fully combined. If using, stir in the optional chopped peanuts.
-
4. Assemble & Freeze: Once the cake layer is completely cooled and firm, pour the peanut butter maple fudge mixture evenly over the cake base in the pan. Gently spread it to create a smooth, consistent top layer. Place the pan into the freezer, ensuring it lies flat, and freeze for about 30-45 minutes, or until the fudge layer is firm but still sliceable.
-
5. Slice & Store: Remove the pan from the freezer. Use the overhanging parchment paper to gently lift the entire block out of the tin. Place it on a cutting board and, with a sharp knife (warming it under hot water can help with cleaner cuts), slice into your desired bar sizes. Store the finished bars in an airtight freezer bag or container in the freezer for up to 3 months. Enjoy directly from the freezer, or let them sit at room temperature for a couple of minutes for a slightly softer texture.
Notes
* Any creamy nut or seed butter (almond, cashew, sunflower seed butter) will work beautifully in place of peanut butter.
* For a lower-sugar option, maple syrup can be replaced with liquid stevia or monk fruit syrup. Adjust to your desired sweetness, keeping in mind the texture might be slightly different.
* Store these bars in an airtight container or freezer bag in the freezer for optimal freshness. They will keep well for up to 3 months.
Nutrition Facts (per serving)
Calories: 325 kcal
Carbohydrates: 19g
Protein: 8g
Fat: 26g
Saturated Fat: 7g
Trans Fat: 1g
Sodium: 137mg
Potassium: 130mg
Fiber: 3g
Sugar: 12g
Vitamin A: 308IU
Calcium: 46mg
Iron: 1mg
Nutrition information is automatically calculated and should be used as an approximation. Actual values may vary based on specific ingredients and preparation methods.
Additional Recipe Information
Bailey Rhatigan
1 hour 10 minutes
20 minutes
Dessert, Snack
American, Vegan
14 bars
325 per serving
plant based, vegan, gluten-free dessert, peanut butter, freezer friendly, healthy treat
Enjoyed this delightful recipe? We’d love to hear from you! Share your thoughts and leave a comment below.