
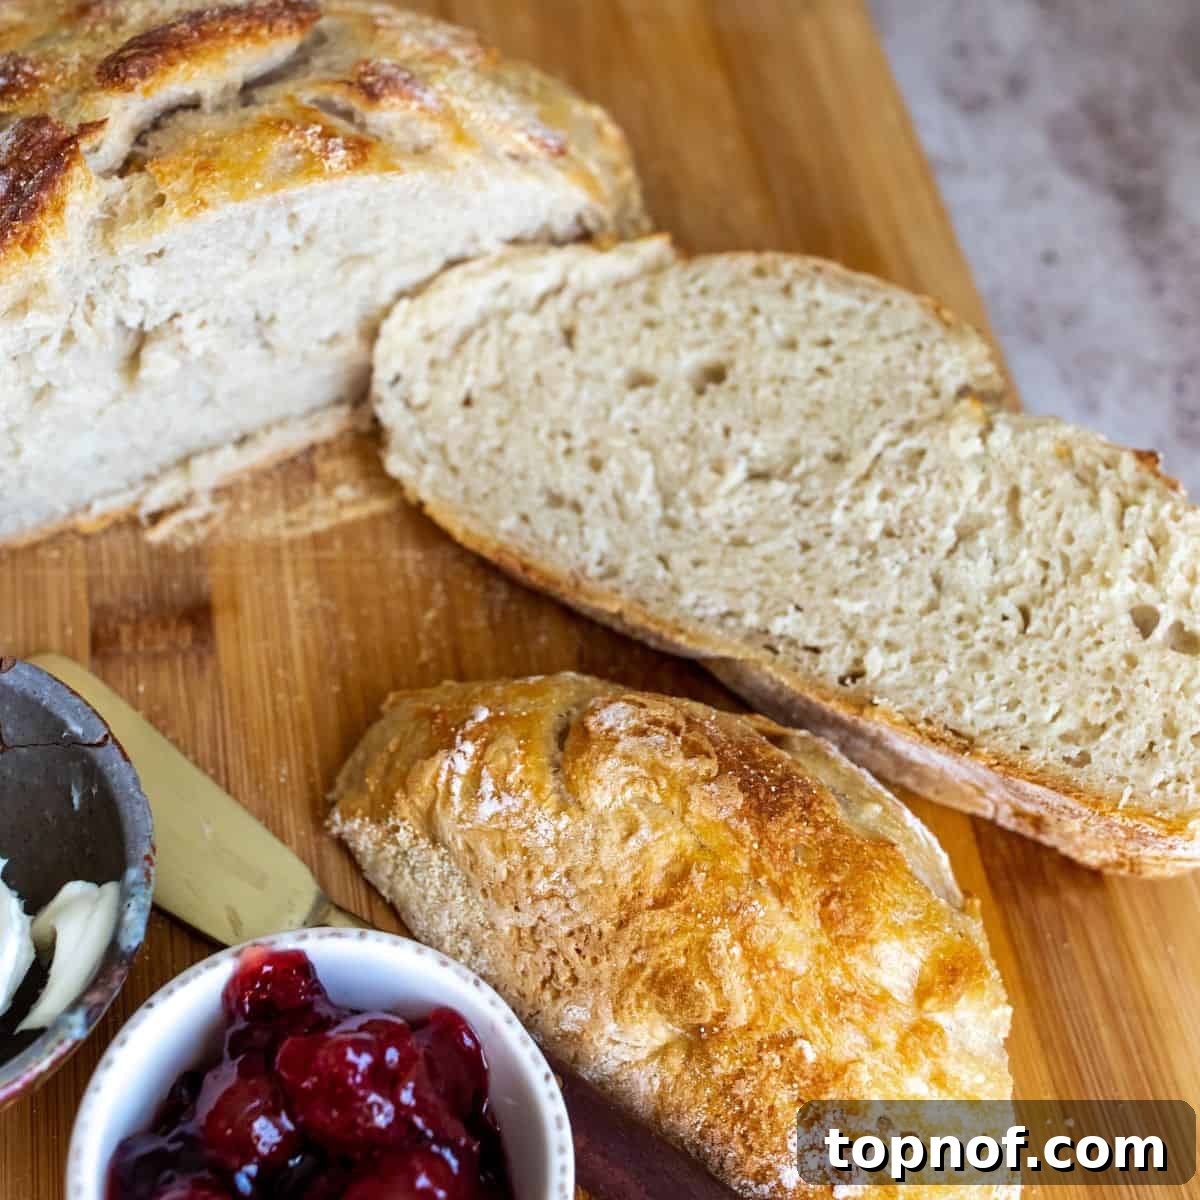
Overnight bread isn’t just a recipe; it’s a culinary revelation that promises gourmet results with minimal effort. Imagine the delightful aroma of freshly baked bread wafting through your home, its crust perfectly golden and crisp, giving way to a wonderfully soft and airy interior. This incredible no-knead bread requires only four basic ingredients, a quick mix, and a leisurely overnight rest, making it the ultimate game-changer for busy home bakers. Say goodbye to pricey artisan loaves from the bakery and embrace the joy of crafting your own perfect boule – a simple, satisfying experience that will undoubtedly change your life and elevate your kitchen skills!
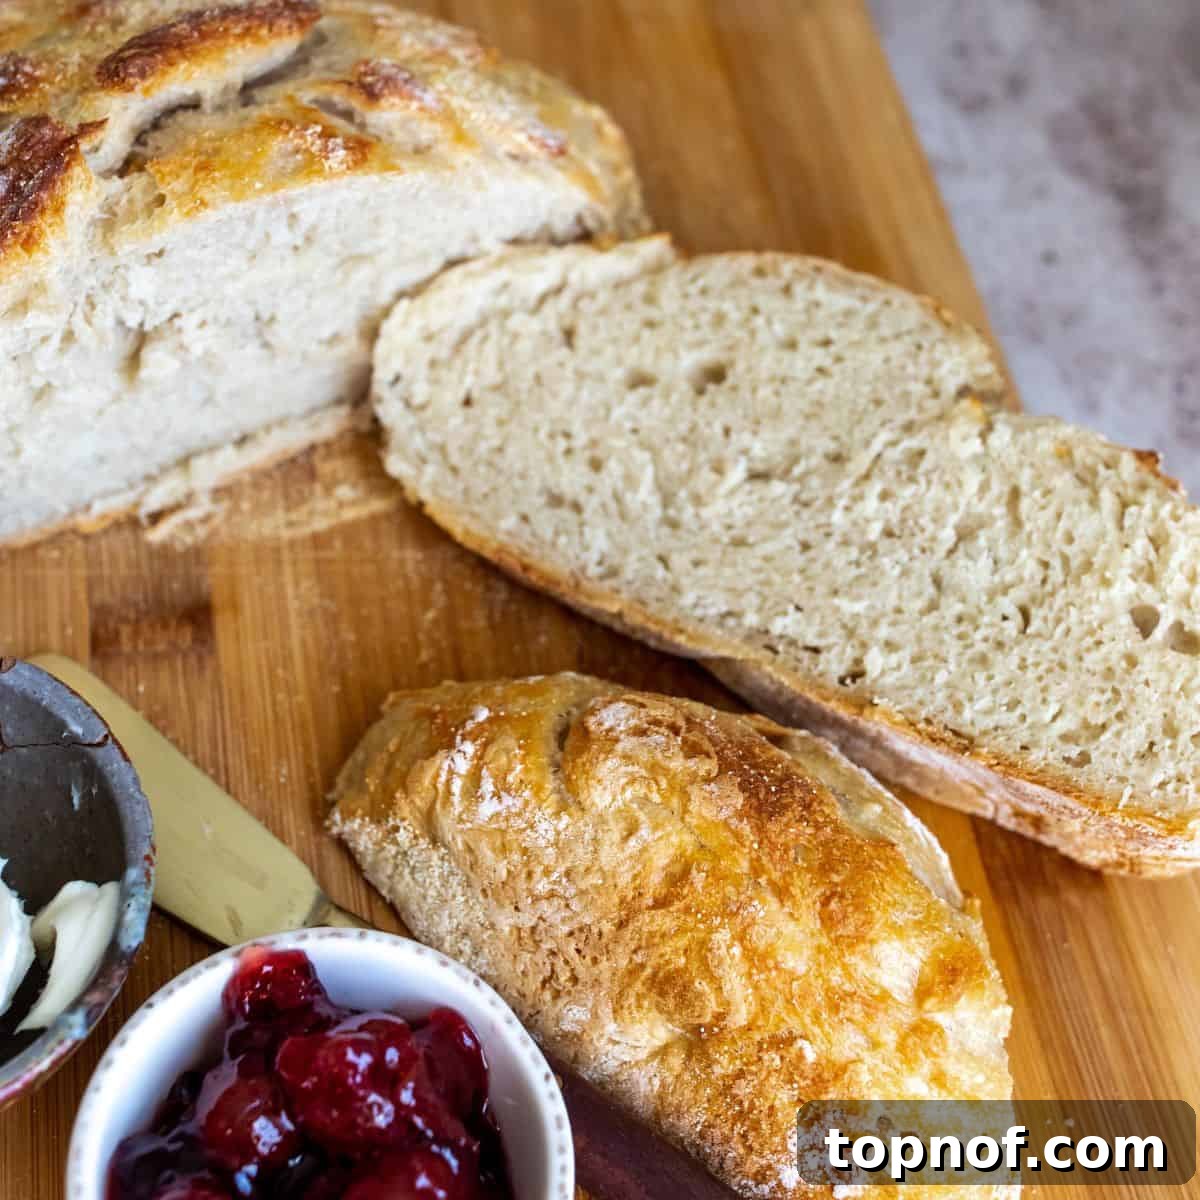
Table of Contents
- Discover the Magic: Why Choose Overnight Bread?
- Understanding Overnight Bread: Simplicity Meets Flavor
- Essential Ingredients for Your Perfect Loaf
- Step-by-Step Guide: Crafting Your Overnight Bread
- Baking Your Overnight Masterpiece: Oven Time
- Overnight Bread FAQs and Expert Tips
- Delightful Pairings for Your Homemade Bread
- Creative Variations: Elevate Your Loaf
- More Irresistible Baked Recipes to Explore
Discover the Magic: Why Choose Overnight Bread?
This overnight bread recipe truly feels almost too good to be true, yet it delivers consistently spectacular results, and I’m thrilled to share its secrets with you! Since my stepmom first introduced me to this method, it has become a weekly staple in my kitchen. What makes it so exceptional? Beyond its incredible taste and texture, it offers unparalleled convenience and versatility. You can effortlessly customize it with various ingredients to create unique flavors, but the beauty of the simple four-ingredient base is more than enough to have you eagerly heading to the kitchen to bake.
The most compelling reason to embrace this recipe is the complete absence of kneading. Yes, you heard that correctly – no laborious kneading required! You simply whisk the dry ingredients, gently mix in the water, and let time work its magic. There’s only one crucial resting period for this dough: an extended fermentation of about 12 to 18 hours, typically done overnight. This slow rise is what develops the complex flavors and creates that signature open, airy crumb. After its long beauty sleep, the dough requires only about 40 minutes in a hot oven to transform into an incredible loaf, boasting a beautifully golden, crackling crust and a remarkably soft, fluffy interior. It’s perfect for beginners and seasoned bakers alike, promising a homemade loaf that tastes truly artisanal every single time.
Understanding Overnight Bread: Simplicity Meets Flavor
Overnight bread, often referred to as no-knead bread, is fundamentally a very basic and incredibly simple bread recipe. It stands out as one of the easiest baking projects to undertake, primarily because it eliminates the most time-consuming and often intimidating steps of traditional bread making. There’s no intensive kneading to develop gluten, nor are there multiple rises to manage. Instead, the ingredients are simply mixed until just combined, covered, and then left undisturbed, usually overnight, to slowly ferment and rise. This extended, slow fermentation is the secret behind its superior flavor and texture.
Is overnight bread better? Many enthusiasts would argue yes, especially for its ease and the quality of the finished product. The long, cool rise allows the yeast more time to break down complex carbohydrates in the flour, resulting in a deeper, more nuanced flavor profile that is often missing in quick breads. This process also contributes to a more developed gluten structure without the need for manual kneading, creating that desirable open crumb and a wonderfully chewy texture. The rustic appearance, often achieved by baking in a preheated Dutch oven, gives it an appeal similar to a crusty French bread boule you might find at a specialty grocery store, yet it’s remarkably mild in taste, making it versatile for any meal. Its simplicity makes it perfect for incorporating freshly baked bread into your routine without the fuss.
Essential Ingredients for Your Perfect Loaf
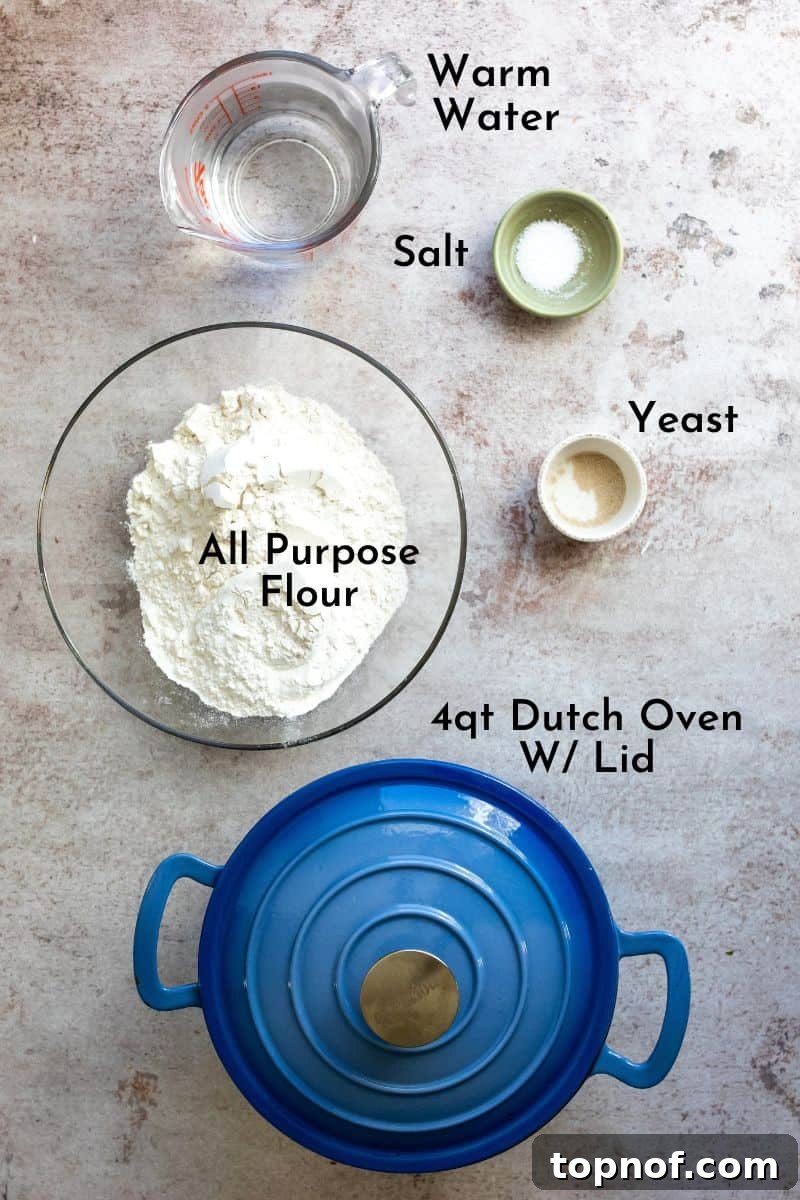
Achieving this amazing bread requires just a handful of staple ingredients, proving that extraordinary results don’t always demand an extensive shopping list. Here’s a closer look at what you’ll need and why each component is vital:
- All-Purpose Flour: This forms the fundamental structure of your bread. Its balanced protein content makes it incredibly versatile for a wide range of baked goods, including this no-knead loaf. While I haven’t personally experimented with other flours for this specific recipe, a good quality all-purpose gluten-free blend designed for baking (often containing xanthan gum) should yield comparable results, though texture may vary slightly. For a chewier crumb, you could experiment with bread flour, or for a nuttier flavor and denser texture, a portion of whole wheat flour could be incorporated.
- Active Dry Yeast: This is the leavening agent responsible for making your bread rise, creating its airy texture. You can typically find it in small packets or jars in the baking aisle. For this recipe, you only need a small amount, as the extended overnight proofing allows even a tiny quantity of yeast to do its job effectively. Both active dry yeast and instant yeast (also known as rapid-rise or fast-acting yeast) work well here; instant yeast simply doesn’t require prior activation in water.
- Salt: Far from just a flavor enhancer, salt is absolutely crucial for bread making. It not only brings out the delicious, savory notes of the flour but also plays a significant role in controlling yeast activity and strengthening the gluten structure. My first attempt without salt resulted in a rather bland and flat loaf, so please don’t skip this essential ingredient!
- Warm Water: The temperature of your water is key for activating the yeast without killing it. It should be comfortably warm to the touch, similar to bathwater – not boiling hot, which would destroy the yeast, and not cold, which would inhibit its activity. Aim for a temperature between 105-115°F (40-46°C) for active dry yeast.
- Cornmeal or Additional All-Purpose Flour: These are used to dust the surface of your Dutch oven, preventing the dough from sticking and contributing to a beautiful, rustic, slightly textured crust. A light sprinkle on top of the dough before baking also adds to that charming, artisanal look.
Beyond these ingredients, ensure you have basic baking equipment like a large mixing bowl, a sturdy wooden spoon or spatula, and plastic wrap. Most importantly, a good quality Dutch oven is highly recommended for achieving the signature crispy crust and perfectly baked interior.
Step-by-Step Guide: Crafting Your Overnight Bread
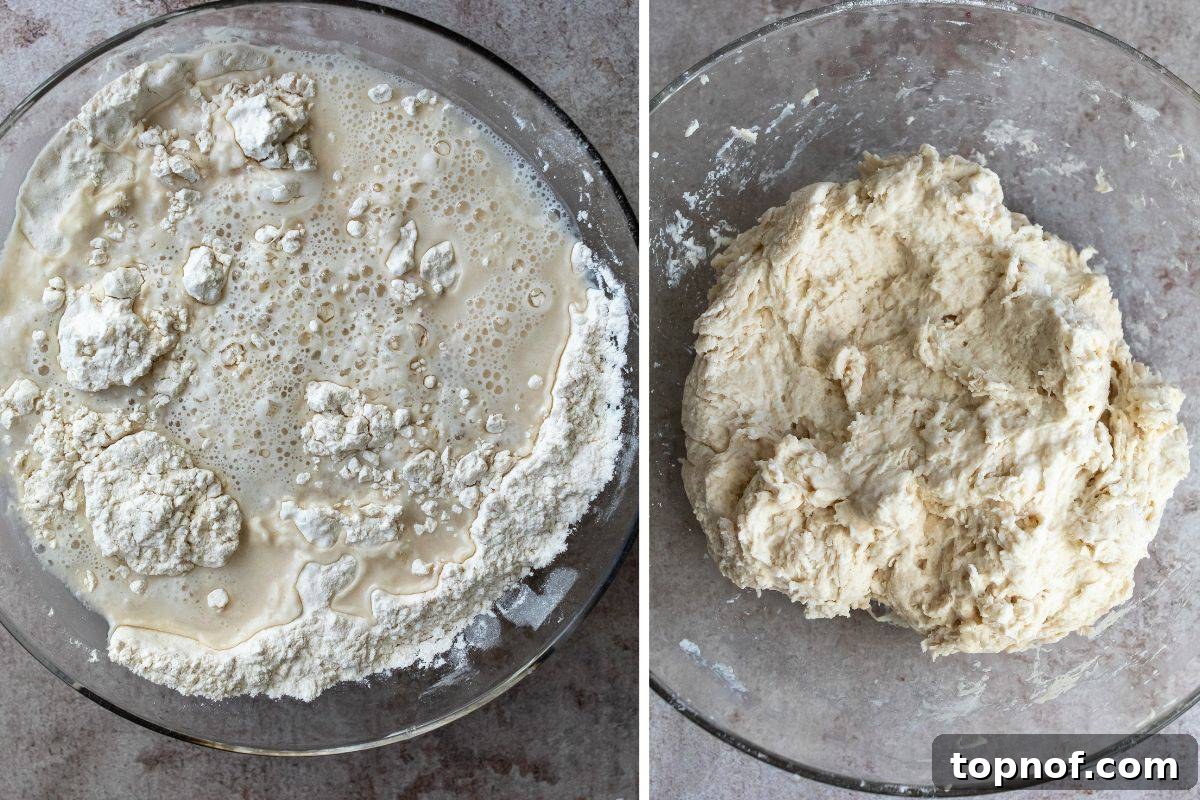
Making this incredible no-knead bread is surprisingly straightforward. Follow these simple steps, and you’ll be enjoying a perfect homemade loaf in no time:
- Prepare Your Dutch Oven: Before you begin mixing, ensure you have a ceramic or cast iron 4-quart Dutch oven with an oven-safe lid. This piece of equipment is fundamental to the success of this recipe, as it traps steam during baking, creating that desirable crispy crust and soft interior. If you don’t own one, I’ve linked a fantastic option here that is very similar to my own. A good Dutch oven is a versatile kitchen investment, perfect for baking bread, simmering soups, and slow-cooking stews, so you’ll find it incredibly useful beyond just this recipe.
- Combine Dry Ingredients: In a large ceramic or glass bowl, add your all-purpose flour, yeast, and salt. Use a whisk to mix these dry ingredients thoroughly. This ensures the yeast and salt are evenly distributed throughout the flour, which is crucial for uniform leavening and flavor. Next, prepare your warm water. You can get warm/hot water directly from the faucet, or if your tap water isn’t warm enough, microwave the required amount for approximately 1 minute and 30 seconds (aiming for 105-115°F or 40-46°C). Start by pouring about 1.5 cups of this warm water slowly over the flour mixture.
- Mix the Dough: Using a sturdy wooden spoon or a silicone spatula, begin to mix everything together. Stir gently but persistently, ensuring all the flour is fully hydrated and integrated into the dough. Don’t be afraid to press the spatula down on the flour mixture to help absorb any dry pockets. The consistency of the dough is important; it should be sticky, but not soupy. Flour brands can vary significantly in their absorption rates, so you may need to add a little more water. Add additional water, less than 1/4 cup at a time, mixing well after each addition until you reach the desired consistency. The maximum amount of water you should need is typically 2 cups.
- Check Dough Consistency: At this stage, your dough should be wet and sticky, but it should still hold together somewhat and not be crumbly or excessively runny. A happy medium between wet and firm is perfect. Refer to the provided photo of my dough for a visual comparison to help you achieve the ideal consistency. This slightly sticky nature is key for developing the airy crumb during the long fermentation.
- The Overnight Rise: Once your dough is mixed to perfection, cover the glass or ceramic bowl tightly with plastic wrap. It’s essential to create an airtight seal to prevent the dough from drying out and to encourage proper fermentation. Place the covered bowl in a warm area of your kitchen – a spot away from drafts is ideal. Allow the dough to rest and rise for at least 12 hours, or ideally, overnight, and up to 18 hours. During this period, the dough will significantly increase in volume (often doubling in size) and appear humid inside the bowl, indicating active yeast fermentation. This slow rise is where the magic happens, developing deep flavors and a wonderful texture.
Baking Your Overnight Masterpiece: Oven Time
After a restful night, your dough is ready to be transformed into a beautiful, crusty loaf. The baking process is just as simple, but a few key steps ensure perfection:
- Preheat Oven and Dutch Oven: When you’re ready to bake, preheat your oven to a scorching 450ºF (232°C). Critically, place your empty Dutch oven (without its lid) into the oven to heat up while the oven preheats. This step is vital for achieving that signature crispy crust. A preheated Dutch oven mimics a professional bread oven, delivering an initial burst of intense heat to the dough and preventing it from spreading too much.
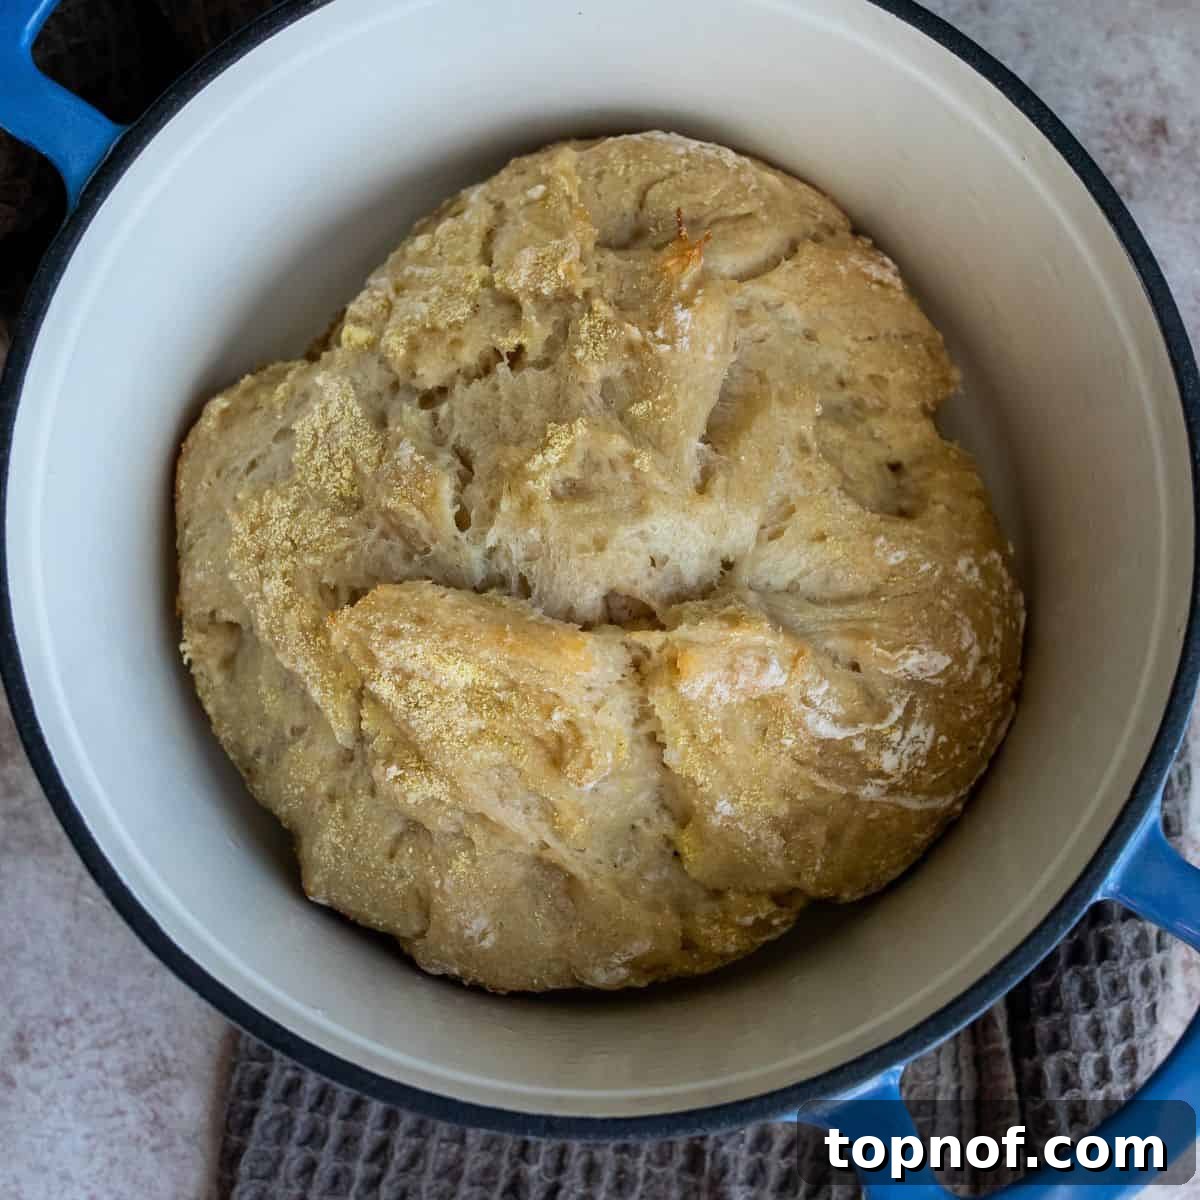
- Shape and Place the Dough: While the oven and Dutch oven are preheating, gently sprinkle a little extra flour over the top of your risen dough in the bowl. This will make it easier to handle. Carefully pull the dough out of the bowl and turn it upside down onto a lightly floured surface. Gently shape it into a ball by performing a series of “envelope folds.” This simply means folding the edges of the dough into the center, forming a neat, somewhat taut ball (refer to the accompanying photo for a visual example). Once the Dutch oven is screaming hot, carefully remove it from the oven using oven mitts. Sprinkle a small amount of cornmeal or flour on the bottom of the pot to prevent sticking and add to the rustic texture. Carefully pick up your shaped dough and gently lower it into the hot Dutch oven. Cover the pot with its lid and immediately place it back into the preheated oven. Bake for 30 minutes.
- Uncover and Finish Baking: After the initial 30 minutes of covered baking, carefully remove the lid from the Dutch oven using oven mitts (be mindful of the steam that will escape!). This phase allows the crust to develop its beautiful golden color and become incredibly crisp. Continue baking uncovered for another 10 to 15 minutes, or until the top of the bread reaches a rich, deep golden brown. Once baked, carefully remove the Dutch oven from the oven and transfer the bread to a wire rack to cool. Allowing the bread to cool for at least 30-60 minutes before slicing is crucial; this resting period allows the internal structure to set and prevents a gummy texture. Then, slice, serve, and enjoy your magnificent homemade creation!
Overnight Bread FAQs and Expert Tips
Here are some frequently asked questions and helpful tips to ensure your overnight bread turns out perfectly every time:
This recipe is incredibly forgiving when it comes to yeast! You can use active dry yeast, instant yeast, rapid-rise yeast, or even traditional dry yeast. All types have worked successfully. If using active dry yeast, ensure your water is warm enough (105-115°F or 40-46°C) to activate it. Instant yeast can be mixed directly with the dry ingredients without prior activation.
Yes, this bread is inherently vegan! It contains only flour, yeast, salt, and water – all plant-based ingredients. As long as you are comfortable consuming yeast, it fits perfectly into a vegan diet.
Absolutely! The beauty of overnight bread lies in its flexibility. While 12 hours is a great minimum, you can let it rise for up to 18-24 hours, especially if you’re using cooler water or your kitchen is on the colder side. A longer rise often contributes to a more developed flavor. However, I wouldn’t recommend exceeding 24 hours, as the yeast can eventually deplete its food source and the dough might over-ferment, leading to a weaker structure and an off-flavor.
Flour absorption can vary based on brand, humidity, and even how it’s stored. If your dough is too sticky and doesn’t hold together at all, add a tablespoon of flour at a time until it reaches the desired consistency (sticky but manageable). If it’s too dry and crumbly, add warm water, a tablespoon at a time, until it comes together. Always add slowly and mix thoroughly after each addition.
Once cooled, store your overnight bread at room temperature in an airtight container, a bread box, or a paper bag inside a plastic bag. This will help keep the crust crisp and the interior soft for 2-3 days. For longer storage, slice the loaf and freeze the slices in a freezer-safe bag. You can then toast them directly from frozen.
Absolutely! The “overnight” aspect is perfect for planning. You can mix the dough the night before, let it rise, and then bake it fresh the next morning, just in time for breakfast or brunch. The aroma of freshly baked bread will be a delightful welcome for your guests!
Delightful Pairings for Your Homemade Bread
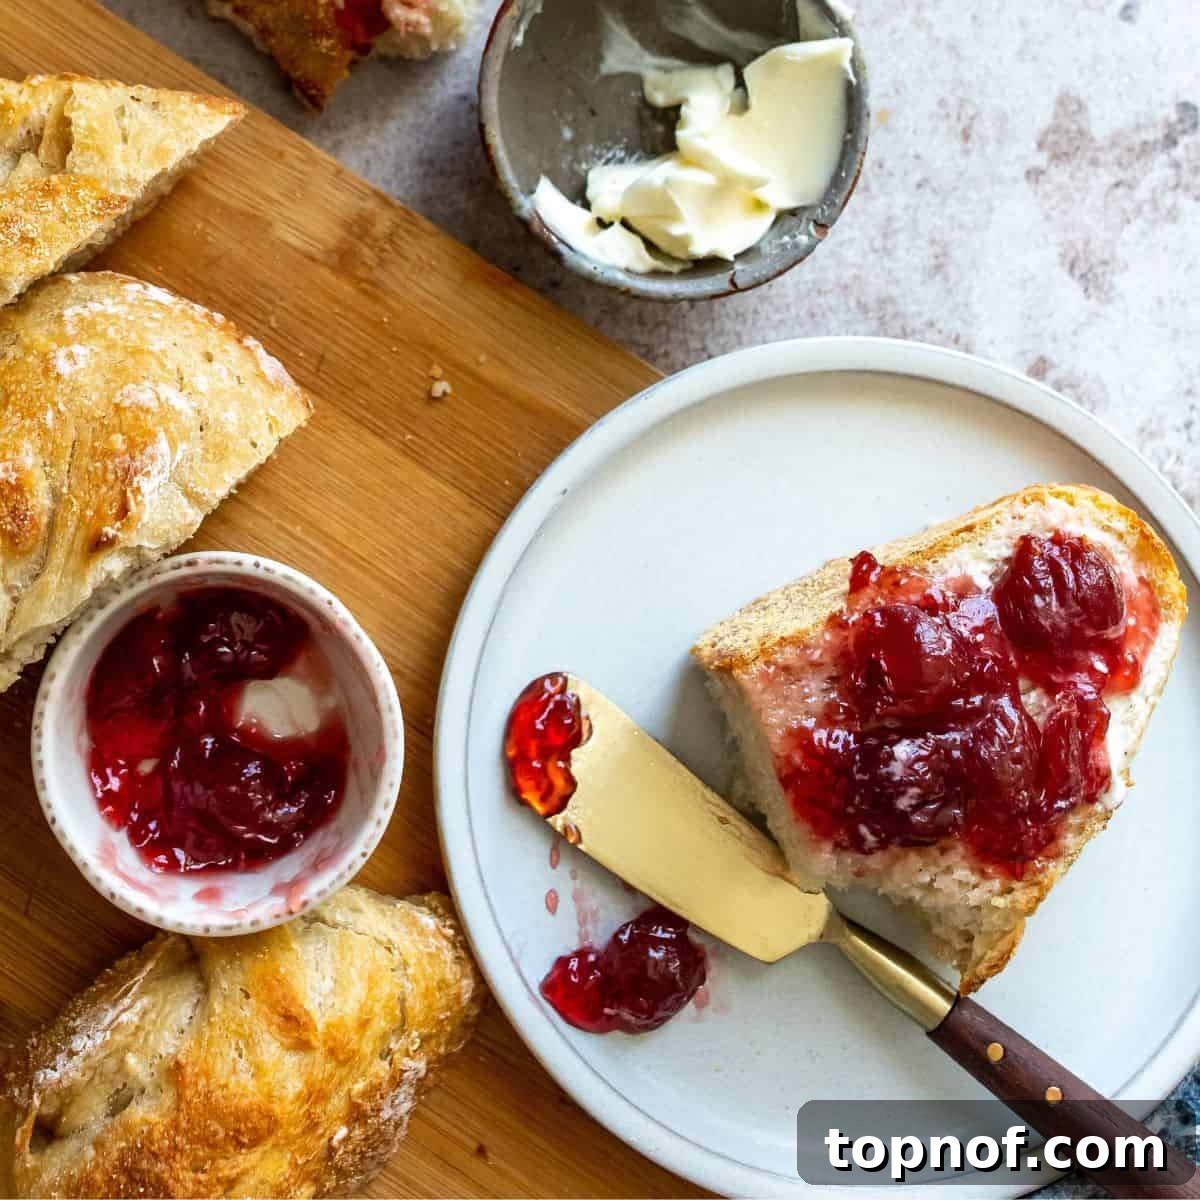
The rustic simplicity and mild flavor of this overnight bread make it an incredibly versatile canvas for a wide array of accompaniments. It truly pairs well with just about anything you can imagine! My personal favorite way to enjoy it is fresh out of the oven, slathered with a little butter and a generous dollop of jam. My Homemade Strawberry Jam tastes absolutely divine on this crusty bread, creating a perfect balance of sweet and savory.
But the possibilities extend far beyond breakfast spreads. This bread makes an excellent companion to hearty soups and stews, perfect for soaking up rich broths. Consider serving it alongside a fresh, vibrant salad like my Asian Cabbage Salad or a colorful Kale and Beet Salad for a complete and satisfying meal. For a more robust pairing, this bread would also be wonderful with savory dishes like homemade Baked Beans, or as a base for appetizers like Balsamic Bruschetta With Roasted Peppers. You can even use it for gourmet sandwiches or as a dipper for olive oil and balsamic vinegar. Truly, the options for enjoying this versatile loaf are endless, making it a staple you’ll reach for again and again.
Creative Variations: Elevate Your Loaf
While the classic four-ingredient overnight bread is spectacular on its own, its simple nature makes it an ideal base for creative culinary experimentation. Don’t hesitate to personalize your loaf with various additions to suit your taste:
- Yeast: As mentioned in the FAQ, this recipe is flexible. Feel free to use active dry yeast, instant yeast, or fast-acting yeast interchangeably. Just ensure the active dry yeast is properly hydrated with warm water.
- Flour: While all-purpose flour provides a consistently excellent result, you can certainly experiment. For a chewier texture, substitute up to half of the all-purpose flour with bread flour. To add more depth and a slightly denser crumb, try replacing a portion (e.g., 1/2 to 1 cup) with whole wheat flour or rye flour. If you’re aiming for a gluten-free loaf, I highly recommend using an all-purpose gluten-free blend specifically designed for baking, as these often contain a mix of flours and starches that mimic the properties of wheat flour.
- Savory Add-Ins: Elevate your bread with savory flavors! I’ve had fantastic results adding fresh or dried herbs like rosemary, thyme, or oregano. Finely chopped roasted garlic mixed into the dough creates an aromatic masterpiece. Other delicious savory additions include grated Parmesan cheese, sun-dried tomatoes (chopped), olives (pitted and chopped), or even a sprinkle of red pepper flakes for a subtle kick. Incorporate these add-ins when you’re doing the final flouring and folding of the dough just before it goes into the oven.
- Sweet Add-Ins: For a delightful breakfast or dessert bread, consider sweet variations. You could mix in dried cranberries, raisins, chopped nuts (like walnuts or pecans), cinnamon, or even a touch of orange zest. These additions are also best folded in during the final shaping stage.
- Seeds and Grains: For added texture and nutrition, sprinkle sesame seeds, poppy seeds, or even rolled oats on the top of the loaf before baking, or mix them into the dough during the initial mixing phase.
More Irresistible Baked Recipes To Explore
Discover More Delicious Baked Creations
Side Dishes
Homemade Garlic Rolls
Side Dishes
Delicious Cauliflower Stuffing
Side Dishes
Balsamic Bruschetta With Roasted Peppers
Side Dishes
Oven Baked Jalapeño Poppers
If you loved this overnight bread recipe, please let me know by leaving a comment and rating below! Also, be sure to follow me on Instagram & Pinterest for even more fun and wholesome recipes that make you feel good from the inside out. Thank you for being here and happy baking!
Overnight Bread
Pin Recipe
Rate Recipe
Print Recipe
Equipment
-
1- 4 Qt Dutch Oven with lid Or something similar
Ingredients
- 3 cup all purpose flour
- ¼ tsp yeast, *see notes
- 1½-2 cup warm water, *see notes
- 1½ tsp salt
- 1 tbsp all purpose flour or corn meal , to sprinkle the raw dough with
Instructions
-
Make sure you have a ceramic or cast iron 4 qt dutch oven with an oven safe lid. If you don’t, I have linked a perfect one here. This one is almost identical to the one I have. They are great for baking and for soups, you will find a lot of use with this.
-
In a large ceramic or glass bowl, add the flour, yeast and salt. Whisk really well to ensure everything is evenly mixed. Next, get warm/hot water from the faucet or microwave the water you have for 1 minute and 30 seconds. Slowly pour it over the flour mix. Start with 1.5 cups, you may need more as you mix since flour absorption can vary greatly.
-
Using a wooden spoon or spatula, slowly mix everything together. Be sure all of the flour mix is soaked up and mixed in. You can press the spatula down on the flour mix to help absorb everything. You may need to add a little bit more water at this step since brands of flour can vary greatly! I would recommend less than 1/4 cup at a time, mixing and then deciding if you need more. Max would be 2 cups (which is what I typically need)
-
Dough should be sticky, but not too wet. It should hold together somewhat well, not crumble apart. A good in between is perfect, be sure to look at the photo of my dough to compare.
-
Cover the glass/ceramic bowl tightly with plastic wrap. Make sure there is no air leaks. Leave in a warm area for at least 12 hours or overnight. The dough will double inside and appear humid in the bowl.
-
When you are ready to bake, preheat the oven to 450º. Place the dutch oven, without the lid on in the oven to heat up while the oven is preheating.
-
While the oven is preheating with the dutch oven in it, sprinkle a little flour over the dough, pull it out of the bowl, turn it upside down and fold it like an envelope. This just means to form a ball shape by folding the edges into one another (see photo for example).
Pull the dutch oven out, sprinkle a little corn meal or flour on the bottom of the pot. Pick up the dough and gently place it in the pot. Cover it and place in the oven to bake for 30 minutes.
-
After 30 minutes take the lid off of the dutch oven with oven mits, carefully and cook uncovered for another 10 minutes or until the top of the bread is golden in color. Let the bread cool a bit before slicing.
Notes
*water needed will vary, read the instructions in step three carefully. You will start with 1.5 cups and may need more, up to 2 cups max.
Nutrition
Calories: 156kcal |
Carbohydrates: 33g |
Protein: 5g |
Fat: 0.4g |
Saturated Fat: 0.1g |
Polyunsaturated Fat: 0.2g |
Monounsaturated Fat: 0.1g |
Sodium: 389mg |
Potassium: 49mg |
Fiber: 1g |
Sugar: 0.1g |
Vitamin C: 0.001mg |
Calcium: 7mg |
Iron: 2mg
Nutrition information is automatically calculated, so should only be used as an approximation.
Additional Info
Like this recipe? Leave a comment below!