
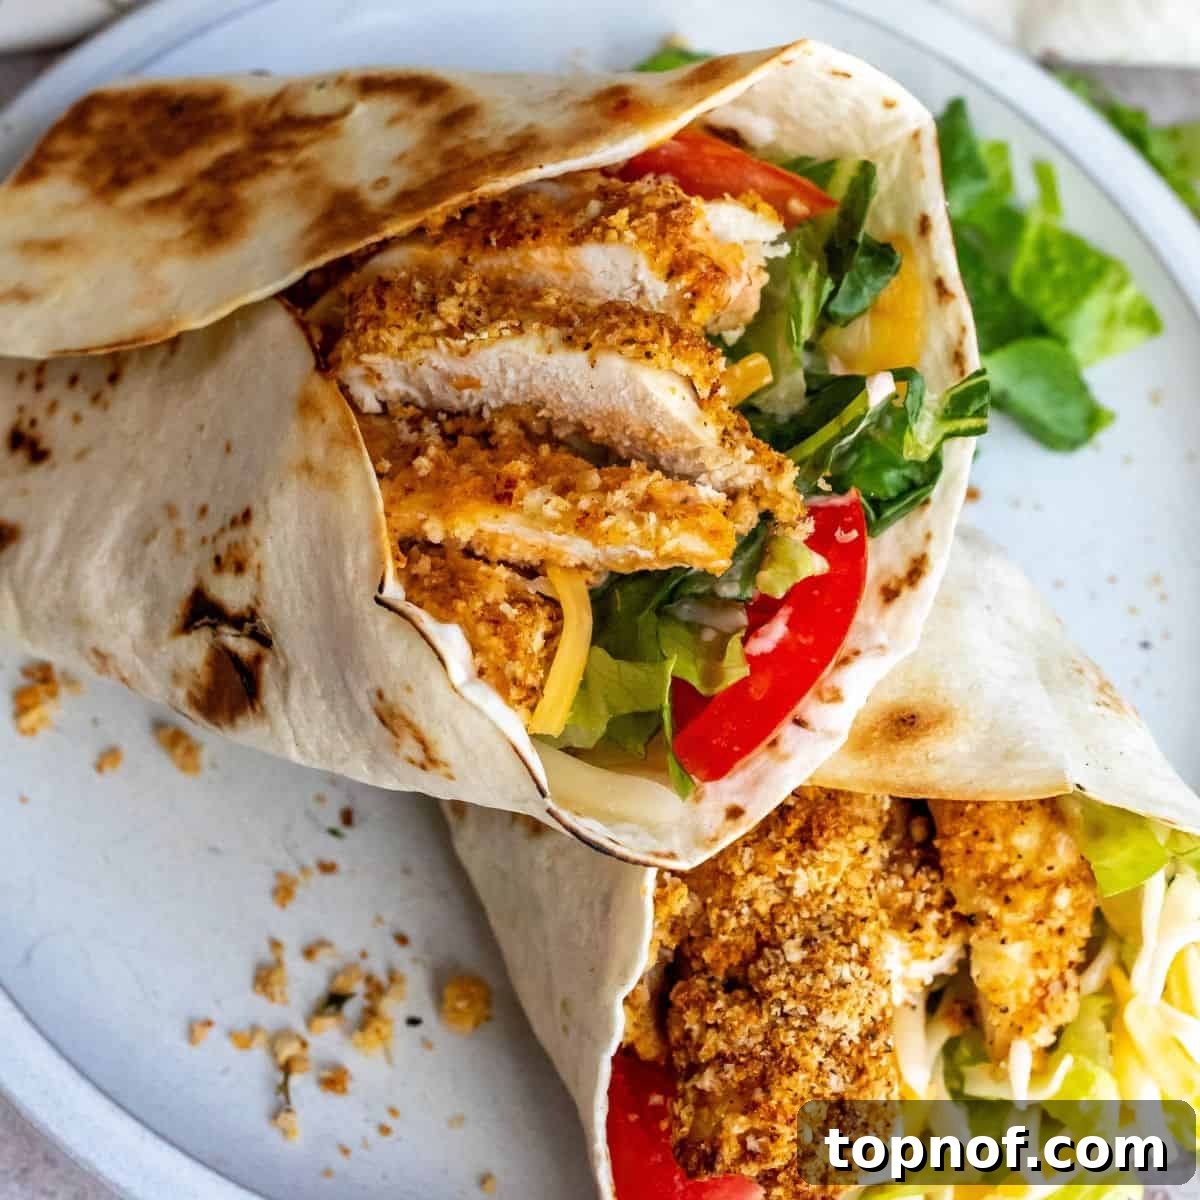
Welcome to your new favorite meal: the **Ultimate Crispy Baked Chicken Wrap**! Prepare your taste buds for an explosion of flavor and texture that will leave your entire family asking for more. Unlike traditional fried chicken, our recipe features succulent chicken breasts that are perfectly baked to a golden, crunchy perfection, ensuring every bite is both juicy and delightfully crispy. This healthier approach doesn’t compromise on taste, making it an ideal choice for any day of the week. Get ready to transform your ordinary chicken into an extraordinary culinary experience with this incredibly simple yet incredibly satisfying recipe.
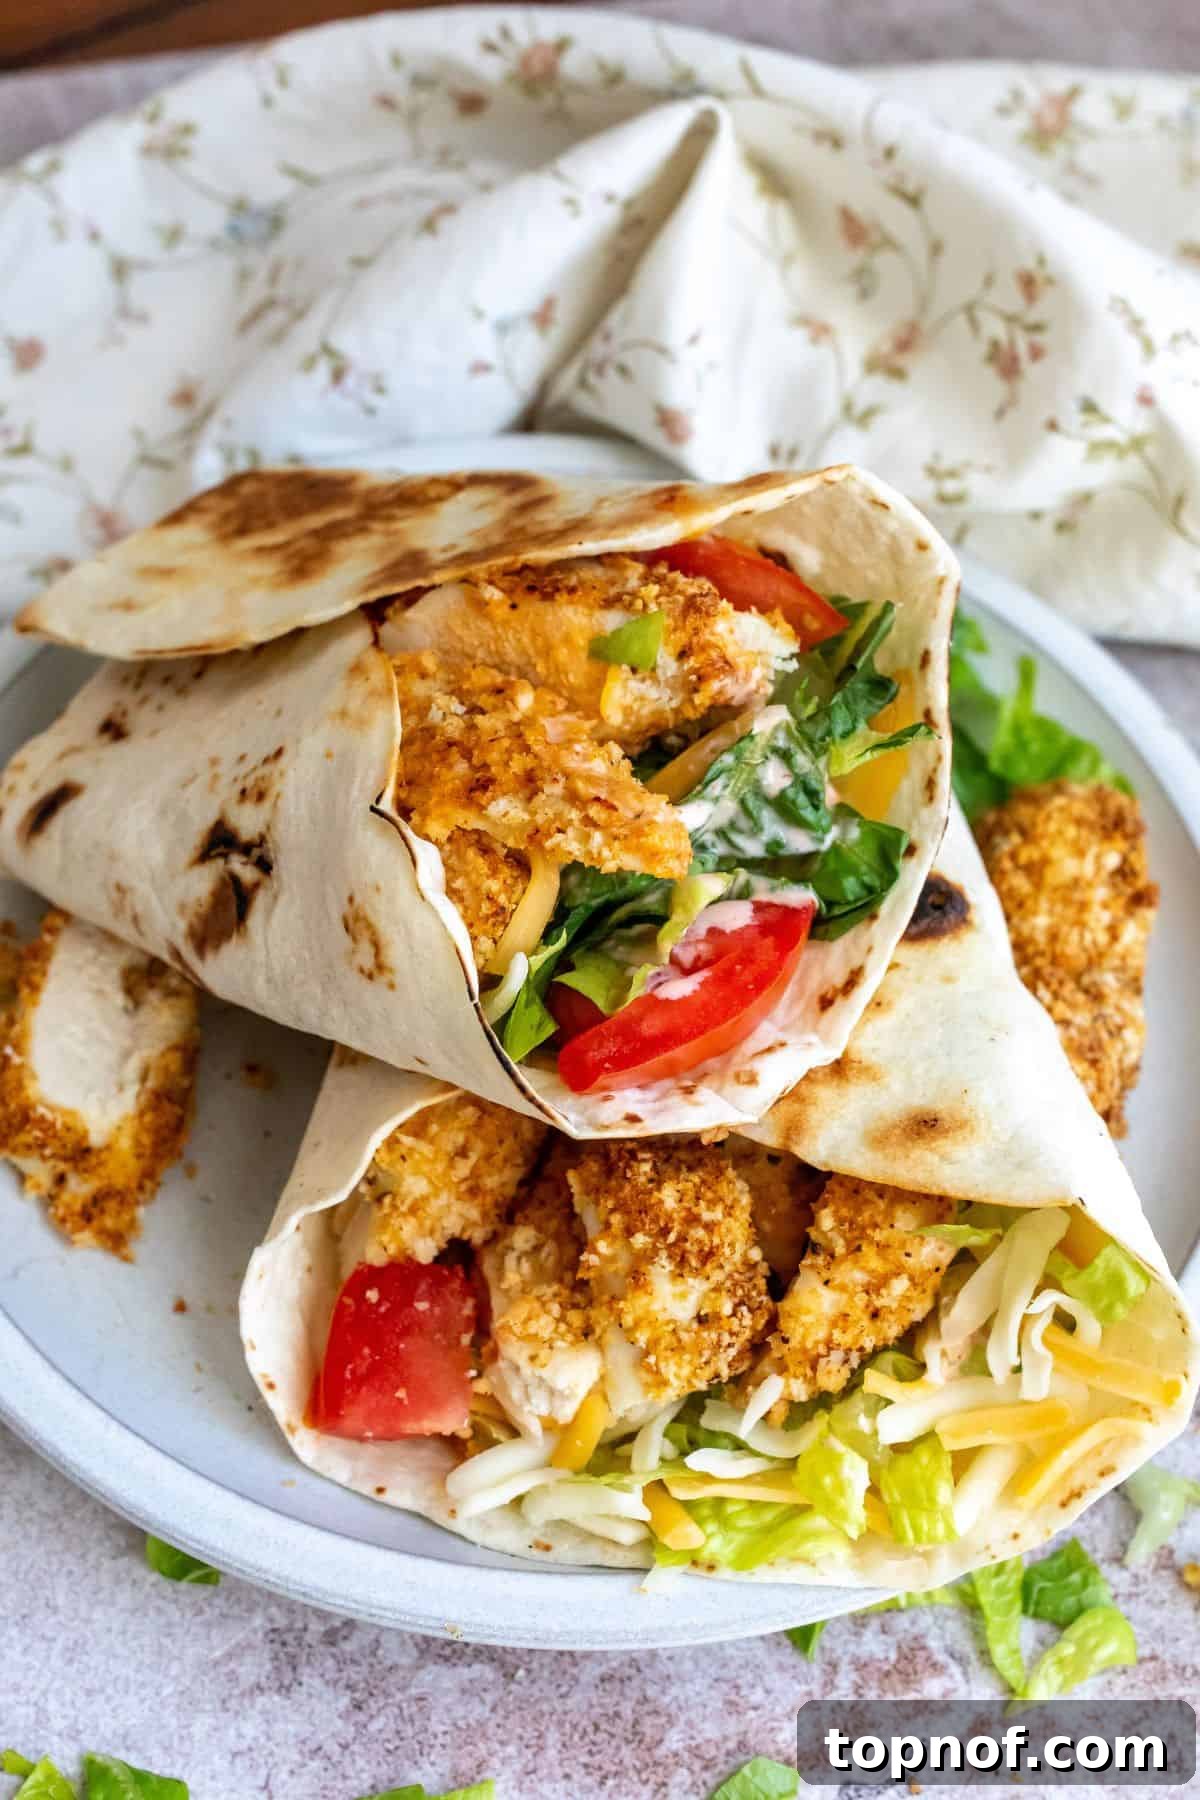
Table of Contents
- Why Choose This Crispy Chicken Wrap?
- Essential Ingredients for Your Crispy Chicken Wraps
- Flavorful Toppings and Optional Add-ins
- Creative Recipe Variations to Explore
- Step-by-Step Guide: How to Craft Your Crispy Chicken Wraps
- Mastering the Art of Assembling Your Wraps
- Expert Tips for the Perfect Crispy Chicken Wrap
- Common Questions About Crispy Chicken Wraps
- Delicious Pairings for Your Chicken Wraps
- More Irresistible Chicken Recipes to Try
Why Choose This Crispy Chicken Wrap?
In a world full of quick meals, this crispy chicken wrap stands out as a healthier, more flavorful, and incredibly versatile option. It’s not just another recipe; it’s a delightful culinary experience designed to make your life easier and your meals more enjoyable. Here’s why you’ll absolutely love making these wraps:
- Healthier Indulgence: Baked, Not Fried! The standout feature of this recipe is the chicken. We achieve an incredible crunch by baking it to perfection, completely eliminating the need for excessive oil and deep-frying. This means you can enjoy that satisfying crispy texture guilt-free, knowing you’re serving a lighter, wholesome meal. Our simple yet effective breading adheres beautifully to the chicken, creating a fantastic crust without the grease.
- Effortless Preparation: Simple & Quick! Life is busy, and we understand the need for recipes that don’t demand hours in the kitchen. This crispy chicken wrap comes together surprisingly quickly, with straightforward steps that are easy to follow for even novice cooks. From prep to plate, you’ll be amazed at how fast you can whip up this family-favorite.
- A Guaranteed Family Favorite: Loved by All Ages! Say goodbye to mealtime battles! This wrap is universally appealing, making it a hit with both kids and adults. Its familiar flavors and satisfying textures ensure it will become a regular request for both lunch and dinner. It’s the perfect solution for those hectic weeknights or lazy weekend lunches.
- Unleash Your Creativity: Endless Flavor Customization! The beauty of this recipe lies in its adaptability. While delicious on its own, it serves as a fantastic canvas for various flavor profiles. Elevate your wraps with different sauce combinations like a zesty Spicy Honey Mustard, a rich Creamy Pesto Dressing, or a bold Chili Onion Crunch. The possibilities are truly endless, allowing you to tailor each wrap to your personal preference.
- Meal Prep Friendly: Plan Ahead for Deliciousness! Looking for a recipe that works with your busy schedule? This crispy chicken wrap is excellent for meal prepping. Prepare the components in advance, and simply assemble when you’re ready to eat, ensuring fresh, flavorful meals throughout the week.
Essential Ingredients for Your Crispy Chicken Wraps
Crafting the perfect crispy chicken wrap starts with a selection of fresh, high-quality ingredients. Each component plays a crucial role in achieving that coveted texture and flavor. Here’s what you’ll need:
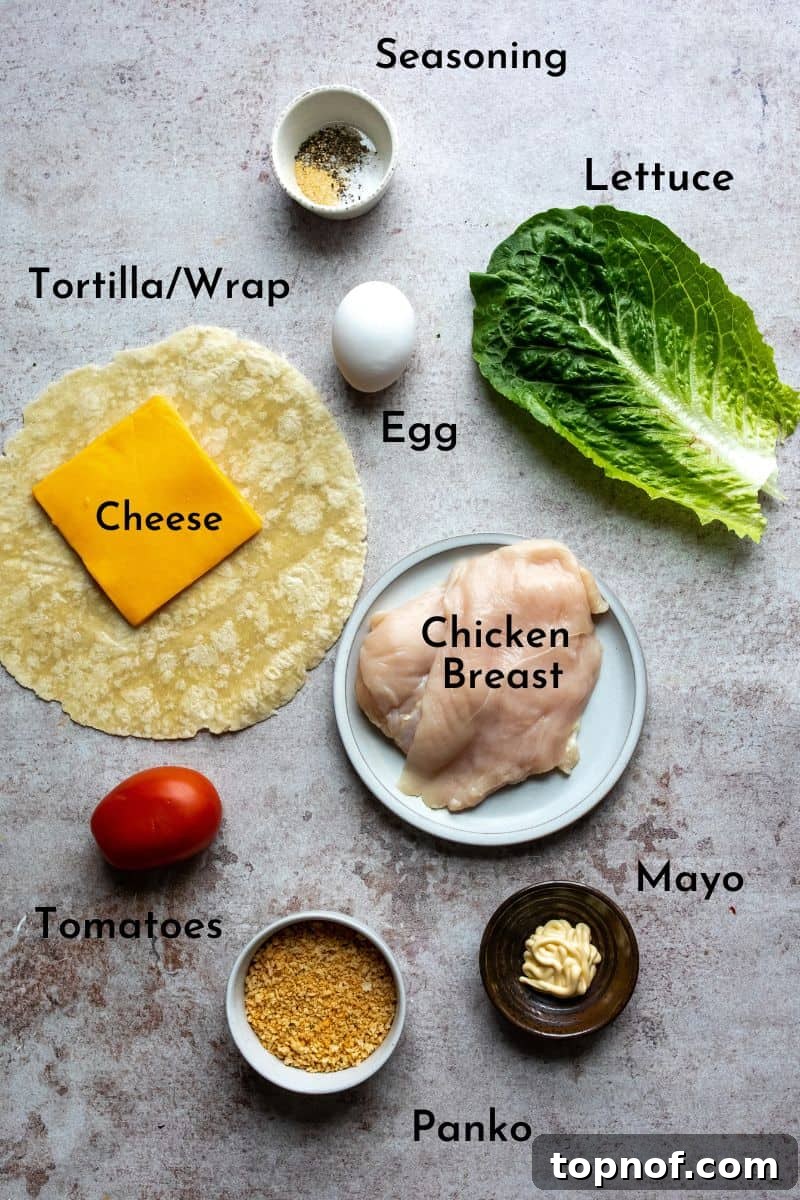
- Wraps (Tortillas): The foundation of our delicious wrap! I highly recommend using burrito-sized tortillas for ample filling and easy folding. The market offers a fantastic variety, from classic plain flour tortillas to healthier whole grain options, vibrant spinach wraps, or even low-carb/keto alternatives. While any choice will work, selecting a sturdy yet pliable wrap is key to holding all your delicious fillings without tearing.
- Chicken Breasts: Boneless, skinless chicken breasts are your best bet for this recipe. Aim for about 1 to 1.5 pounds, depending on how many servings you need. For the best flavor and texture, choose high-quality chicken breasts. Pounding them to an even thickness ensures they cook uniformly and remain incredibly juicy.
- Egg: Essential for our “egg wash,” which acts as the perfect adhesive for the breadcrumbs, ensuring an even, crispy coating that sticks beautifully during baking.
- Mayonnaise: Don’t skip this secret ingredient! A tablespoon of mayonnaise in the egg wash adds a subtle richness and, surprisingly, contributes to a more tender chicken while enhancing the crispiness of the panko coating. I prefer Dukes Mayo for its creamy texture and tangy flavor, but your favorite brand will work wonders.
- Seasoning: A simple yet powerful blend of salt, freshly ground black pepper, and garlic powder creates a foundational flavor profile that complements the chicken and breading perfectly. Feel free to adjust quantities to your taste or add a pinch of paprika for extra color and depth.
- Panko Breadcrumbs: The superstar for achieving maximum crispness! Panko breadcrumbs are coarser and flakier than regular breadcrumbs, resulting in an incredibly light, airy, and extra-crunchy crust that truly elevates this wrap.
Flavorful Toppings and Optional Add-ins
Once your crispy chicken is ready, it’s time to load up your wraps with fresh, vibrant toppings!
- Lettuce: While optional, a generous handful of shredded lettuce (such as romaine or iceberg) adds a refreshing crunch, a vibrant pop of color, and essential roughage to balance the richness of the chicken.
- Cheese: Customize to your heart’s content! Shredded or sliced cheese both work wonderfully. Sharp cheddar provides a bold, savory kick, but Monterey Jack, pepper jack, or a mild provolone would also be delicious choices. Skip it for a dairy-free option.
- Tomato: Sliced or diced ripe tomatoes offer a burst of fresh, juicy sweetness and acidity that beautifully contrasts the savory chicken.
- Additional/Optional Add-ins: Get creative with these flavor enhancers!
- Red Onion: Thinly sliced for a sharp, zesty bite.
- Cilantro: Freshly chopped for an aromatic, herbaceous note.
- Avocado: Sliced or mashed for creamy richness and healthy fats.
- Spicy Kicks: A drizzle of buffalo sauce, sriracha, or a sprinkle of chili flakes for heat lovers.
- Tangy Twists: Classic yellow mustard, Dijon mustard, or a splash of pickle juice for a tangy kick.
- Pickles: Sliced dill pickles add a delightful briny crunch.
- Jalapeños: Fresh or pickled for an extra layer of spice.
- Crispy Onions/Jalapeños: For even more texture.
Creative Recipe Variations to Explore
This crispy chicken wrap recipe is wonderfully adaptable, allowing you to easily adjust it to suit different dietary needs, preferences, or what you have on hand:
Meat Alternatives: For a quicker meal or a different texture, you can certainly skip the crispy coating. Instead, use pre-cooked baked chicken, rotisserie chicken, or even grilled chicken for this recipe. Simply shred or dice the cooked chicken and proceed with assembling the wraps.
Wrap Options: While large burrito-sized tortillas are ideal for holding all the fillings, feel free to experiment with other types. Spinach, whole grain, or even low-carb and keto-friendly wraps are excellent choices. You can also use smaller street taco-sized tortillas for mini wraps, perfect for appetizers or kids’ portions.
Vegetable Boosts: Enhance the nutritional value and flavor with various vegetables. Swap lettuce for fresh spinach or a spring mix. Add creamy avocado slices, thinly sliced red onion, or bell peppers for extra crunch and sweetness. Consider adding roasted vegetables like zucchini or corn for a heartier filling. Pickles or pickled jalapeños can also introduce a wonderful tangy element.
Breadcrumb Substitutions: Panko breadcrumbs are highly recommended for their superior crispiness, but if you don’t have them, don’t fret! You can substitute with crushed saltine crackers (ensure they’re finely crushed for an even coating) or regular fine breadcrumbs. For a gluten-free option, use gluten-free panko or crushed gluten-free crackers.
Make It Healthier:
- Mayo: While mayo adds flavor and moisture to the chicken, you can omit it from the egg wash to cut calories and fat. The chicken will still be crispy, though the texture might be slightly different.
- Cheese: Skipping the cheese is an easy way to reduce 50-100 calories per wrap and makes the recipe dairy-free.
- Wrap Choice: Opt for whole wheat or low-carb tortillas.
- Extra Veggies: Load up on even more fresh vegetables to boost fiber and nutrients.
Step-by-Step Guide: How to Craft Your Crispy Chicken Wraps
Preparing these incredibly flavorful and crispy chicken wraps is a straightforward process. Follow these steps to achieve a perfectly cooked, juicy chicken that tastes deliciously fried without all the extra calories and oil!
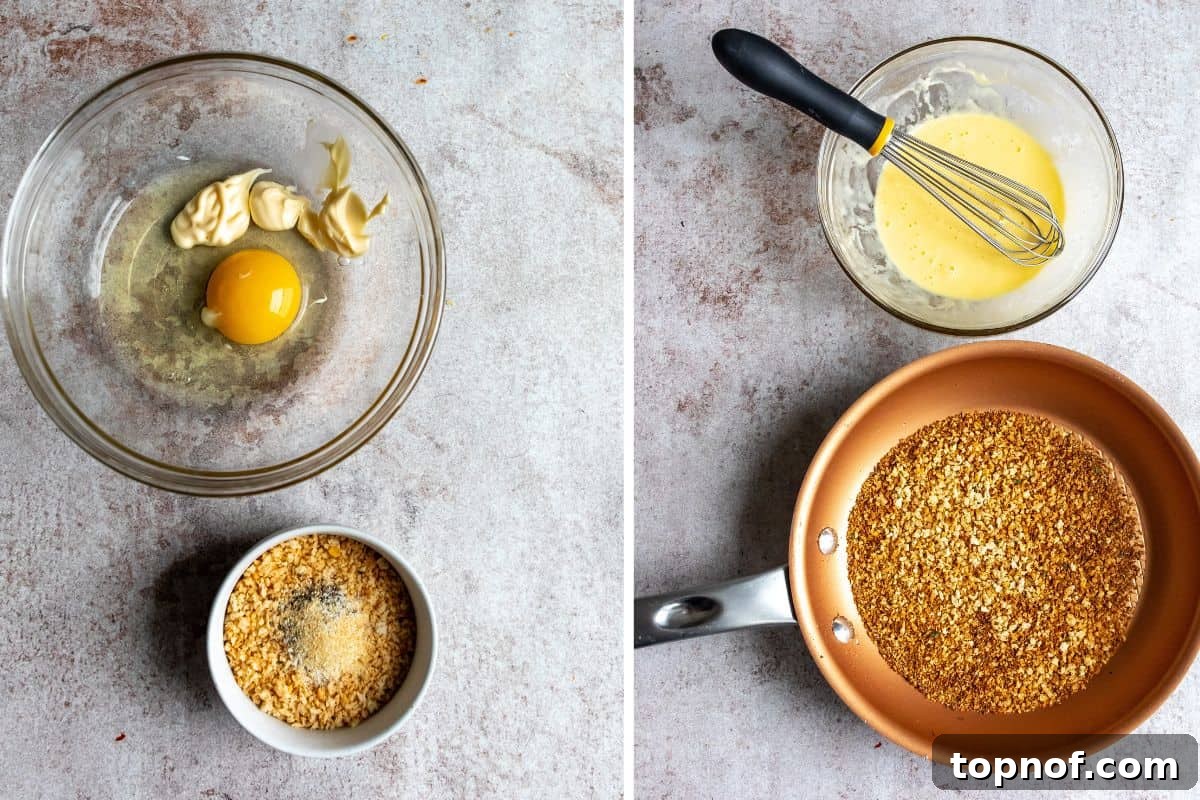
Step One: Prepare Your Oven and Coating Mixture
Preheat your oven to 425°F (220°C). This high temperature is key to achieving that beautiful golden crisp. While the oven heats, prepare your “wet” coating for the chicken. In a medium bowl, combine one egg, one tablespoon of mayonnaise, ¼ teaspoon of salt, ½ teaspoon of garlic powder, and ¼ teaspoon of ground pepper. Whisk these ingredients together until the mixture is smooth and well combined; then set it aside. For perfectly crispy chicken, grab a baking sheet and place a wire rack (cooling rack) on top. This setup allows air to circulate around the chicken, ensuring both sides cook evenly and get wonderfully crisp. *Pro Tip: If you prefer, you can air fry the chicken at 375°F (190°C) for 15-18 minutes instead of baking.*
Step Two: Toast the Panko Breadcrumbs for Extra Crunch
In a dry skillet, add 1½ cups of panko breadcrumbs along with any additional seasonings you might want to add for the breading (e.g., a pinch of paprika, onion powder). Toast the panko over medium-low heat, stirring frequently, until it deepens slightly in color and becomes fragrant, usually about 4-5 minutes. This step is crucial for enhancing the panko’s flavor and ensuring an even crispier texture. Once toasted, remove the skillet from the heat and set it aside to cool slightly.
Step Three: Tenderize and Prepare the Chicken
Take your 1-1.5 pounds of boneless, skinless chicken breasts. For best results, slice each chicken breast horizontally to create two thinner cutlets, or if they are already thin, pound them. Place one chicken breast at a time inside a gallon-sized zip-top bag. Using the flat side of a meat mallet or a rolling pin, pound the chicken to an even ¼-inch thickness. This not only tenderizes the chicken, breaking down tough fibers for a juicier result, but also ensures quick and even cooking. Repeat with the remaining chicken breasts.
Step Four: Coat and Bake Your Crispy Chicken
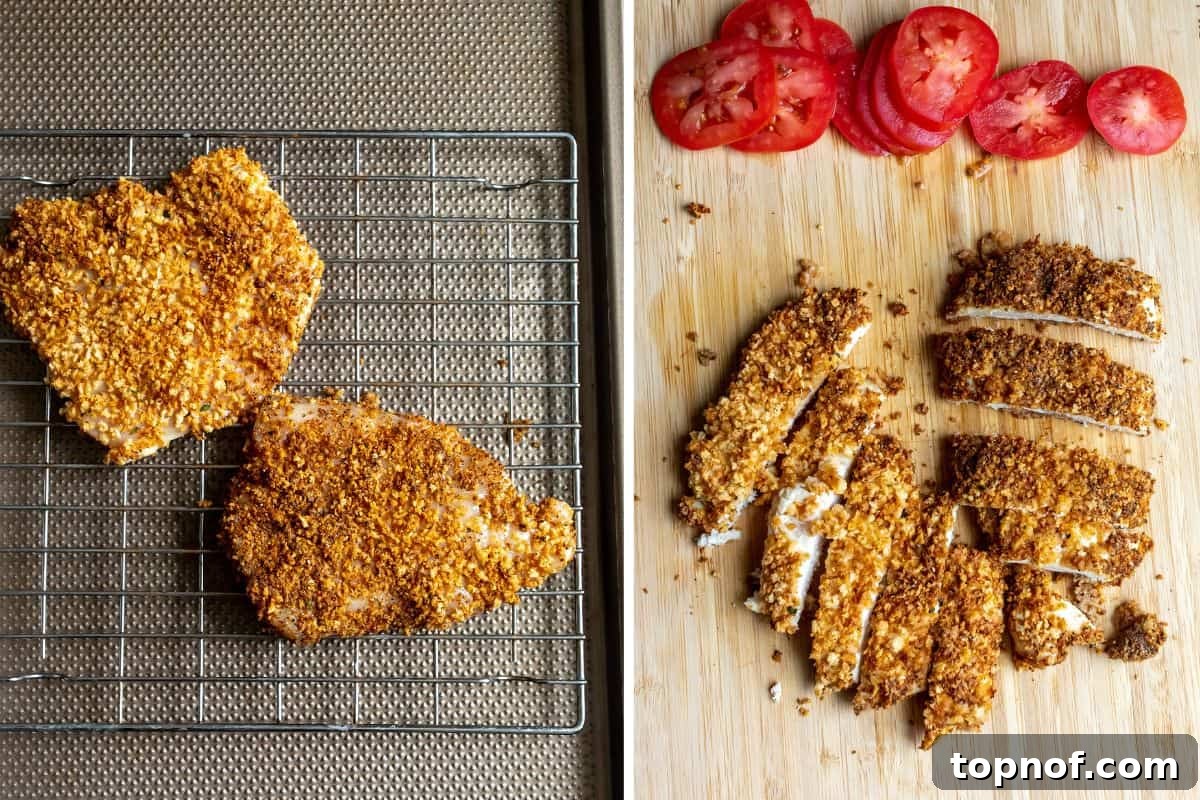
Now it’s time to coat your chicken! First, dredge each flattened chicken breast thoroughly in the egg and mayonnaise mixture, ensuring both sides are well coated. Allow any excess liquid to drip off. Next, transfer the chicken to the skillet containing your toasted panko breadcrumbs (this saves on dishes!). Generously coat both sides of the chicken with the panko, pressing gently to ensure the crumbs adhere well. Place the coated chicken breasts on the wire rack you prepared on the baking sheet. Bake in the preheated oven for 17-20 minutes, or until the internal temperature reaches 165°F (74°C). The chicken should be beautifully golden brown and crispy.
Step Five: Prepare Your Fillings
Once the chicken is cooked, remove it from the oven and let it rest for a few minutes. This allows the juices to redistribute, ensuring maximum tenderness. While the chicken rests, thinly slice your lettuce, chop your tomatoes, and gather your chosen cheese and favorite sauce. Have everything ready for a seamless assembly process.
Mastering the Art of Assembling Your Wraps
Assembling a perfectly packed wrap ensures every bite is balanced and delicious. Here’s how to do it:
Step Six: Fill and Fold Your Wraps
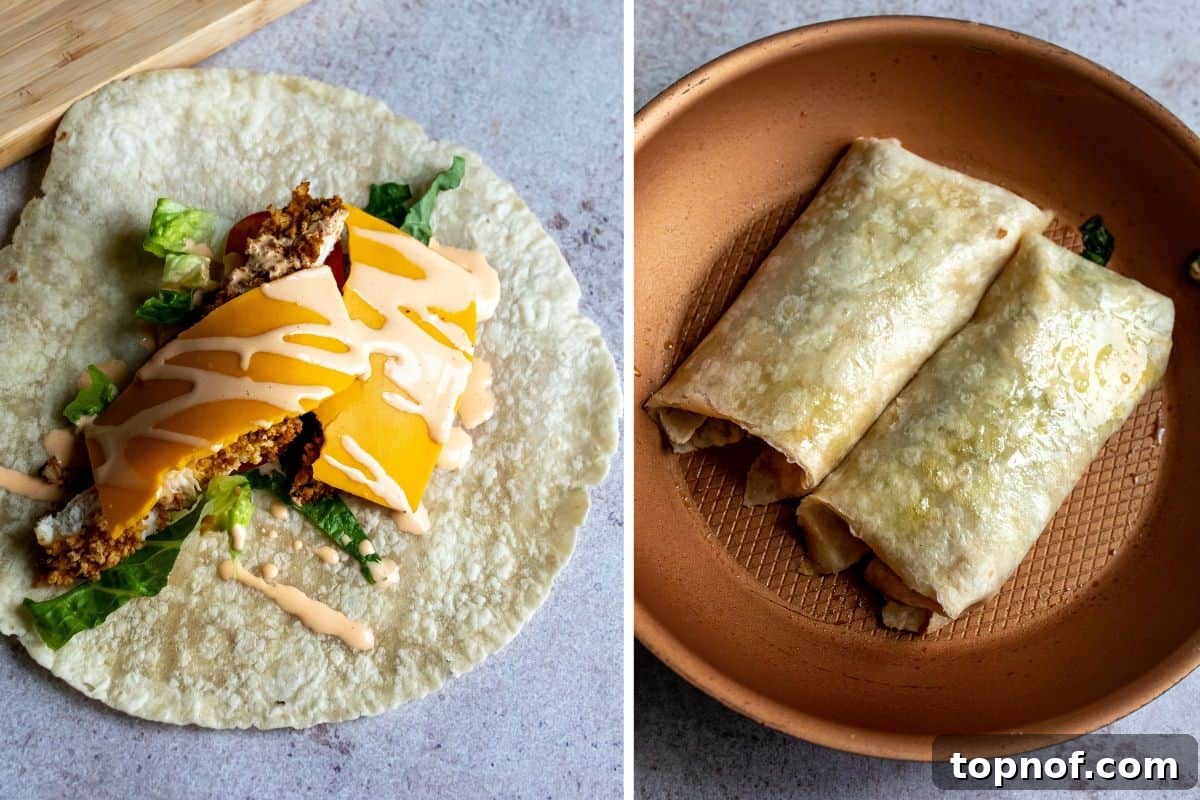
Take a tortilla and lay it flat. Slice the rested crispy chicken into strips or dice it into bite-sized pieces. Arrange the chicken and all your desired toppings (lettuce, tomato, cheese, optional add-ins) neatly in the center of the wrap, making sure not to overfill. Drizzle your sauce of choice generously over the ingredients. To fold like a burrito, tuck in both the left and right sides of the tortilla over the filling, then starting from the bottom, tightly roll the wrap upwards horizontally. Alternatively, you can fold the bottom edge up first, then fold in the sides, and finally roll it up. The goal is a compact, secure wrap.
Step Seven: Optional – Toast Your Wraps for an Extra Crunch
For an extra layer of crispiness and to help seal the wrap, lightly oil a skillet and heat it over medium-high heat. Place the assembled wrap seam-side down in the hot skillet. Cook undisturbed for about 3-4 minutes per side, or until the tortilla is golden brown and crispy, and the cheese (if used) is slightly melted. This step adds a wonderful textural contrast and warms the fillings beautifully. Once toasted, remove the wrap from the heat and let it cool for just a minute before slicing and enjoying. This simple step truly elevates the wrap experience!
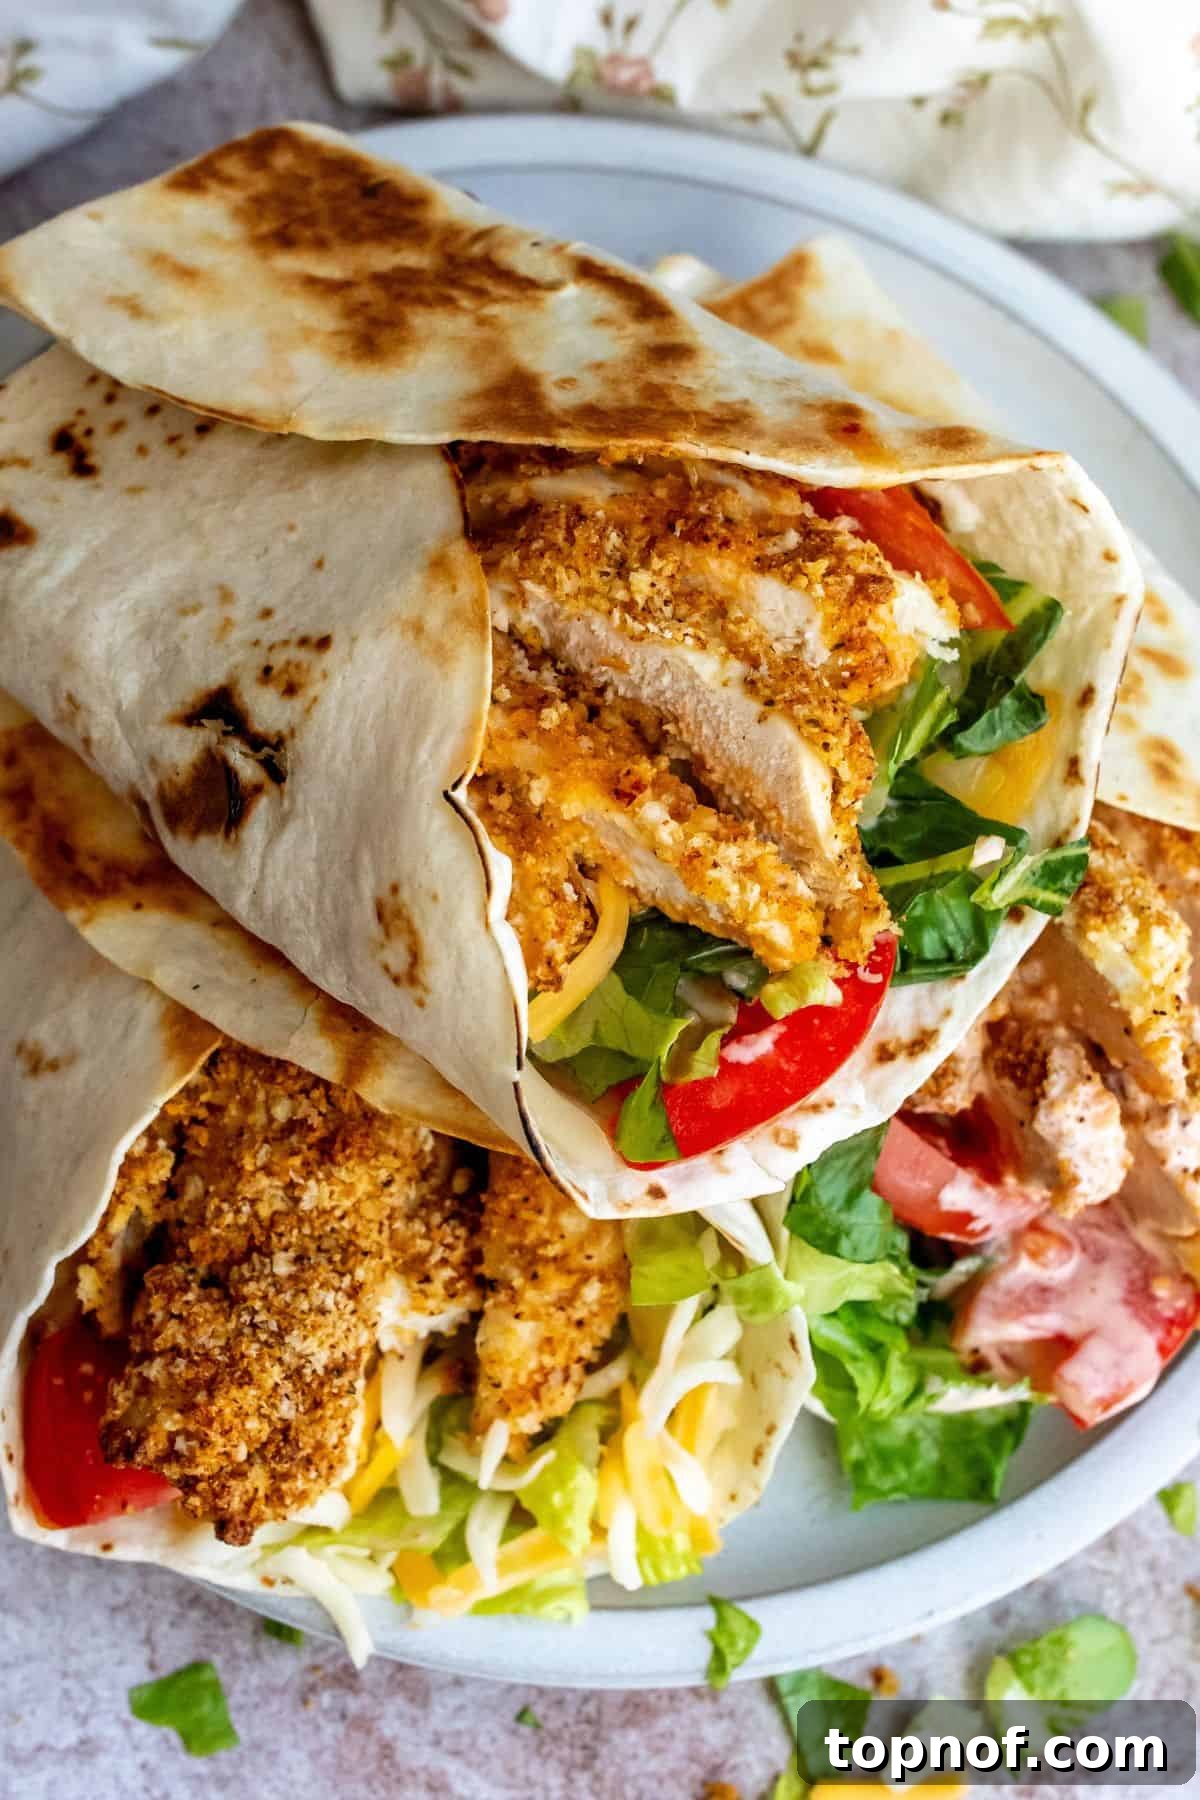
Expert Tips for the Perfect Crispy Chicken Wrap
- Don’t Overcook the Chicken: Overcooked chicken can become dry and tough. Always use a meat thermometer to ensure the internal temperature of the chicken reaches 165°F (74°C). This guarantees juicy, tender results every time.
- Tenderize Your Chicken: Pounding the chicken breasts to an even ¼-inch thickness is a game-changer. This process breaks down muscle fibers, resulting in incredibly tender and juicy chicken, and also ensures uniform cooking.
- Wire Rack is Your Secret Weapon: Baking the chicken on a wire rack placed over a baking sheet is essential for maximum crispness. It allows hot air to circulate all around the chicken, preventing a soggy bottom and promoting an even golden-brown crust.
- Toast Your Panko: Don’t skip the step of toasting your panko breadcrumbs in a dry skillet before coating the chicken. This simple technique amplifies their nutty flavor and makes them even crispier when baked.
- Flavorful Sauces are Key: Elevate your wraps with a delicious sauce. I highly recommend trying my Spicy Honey Mustard for a sweet and tangy kick, or my refreshing Lemon Herb Tahini Dressing for a bright, Mediterranean-inspired flavor. Other fantastic options include BBQ sauce, ranch, hot sauce, Italian dressing, or a simple sriracha mayo.
- Don’t Overfill Your Wraps: While it’s tempting to pack in as many delicious fillings as possible, overfilling can make your wraps difficult to fold and eat. Aim for a balanced amount that allows for a neat, secure roll.
- Optional Skillet Toasting: For an extra layer of texture and a beautifully sealed wrap, lightly toast the assembled wrap in a skillet for a few minutes per side. This adds a warm, crispy exterior that is utterly delightful.
Common Questions About Crispy Chicken Wraps
Absolutely! These wraps are fantastic for meal prepping. You can cook the crispy chicken ahead of time, chop your vegetables, and prepare your sauce. Store each component separately in airtight containers in the fridge. On the day of enjoying, simply reheat the chicken if desired, and assemble your wrap with fresh lettuce and dressing. This ensures everything stays fresh and crispy until you’re ready to eat.
Yes, it’s very easy to make these wraps dairy-free. Simply omit the cheese, or opt for a high-quality dairy-free shredded cheese alternative. All other main ingredients are typically dairy-free.
The main secret to achieving incredibly crispy baked chicken lies in two key techniques: using panko breadcrumbs and baking the chicken on a wire rack. Panko’s flaky texture creates a superior crunch, and the wire rack allows hot air to circulate evenly around the chicken, ensuring both sides crisp up beautifully without becoming soggy.
While chicken breasts are recommended for their lean texture and ease of pounding, you can certainly use boneless, skinless chicken thighs. They might require a slightly longer cooking time and may not pound as flat, but they will still be delicious and juicy.
Cooked crispy chicken can be stored in an airtight container in the refrigerator for up to 3-4 days. It’s best to store assembled wraps for no more than 1-2 days, as the fresh vegetables and sauce can make the tortilla soggy over time. For best results, store ingredients separately and assemble fresh when ready to eat.
Delicious Pairings for Your Chicken Wraps
These versatile crispy chicken wraps pair wonderfully with a variety of side dishes, making for a complete and satisfying meal:
Carbohydrate Sides:
- Crispy Homemade Fries: Nothing beats the classic combination of a wrap and a side of perfectly seasoned, crispy homemade fries.
- Potato Chips: A simple, crunchy, and always satisfying choice.
- Sweet Potato Fries: For a slightly healthier and sweeter alternative.
- Quinoa Salad: A light and nutritious grain salad can be a great complement.
Veggies & Salad Companions:
- Roasted Vegetables: A medley of roasted veggies like broccoli, bell peppers, or asparagus would add fantastic flavor and nutrients. Consider serving them with Honey Roasted Carrots and Parsnips for a touch of sweetness.
- Air Fryer Zucchini Fries: A lighter, guilt-free alternative to traditional fries, these Air Fryer Zucchini Fries offer a delightful crunch.
- Fresh Garden Salad: A simple side salad with a light vinaigrette is always a refreshing choice.
- Crunchy Salads: Pair your wrap with a vibrant and satisfying salad like my Healthy Vegan Kale Caesar, a refreshing Greek Cucumber Salad, or a crisp Simple Mixed Greens Salad. All these options provide a fantastic balance of flavors and textures.
More Irresistible Chicken Recipes to Try
Discover More Chicken Favorites
Dinner
Hearty Green Chili Chicken Enchiladas
Dinner
Dairy-Free, Healthier Chicken Pot Pie
Dinner
Healthier Enchilada Casserole
Lunch
Simple & Delicious Naked Chicken Tenders
If you’ve enjoyed making (and devouring!) this crispy chicken wrap recipe, please let me know your thoughts in the comments below! Your feedback means the world. For even more delicious, feel-good recipes and culinary inspiration, be sure to follow me on Instagram and Pinterest. Thank you for visiting and happy cooking!
⭐
⭐
⭐
⭐
Crispy Chicken Wrap
Pin Recipe
Rate Recipe
Print Recipe
Equipment
-
Baking Sheet
-
Metal Wire Rack
-
Mixing Bowls
-
Meat Mallet or Rolling Pin
Ingredients
- 1 lb boneless, skinless chicken breast
- 1 large egg
- 1 tbsp mayonnaise, *see notes
- 1½ cup panko breadcrumbs, *see notes for alternatives
- ¼ tsp salt
- ½ tsp garlic powder
- ¼ tsp ground black pepper
- ½ cup chopped lettuce (romaine or iceberg)
- 1 medium tomato, chopped or sliced
- ¼ cup shredded cheese (sharp cheddar recommended, optional)
- 4 tbsp sauce of choice, *see notes for suggestions
- 4 burrito-sized tortillas/wraps
Instructions
-
Set oven to 425ºF (220°C). Prepare the crispy chicken coating mixture: Place the egg, mayo, salt, garlic powder, and pepper in a medium bowl and whisk until smooth; set aside. Get a baking sheet out and place a wire rack/cooling rack on it. This is the trick to getting the chicken perfectly crispy and cooked evenly. If air frying, preheat air fryer to 375°F (190°C).
-
Mix panko and any additional seasoning (optional) together. Add it to a dry skillet and toast on medium/low heat, stirring often. Only toast until the panko browns a bit in color and becomes fragrant, about 4-5 minutes. Take it off the heat and set aside.
-
Working with one chicken breast at a time, slice them horizontally if they are very thick to create thinner cutlets. Place the chicken inside a gallon zip-top bag and pound with the flat side of a meat mallet or rolling pin to an even 1/4-inch thickness. Set the tenderized chicken breasts aside and repeat with remaining breasts.
-
Dredge each chicken breast in the egg/mayo wash, ensuring it’s fully coated. Then, transfer the chicken to the skillet with the toasted panko crumbs and coat both sides thoroughly, pressing gently to adhere the crumbs.
For The Oven: Place the coated breasts on the wire rack that’s on the baking sheet (see photo). Bake in the oven for 17-20 minutes or until internal temperature is 165ºF (74°C) and chicken is golden and crispy.
-
If air frying: Cook on 375ºF (190°C) for 15-18 minutes, flipping halfway through, or until internal temp is 165ºF (74°C).
-
Once chicken is cooked, let it rest for a few minutes before slicing into strips or bite-sized pieces. While it rests, slice up your lettuce, tomato, and get your sauce of choice and cheese ready.
-
Assemble the wrap: Lay a tortilla flat. Place the sliced crispy chicken, lettuce, tomato, and cheese (if using) into the center of the wrap, trying not to overfill. Drizzle your desired sauce over the ingredients. Fold the wrap up like you would a burrito: tuck in both ends, then roll tightly from the bottom upwards. Or fold the bottom in, then the sides, and roll.
-
Optional step for extra crispiness: Add the assembled wrap to a lightly oiled skillet pan on medium-high heat. Place the wrap with the folded side down first to seal it. Let it cook untouched for about 3-4 minutes per side, until browned and crispy. Remove from heat and let it cool for a minute. Then, eat and enjoy your perfectly crispy chicken wrap!
Notes
*If panko breadcrumbs are unavailable, crushed saltine crackers or regular breadcrumbs will also work well in place of panko. Ensure crackers are finely crushed.
- Don’t overcook the chicken. Be sure to use a meat thermometer to check that the internal temp is at 165ºF (74°C) for food safety and optimal juiciness.
- Be sure to use a mallet or rolling pin to tenderize the chicken. This breaks down the fibers in the chicken breasts, giving it a super juicy texture and ensuring even cooking.
- Dress these wraps with your favorite sauce. Highly recommended are Spicy Honey Mustardor Lemon Herb Tahini Dressing. Other excellent dressings to consider include BBQ sauce, Italian Dressing, Ranch, hot sauce, sriracha mayo, or a simple honey mustard.
Store leftover cooked crispy chicken in an airtight container in the fridge for up to 4 days. Assemble wraps fresh for best results.
Nutrition
Nutrition information is automatically calculated, so should only be used as an approximation.
Additional Info