
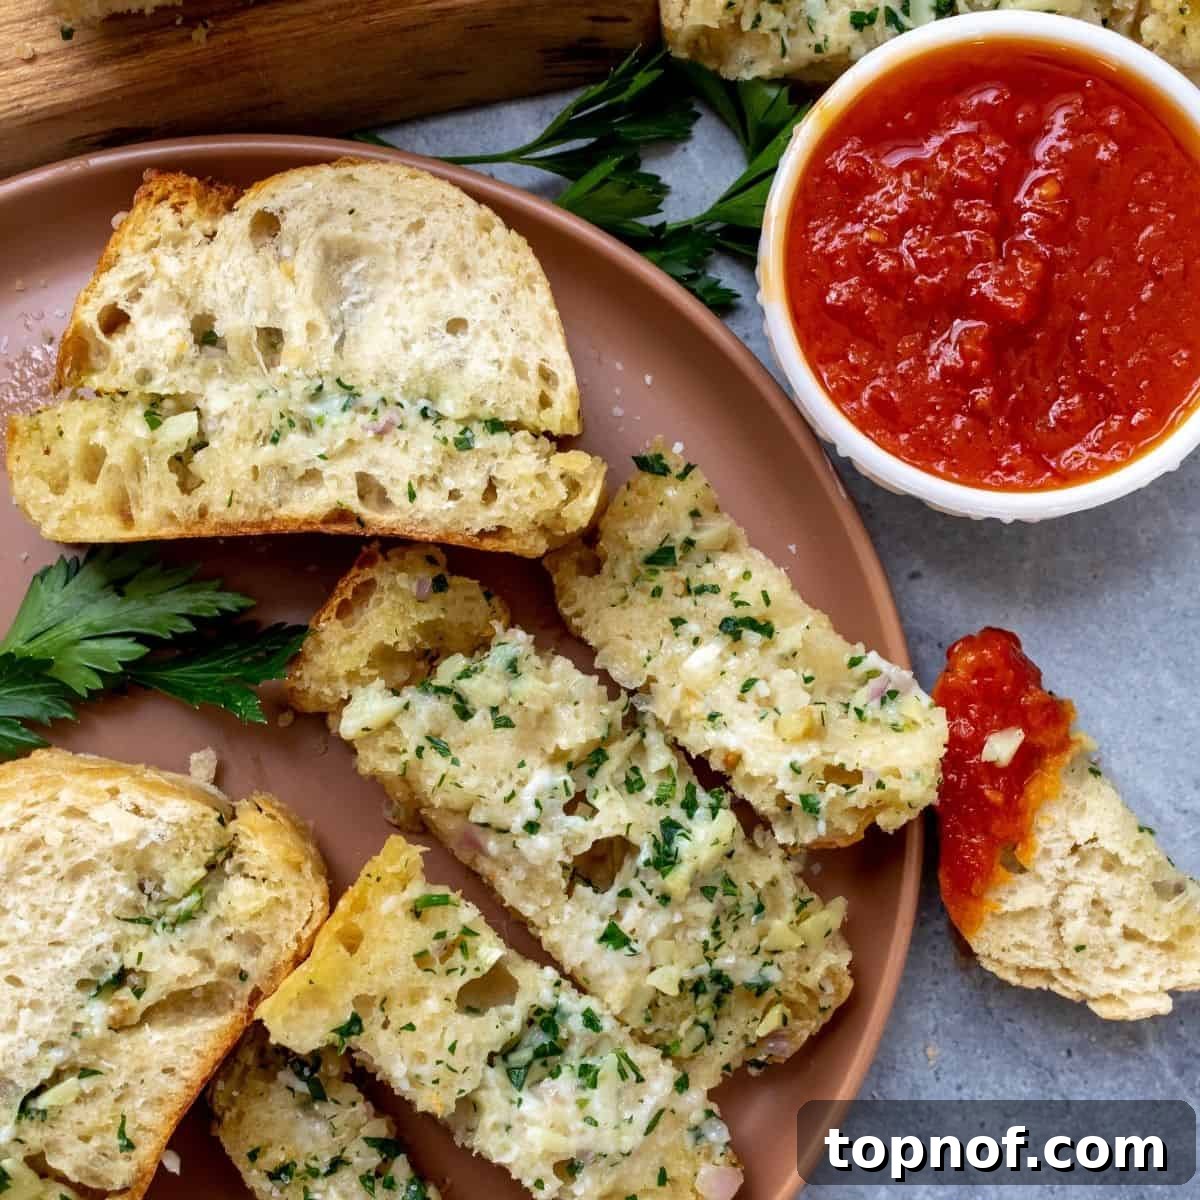
Craving that perfect golden-brown crust, soft interior, and an irresistible aroma of garlic? Look no further! This crispy, no-fuss air fryer garlic bread is the ideal culinary companion for any meal. It’s fantastic for soaking up every last drop of your favorite sauce or dipping into warm, rich marinara. Your entire family will absolutely adore this recipe, and it’s incredibly simple to adapt for a delicious vegan option.
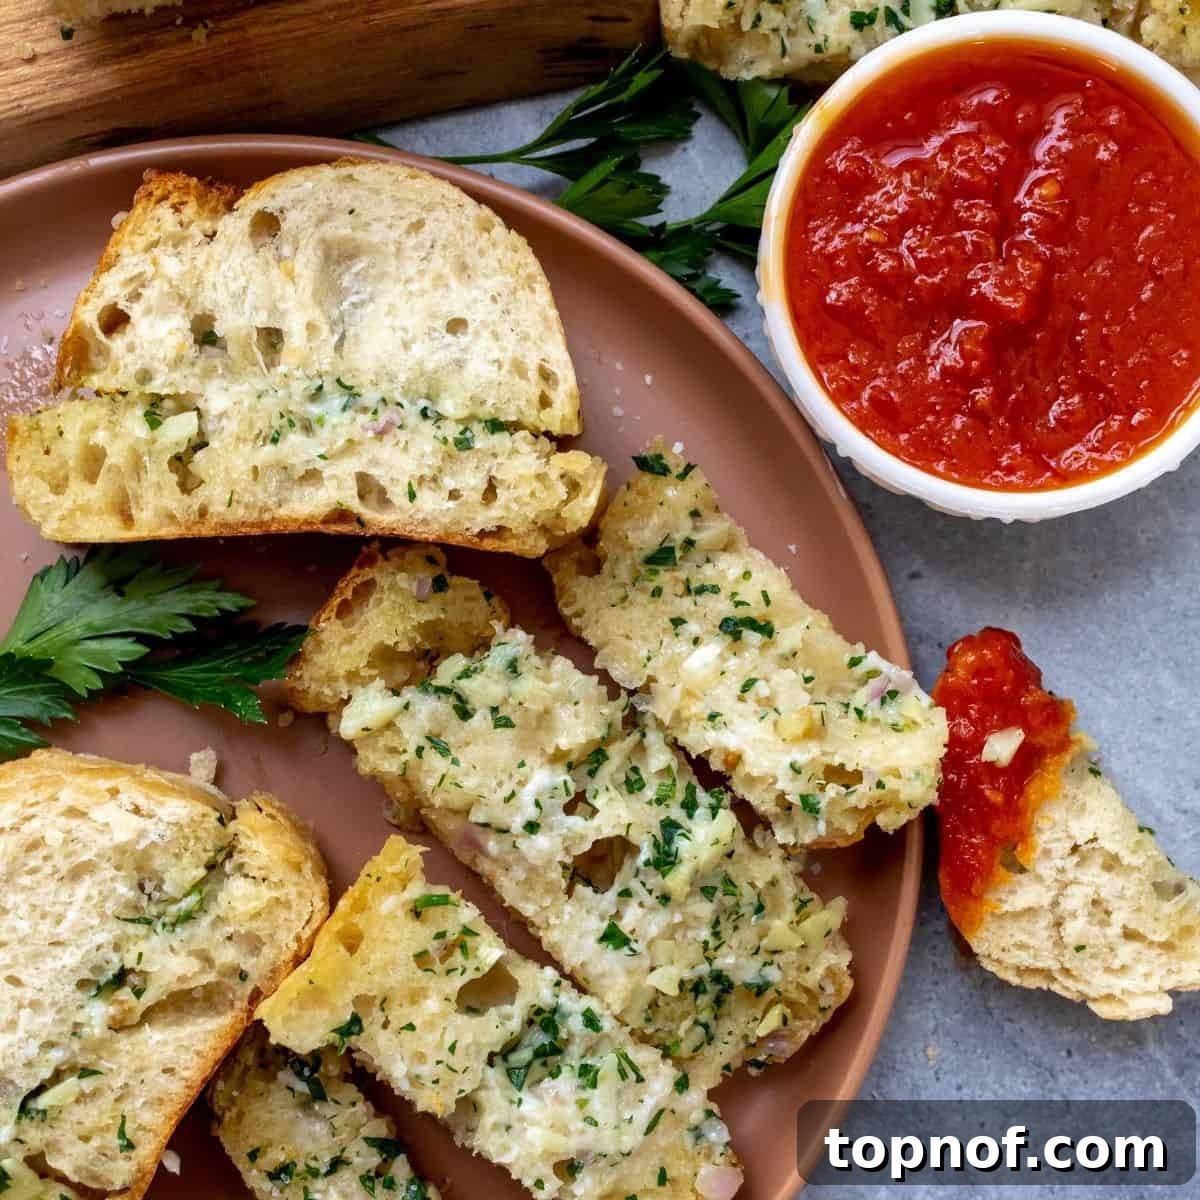
Do you remember those frozen garlic bread loaves from the grocery store? The ones loaded with excessive compound butter and often a long list of less-than-ideal ingredients? While they certainly hit the spot back then, often taking 30 minutes or more to warm up, we now have a superior alternative. This air fryer garlic bread delivers a remarkably similar flavor and texture – only better! We’re talking about fresher ingredients, significantly less wait time, and complete customization to suit your preferences and dietary needs.
Elevate your dinner experience by serving this incredible garlic bread alongside a hearty pasta dish like Blackened Chicken Fettuccine Alfredo, or let it shine as a standalone snack.
Why This Air Fryer Garlic Bread Will Be Your New Go-To Side
This recipe isn’t just about making garlic bread; it’s about making your life easier and your meals more delicious. Here’s why this air fryer version deserves a permanent spot in your recipe collection:
Effortless Preparation for Busy Weeknights
Forget the long preheat times and uneven baking of a traditional oven. This garlic bread is designed for maximum flavor with minimum fuss. It’s incredibly easy to whip up, making it a perfect last-minute addition to any dinner, or a quick snack when hunger strikes.
Dietary Friendly & Wholesome Ingredients
One of the best features of this recipe is its flexibility. It can be effortlessly made plant-based, which is my personal preference, ensuring that everyone at the table can enjoy it. Using fresh ingredients means you’re not only getting incredible flavor but also avoiding artificial additives often found in store-bought options. You control what goes into it, ensuring a wholesome and delicious treat.
Unbeatable Speed & Crispy Perfection
The air fryer is a game-changer for garlic bread. You can have perfectly golden, crispy garlic bread ready in your air fryer in under 20 minutes. This rapid cooking time ensures a delightfully crunchy exterior and a soft, pillowy interior every single time. While an oven option is also provided, the air fryer truly excels in delivering that desirable crispness with remarkable speed.
Versatile Serving Options
Beyond being a fantastic partner to pasta, this garlic bread is incredibly versatile. Pair it with virtually any meal – from hearty main courses to light lunches. It’s exceptional when dunked into steaming bowls of soups or chilis, or served alongside a warm bowl of marinara sauce for an instant appetizer. Its delicious flavor profile complements a wide array of dishes.
Essential Ingredients for Irresistible Air Fryer Garlic Bread
Crafting the perfect garlic bread starts with selecting quality ingredients. Here’s what you’ll need to create this incredibly flavorful and satisfying side dish:
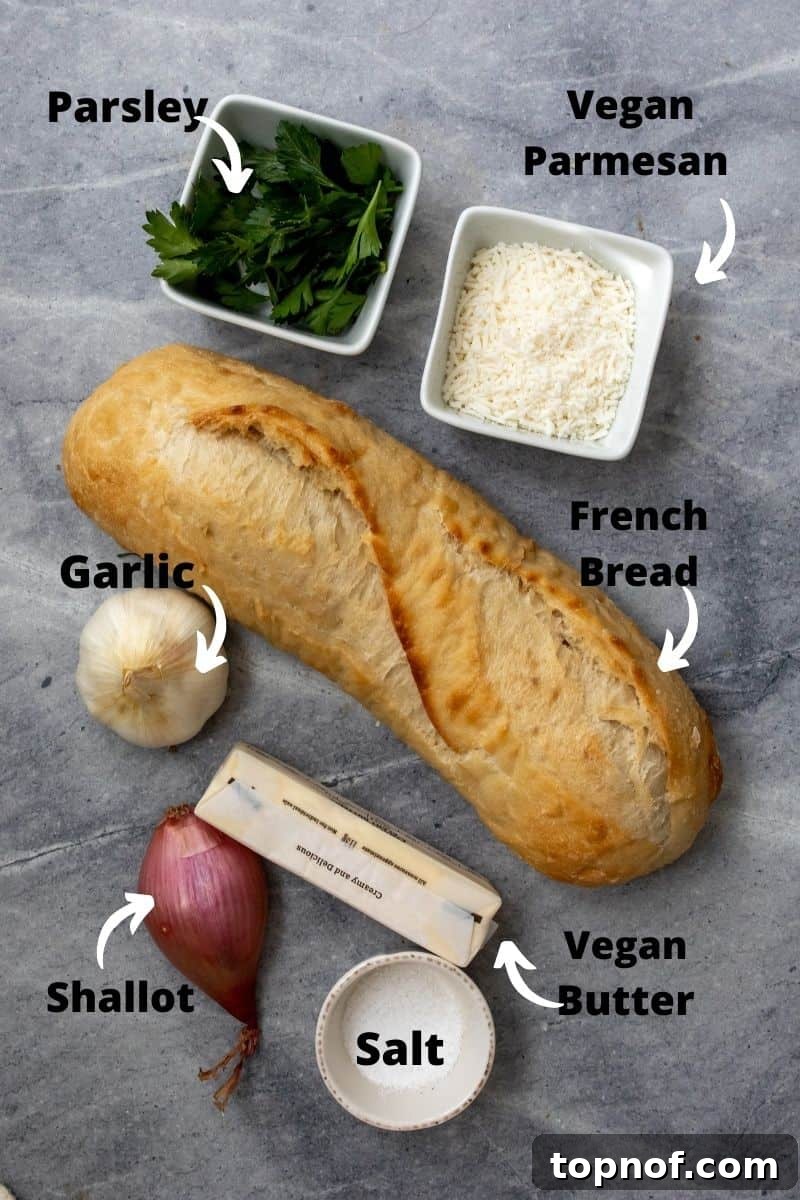
- French Bread Baguette: The foundation of our garlic bread. Opt for a fresh baguette from your local bakery for the best texture and flavor. The ideal size is typically around 12-14oz. If you prefer, sourdough or a gluten-free baguette can also be used as excellent alternatives.
- Plant-based Butter: For that rich, creamy base. Bringing it to room temperature is crucial for easy spreading. This brand is a fantastic choice, offering excellent flavor and texture. If you’re not following a plant-based diet, feel free to use your favorite dairy butter.
- Plant-Based Mozzarella Or Parmesan: An optional but highly recommended addition for cheesy goodness. These plant-based options melt beautifully and add a wonderful savory note. Violife is a brand I particularly enjoy. Dairy cheese works just as well if preferred.
- Fresh Garlic: The star of the show! Freshly minced garlic provides the most potent and aromatic flavor. For a milder, sweeter garlic taste, you can roast the garlic cloves before chopping – a fantastic way to mellow its sharpness.
- Fresh Parsley: Not just for garnish! Finely chopped fresh parsley adds a vibrant pop of color and a fresh, herbaceous note that balances the rich garlic and butter.
- Salt: A touch of coarse sea salt enhances all the flavors and provides a slight textural crunch.
- Marinara for dipping: Absolutely optional, but highly encouraged! A warm, rich marinara sauce is the ultimate dipping companion for garlic bread.
- Shallot (Optional but Recommended): Finely chopped shallots contribute a subtle, sweet oniony note that complements the garlic beautifully without overpowering it.
Step-by-Step Guide to Crafting Your Air Fryer Garlic Bread
Follow these simple steps to create perfectly crispy, garlicky bread that will disappear in minutes!
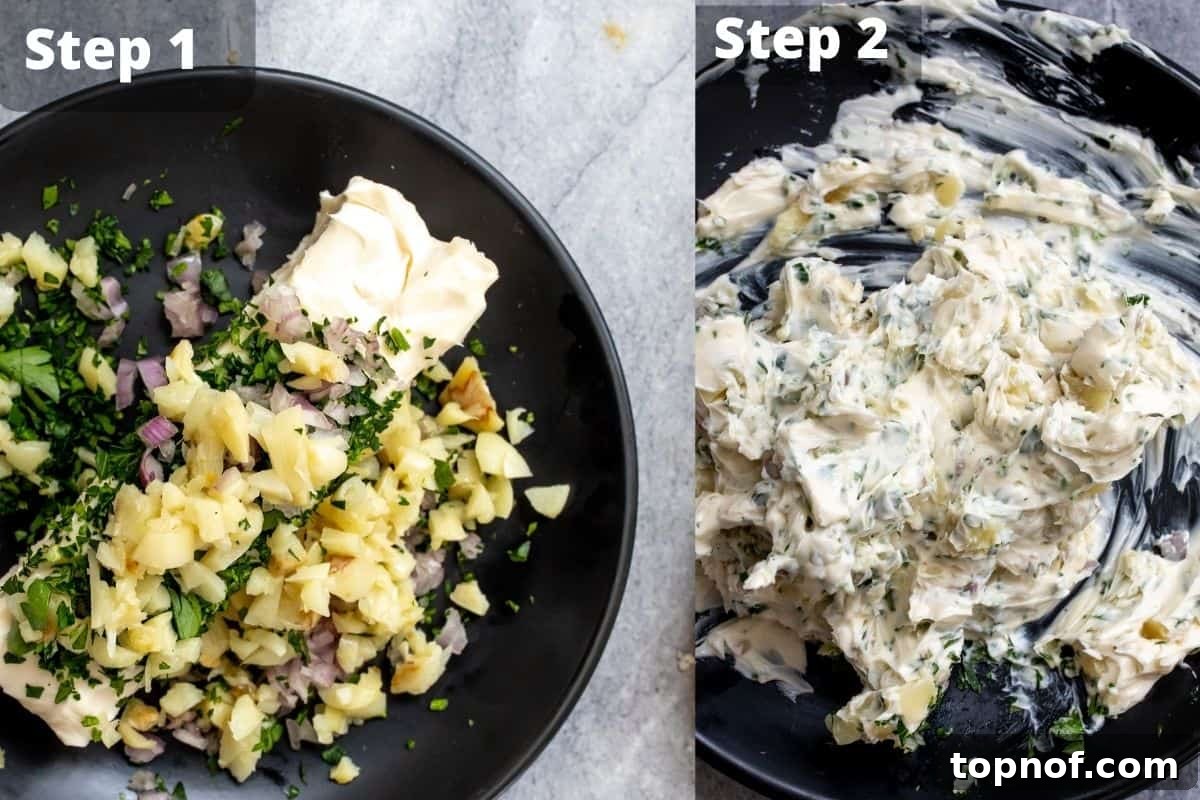
- Prepare Your Butter and Aromatics: Begin by placing your plant-based butter (or dairy butter) on a medium-sized plate or in a bowl and allow it to come to room temperature. This is crucial; you want it soft enough to easily mash with a fork, but not melted or microwaved, as this can affect the texture of your compound butter. While the butter softens, finely chop your shallot, parsley, and garlic into very small, spreadable pieces. The finer the chop, the better the flavors will meld and distribute. If you prefer a milder garlic flavor, consider roasting the garlic cloves first before chopping. You can find detailed instructions for roasting garlic in the “Notes” section of the recipe card below.
- Create the Garlic Herb Compound Butter: Once the butter is soft, pile all your finely chopped ingredients (shallot, parsley, garlic) onto it. Sprinkle generously with coarse sea salt. Using a fork, thoroughly mix all the ingredients together until they are well combined and the butter is soft and easily spreadable. Next, take your French bread baguette and, using a serrated bread knife, carefully slice it open lengthwise, creating two halves but keeping them slightly attached at the base if possible. This makes it easier to handle and ensures the bread stays together during cooking.
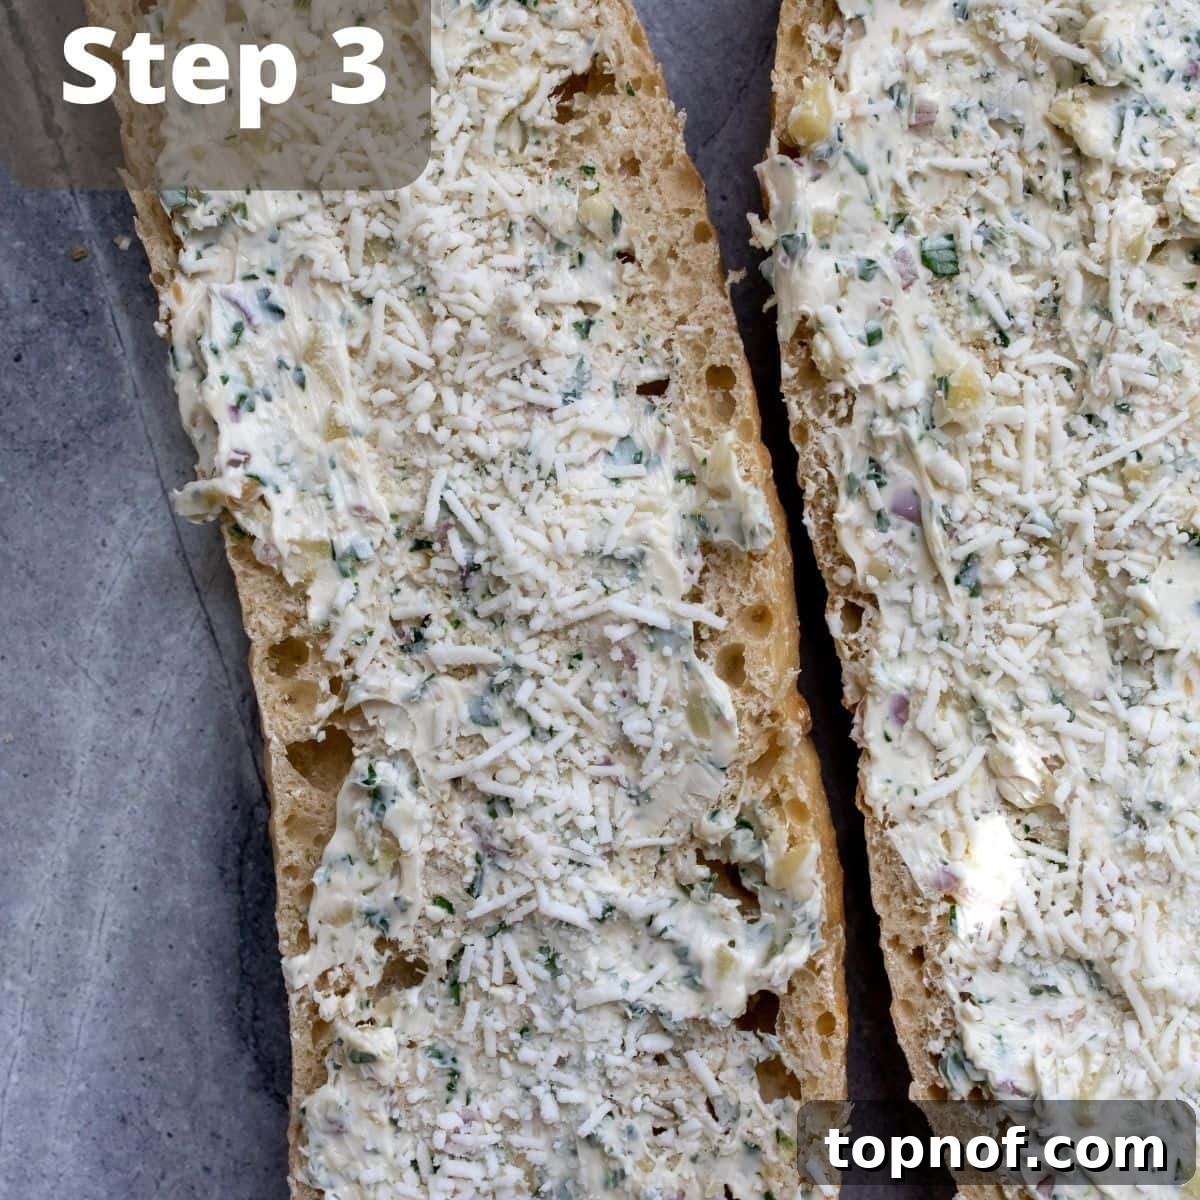
- Spread and Assemble: With your compound butter ready and your baguette sliced, evenly spread the butter mixture over the entire cut surface of both bread halves. Don’t be shy; you should have just the right amount for a generous coating. This ensures maximum flavor in every bite. After spreading the butter, sprinkle your optional plant-based mozzarella or parmesan cheese evenly over the buttered bread. Now, gently close the bread back together, mimicking its original shape. Wrap the entire loaf snugly in tin foil, but remember to leave a small opening at the very top of the tin foil wrap. This small vent allows steam to escape, preventing the bread from becoming soggy and promoting a crispier crust.
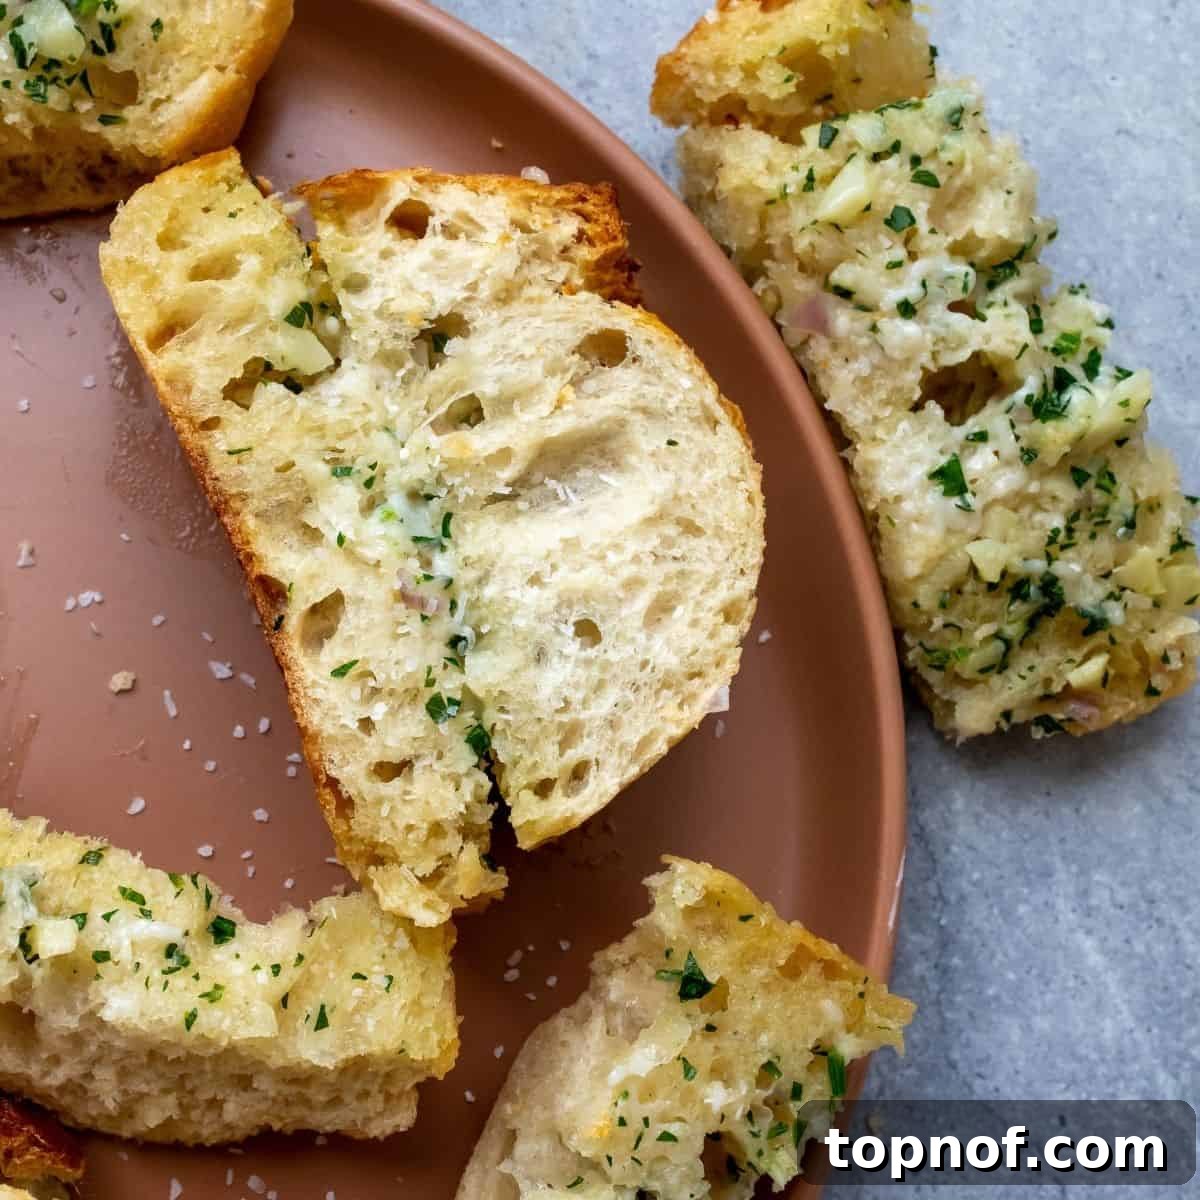
- Air Fry to Golden Perfection: Place your foil-wrapped garlic bread into the air fryer basket or oven. Set your air fryer to 350ºF (175ºC) and air fry for approximately 10 minutes. The exact time may vary slightly depending on your air fryer model, so keep an eye on it. You’re looking for a beautiful golden-brown color on the top and a deliciously crispy texture. Once it reaches this perfect state, carefully remove it from the air fryer. Allow the garlic bread to cool for just 2 minutes before slicing it into individual portions. Serve immediately and enjoy with any meal, alongside soups, chilis, or simply on its own, dunked in a bowl of warm marinara sauce.
Expert Tips & Frequently Asked Questions (FAQs)
Mastering air fryer garlic bread is simple, but a few tips and common questions can help you achieve perfection every time. Here’s everything you need to know:
Achieving the Crispiest Crust
- Don’t Overcrowd: Ensure there’s enough space in your air fryer basket for air to circulate properly. If making multiple loaves, cook them in batches.
- Vent the Foil: As mentioned in the instructions, leaving a small opening in the tin foil wrap is key. This allows steam to escape, preventing the bread from steaming and becoming soggy, ensuring a crispy exterior.
- Final Unwrapped Broil (Optional): For an extra-crispy, golden-brown finish, you can unwrap the garlic bread from the foil for the last 1-2 minutes of cooking. Watch it closely to prevent burning.
Flavor Variations to Try
- Spicy Kick: Add a pinch of red pepper flakes to your butter mixture for a delightful heat.
- Herbaceous Twist: Experiment with other fresh herbs like chives, oregano, or thyme in addition to parsley.
- Lemon Zest Brightness: A tiny bit of lemon zest mixed into the butter can add a bright, fresh note that cuts through the richness.
- Roasted Garlic Infusion: If you love a deeper, sweeter garlic flavor, make sure to roast your garlic cloves before incorporating them into the butter mixture.
Storage and Reheating
- Room Temperature: Cooked garlic bread can be stored on the counter, well-wrapped, for up to 3 days.
- Refrigeration: For longer storage, refrigerate in an airtight container for up to one week.
- Freezing: Garlic bread freezes beautifully! You can freeze either baked or unbaked loaves for up to three months. Wrap them tightly in plastic wrap, then a layer of foil.
- Reheating:
- From Refrigerated: Pop it back into the air fryer at 350°F (175°C) for about 5 minutes, or until heated through and crispy.
- From Frozen (Baked): Place directly into the air fryer at 300°F (150°C) for about 10-12 minutes, or until defrosted, hot, and crispy.
- From Frozen (Unbaked): Thaw slightly or cook directly from frozen, wrapped in foil, at 350°F (175°C) for 15-20 minutes, then unwrap for the last few minutes for crisping.
Absolutely! This recipe is incredibly adaptable. Simply swap out the traditional French baguette for your favorite gluten-free bakery bread. Ensure all other ingredients, like butter and cheese, are certified gluten-free if cross-contamination is a concern for severe allergies.
Yes, definitely! If you are not following a plant-based diet, feel free to use your favorite regular dairy butter and cow’s milk cheese (mozzarella or parmesan). The cooking method and ratios will remain the same, delivering equally delicious results.
Of course! This garlic bread is just as delicious when baked in a traditional oven. Preheat your oven to 350°F (175°C) and follow all the instructions for preparation and wrapping in foil. However, baking in an oven will take a bit longer, typically closer to 20-25 minutes, or until it’s fully cooked and crisped to your liking. Oven temperatures can vary, so it’s a good idea to check on it periodically to ensure it doesn’t burn.
While a classic French baguette is ideal for its crusty exterior and soft interior, you can also use ciabatta, sourdough, or even thicker slices of rustic Italian bread. The key is to use a bread that can stand up to the butter mixture without becoming soggy and provides a good balance of crispiness and chew.
Soggy garlic bread often results from too much moisture or improper air circulation. Make sure your butter isn’t melted (just softened), and crucially, remember to leave a small vent in your tin foil wrapping. This allows steam to escape instead of condensing inside and making the bread wet. Also, ensure your air fryer isn’t overcrowded.
More Delicious Recipes to Explore
If you loved this easy air fryer garlic bread, you’ll surely enjoy these other comforting and flavorful recipes:
Dinner
Air Fryer Ground Turkey Meatballs
Dinner
Creamy Veggie Pasta
Salads
Kale Salad With Roasted Red Pepper Dressing
Dinner
Dairy Free, Healthier Chicken Pot Pie
We hope this guide inspires you to create the most delicious air fryer garlic bread. If you tried and loved this recipe, please let us know in the comments below! Don’t forget to follow me on Instagram and Pinterest for even more fun and wholesome recipes designed to make you feel good from the inside out. Thanks for being here and happy cooking!
Easy Air Fryer Garlic Bread
Bailey Rhatigan
Crispy, no-fuss air fryer garlic bread is the perfect dinner companion. Great for soaking up leftover sauce or dipping into warm marinara. Your whole family will love this recipe and it can easily be made vegan.
8 mins
10 mins
8
Equipment
- air fryer or oven
- tin foil
- bread knife
Ingredients
- 1 french bread baguette * (about 12-14oz from the bakery)
- ½ cup plant-based butter; room temperature * (or dairy butter)
- 3 tbsp finely chopped parsley
- 3 tbsp finely chopped garlic; * (about 3 cloves, see notes below to roast garlic for a milder flavor)
- 2 tbsp finely chopped shallots (optional, but highly recommended)
- ½ tsp coarse sea salt
- ¼ cup vegan mozzarella or parmesan * (optional, or dairy cheese)
- ½ cup warm marinara (optional, for dipping)
Instructions
-
Bring your butter to room temperature on a medium-sized plate or in a bowl. It should be softened enough to mush with a fork; do not microwave or melt it! Next, finely chop your shallot, parsley, and garlic into small, spreadable pieces. If you prefer a milder garlic taste, you may roast your garlic cloves before chopping to mellow the flavor. Refer to the “Notes” section for roasting instructions.
-
Pile all the chopped ingredients onto the softened butter, sprinkle with salt, and mix well with a fork until thoroughly combined and spreadable. Slice your French bread baguette open lengthwise using a bread knife.
-
Evenly spread the butter mixture (compound butter) over the entire cut surface of the bread, ensuring both halves are generously coated. You should have the perfect amount. Then, sprinkle the optional parmesan or mozzarella cheese over the buttered bread. Close the bread back together in its original shape. Wrap the bread snugly in tin foil, leaving a small opening at the top to allow steam to vent.
-
Place the wrapped bread in your air fryer oven at 350°F (175°C) and air fry for approximately 10 minutes, or until the top is golden brown and crispy. Once cooked, carefully remove it. Let it cool for 2 minutes before slicing and serving. Enjoy with any meal, soups, chili, or by itself with marinara sauce.
Notes
* If you are not plant-based, you may use cow’s milk butter and cow’s milk cheese.
* To roast garlic: Slice the top off a whole garlic bulb to expose the cloves. Drizzle generously with olive oil and wrap tightly in tin foil. Bake in a preheated oven at 350°F (175°C) for about 15 minutes, or until the garlic is lightly browned, soft, and fragrant. Allow to cool, then squeeze out the roasted cloves and chop or mash.
Nutrition
Nutrition information is automatically calculated, so should only be used as an approximation.
- Calories: 252kcal
- Carbohydrates: 29g
- Protein: 6g
- Fat: 12g
- Saturated Fat: 3g
- Polyunsaturated Fat: 3g
- Monounsaturated Fat: 6g
- Sodium: 392mg
- Potassium: 90mg
- Fiber: 1g
- Sugar: 1g
- Vitamin A: 634IU
- Vitamin C: 3mg
- Calcium: 34mg
- Iron: 2mg
Additional Info
Bailey Rhatigan
8 minutes
10 minutes
Appetizer, Side Dish
American, Italian-Inspired
8
252
20 minute, Air Fryer, Garlic Bread, Easy Recipe, Vegan Option