
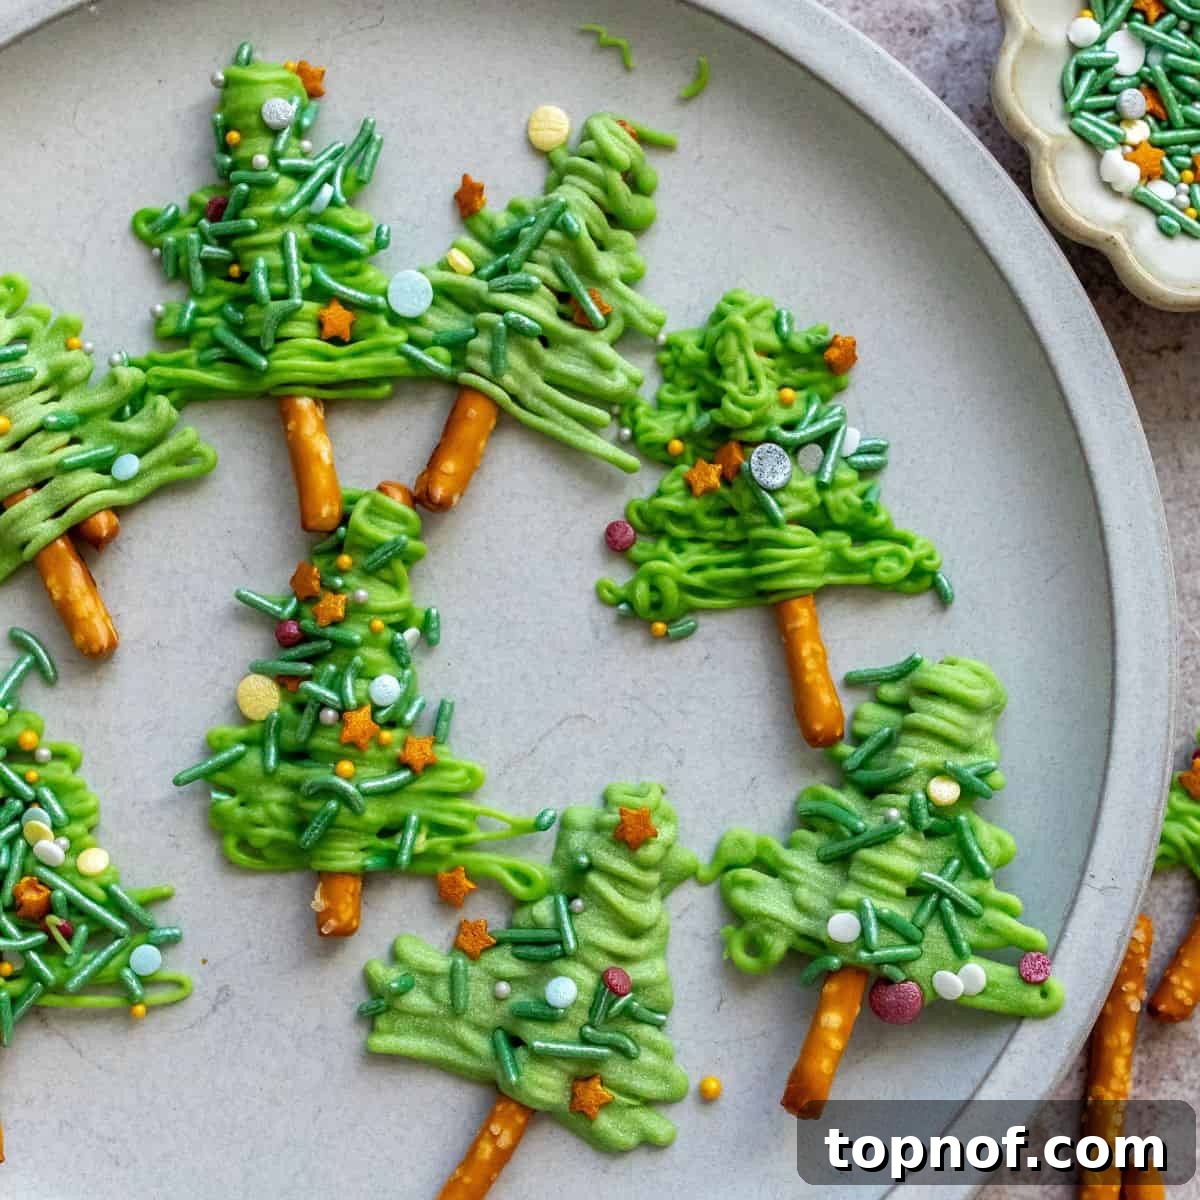
The holiday season calls for treats that are not only delicious but also bring a touch of festive magic to any celebration. These easy Pretzel Christmas Trees perfectly fit the bill! They are irresistibly cute, boast a delightful sweet and salty flavor, and have become a beloved tradition in many homes. Imagine these charming little trees gracing your Christmas cookie platter or adding a whimsical touch to your dessert spread. Best of all, they’re incredibly simple to make, allowing you to decorate them any way your heart desires. Get ready to spread joy with every delightful bite!
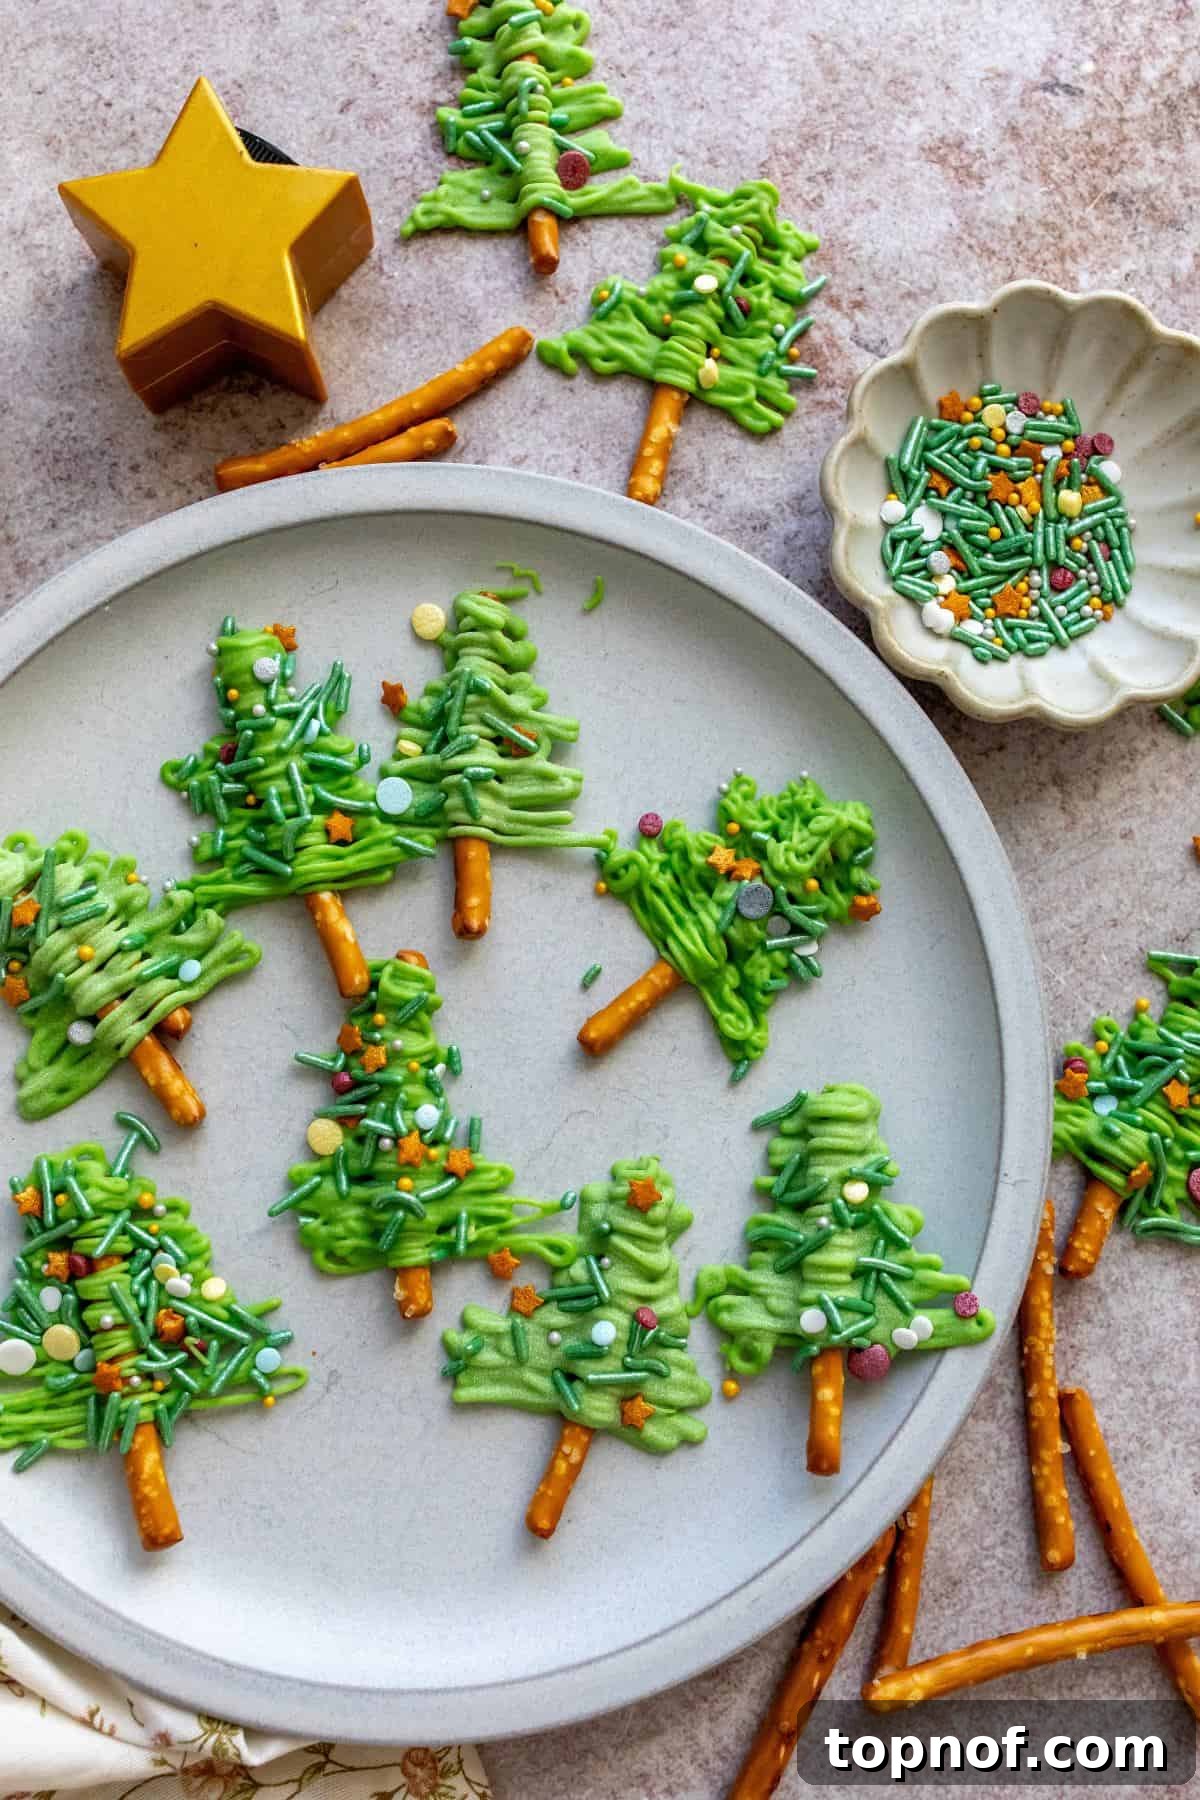
Why You’ll Adore Making Pretzel Christmas Trees This Holiday Season
There’s something uniquely special about these Pretzel Christmas Trees that makes them a holiday favorite year after year. Beyond their undeniable charm, they offer a perfect balance of sweet and salty, making them a crowd-plepleaser for all ages. But their appeal extends beyond just taste and aesthetics; their simplicity and versatility make them an ideal addition to your festive baking repertoire. Here are just a few reasons why this recipe will quickly become a go-to for your holiday celebrations:
- Effortlessly Easy: Forget complicated recipes and intricate baking techniques. These delightful treats require just a few simple steps and minimal fuss, making them accessible even for novice bakers or a fun activity for kids. You’ll be amazed at how quickly you can transform basic ingredients into a stunning holiday display.
- No-Bake Wonder: Free up valuable oven space during the busy holiday season! These Pretzel Christmas Trees are a fantastic no-bake option, requiring only a microwave for melting chocolate. This means less stress, less heat in the kitchen, and more time to enjoy the festivities with your loved ones.
- Customization Galore: The beauty of these treats lies in their adaptability. While green food coloring and festive sprinkles are classic, you’re only limited by your imagination. Experiment with different sprinkle colors, shapes, or even edible glitter. You can skip the food coloring entirely for elegant white trees or even use different chocolate for a unique twist.
- Perfect for Prep-Ahead: Hostess with the mostest? These Christmas trees can be made well in advance, stored properly, and then brought out when guests arrive or when you’re ready to assemble your cookie platters. This allows for less last-minute scrambling and more relaxed holiday entertaining.
- Irresistible Sweet & Salty Harmony: The combination of crisp, salty pretzel sticks with smooth, sweet chocolate is simply divine. It’s a flavor profile that keeps everyone coming back for more, creating a truly addictive holiday snack that stands out from typical sugary sweets.
Essential Ingredients for Your Festive Pretzel Trees
Crafting these adorable Pretzel Christmas Trees requires only a handful of readily available ingredients. While the full list with precise measurements is detailed in the recipe card below, here’s a closer look at each component and why it’s essential for achieving perfect results:
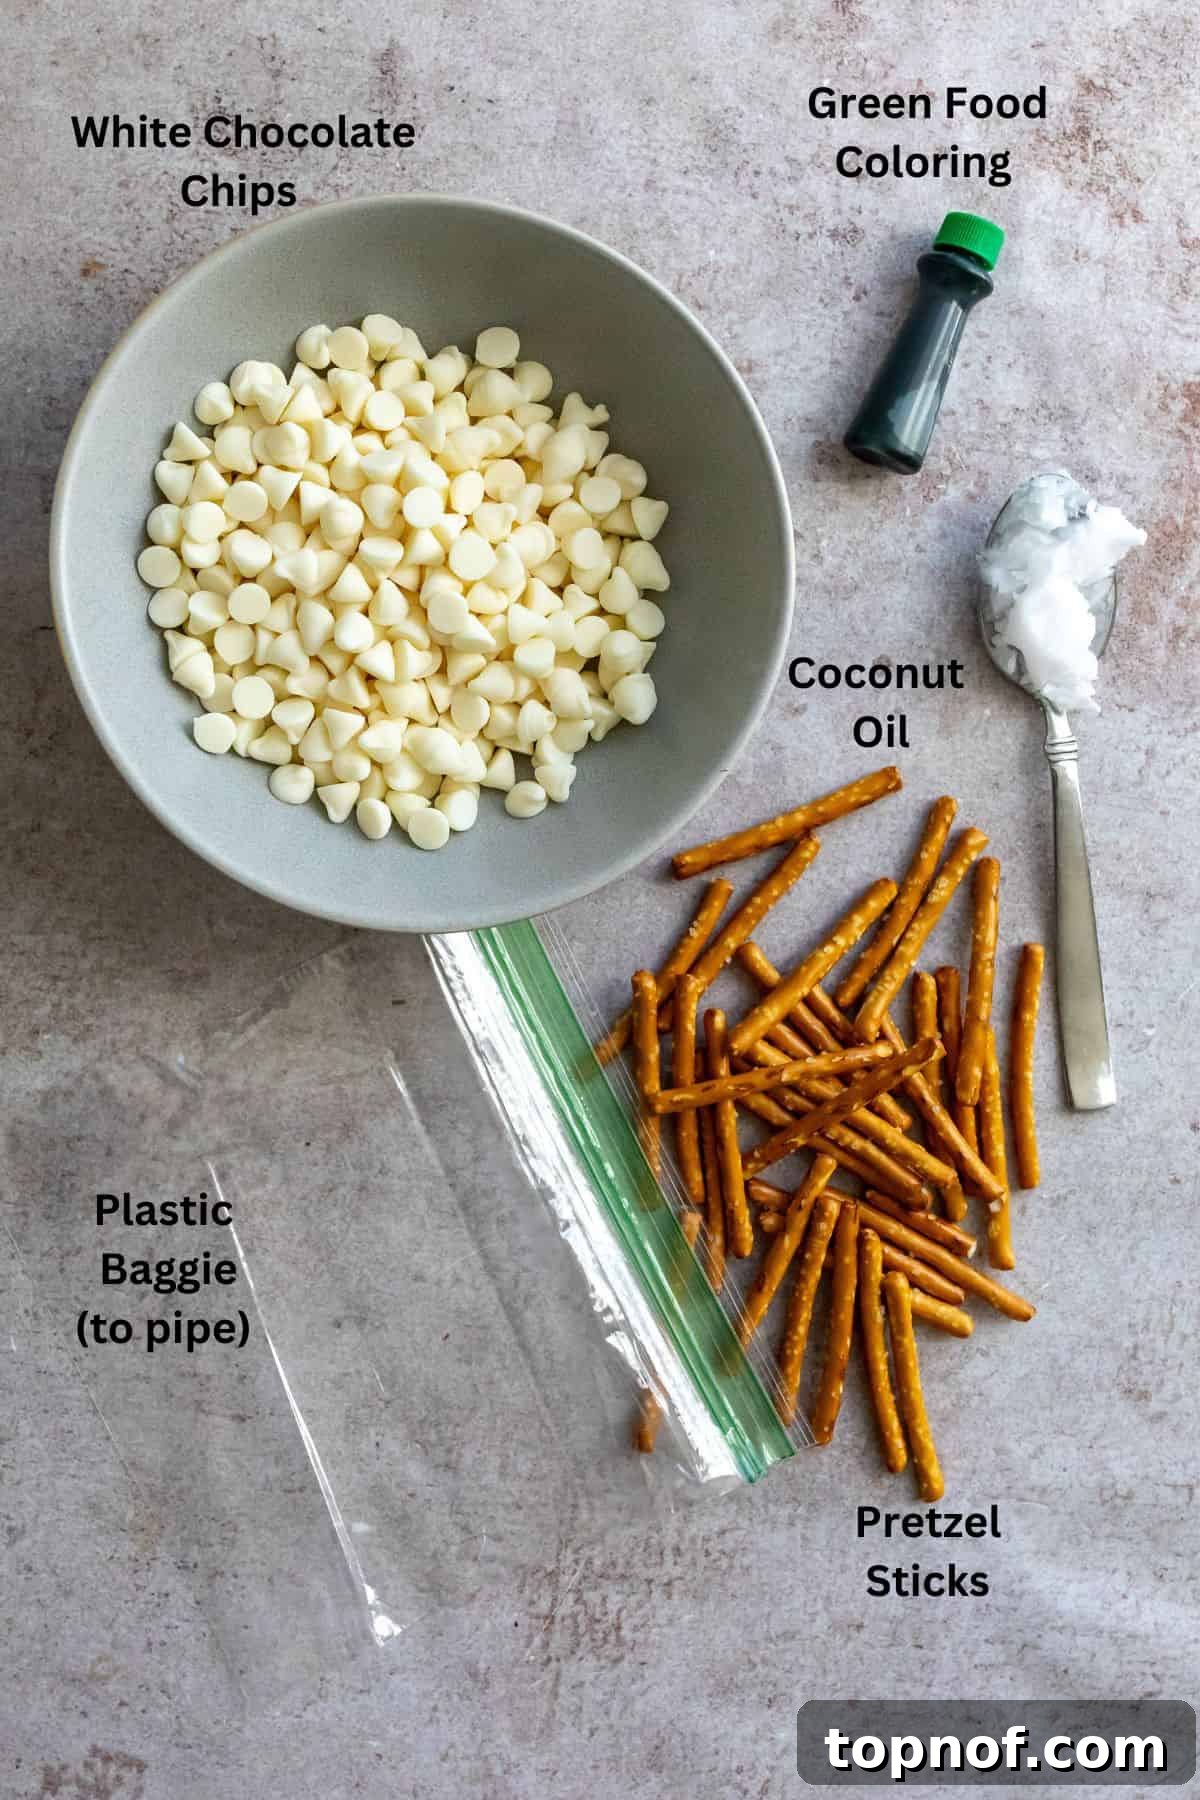
- Pretzel Sticks: These form the sturdy “trunk” of your Christmas trees. Opt for classic pretzel sticks, as their elongated shape is crucial for creating the tree structure. Thicker sticks generally work best as they provide a good base for the chocolate and sprinkles. Avoid very thin pretzels, as they might break easily under the weight of the chocolate.
- White Chocolate Chips: White chocolate is the star here, as its light color provides the perfect canvas for vibrant food coloring. High-quality white chocolate chips or baking wafers melt smoothly and offer a creamy texture. Avoid using confectionery coating or almond bark if possible, as it may not taste as rich, though it will still work in a pinch.
- Coconut Oil: This is a secret weapon for achieving perfectly smooth, dippable, and pipeable chocolate. Coconut oil helps to thin out the melted chocolate, making it easier to work with and allowing it to accept food coloring more effectively without seizing. A small amount goes a long way in improving the chocolate’s consistency.
- Green Food Coloring: To truly transform your pretzels into festive Christmas trees, green food coloring is a must. Gel food coloring is highly recommended over liquid drops as it delivers a more intense, vibrant color without altering the chocolate’s consistency. You can adjust the amount to achieve your desired shade of green, from a subtle pastel to a deep emerald. Of course, you can always skip it and make elegant white trees!
- Sandwich-Size Ziplock Bag (or Piping Bag): This simple tool is essential for neatly piping the chocolate onto the pretzel sticks. A sturdy sandwich-size Ziplock bag with a corner snipped off works perfectly, but a dedicated piping bag with a small round tip can also be used for more precise designs.
- Festive Sprinkles: While optional, sprinkles are what truly bring these Christmas trees to life! Choose an assortment of red, green, white, silver, or gold sprinkles. Nonpareils, jimmies, or even small edible stars or pearls can create wonderful festive decorations. Have them ready before you start piping, as you’ll need to work quickly!
Crafting Your Pretzel Christmas Trees: A Step-by-Step Guide
Making these delightful Pretzel Christmas Trees is a fun and straightforward process. Follow these detailed steps to ensure your holiday treats turn out perfectly every time. Remember, working quickly once the chocolate is melted is key!
- Step One: Prepare Your Workstation. Start by lining a large cookie sheet with parchment paper. This prevents the chocolate from sticking and makes for easy removal later. Neatly arrange your pretzel sticks on the parchment paper, ensuring there’s about 1 to 1.5 inches of space between each one. This spacing is important to prevent the chocolate from merging as you pipe. In a microwave-safe bowl, combine your white chocolate chips and coconut oil.
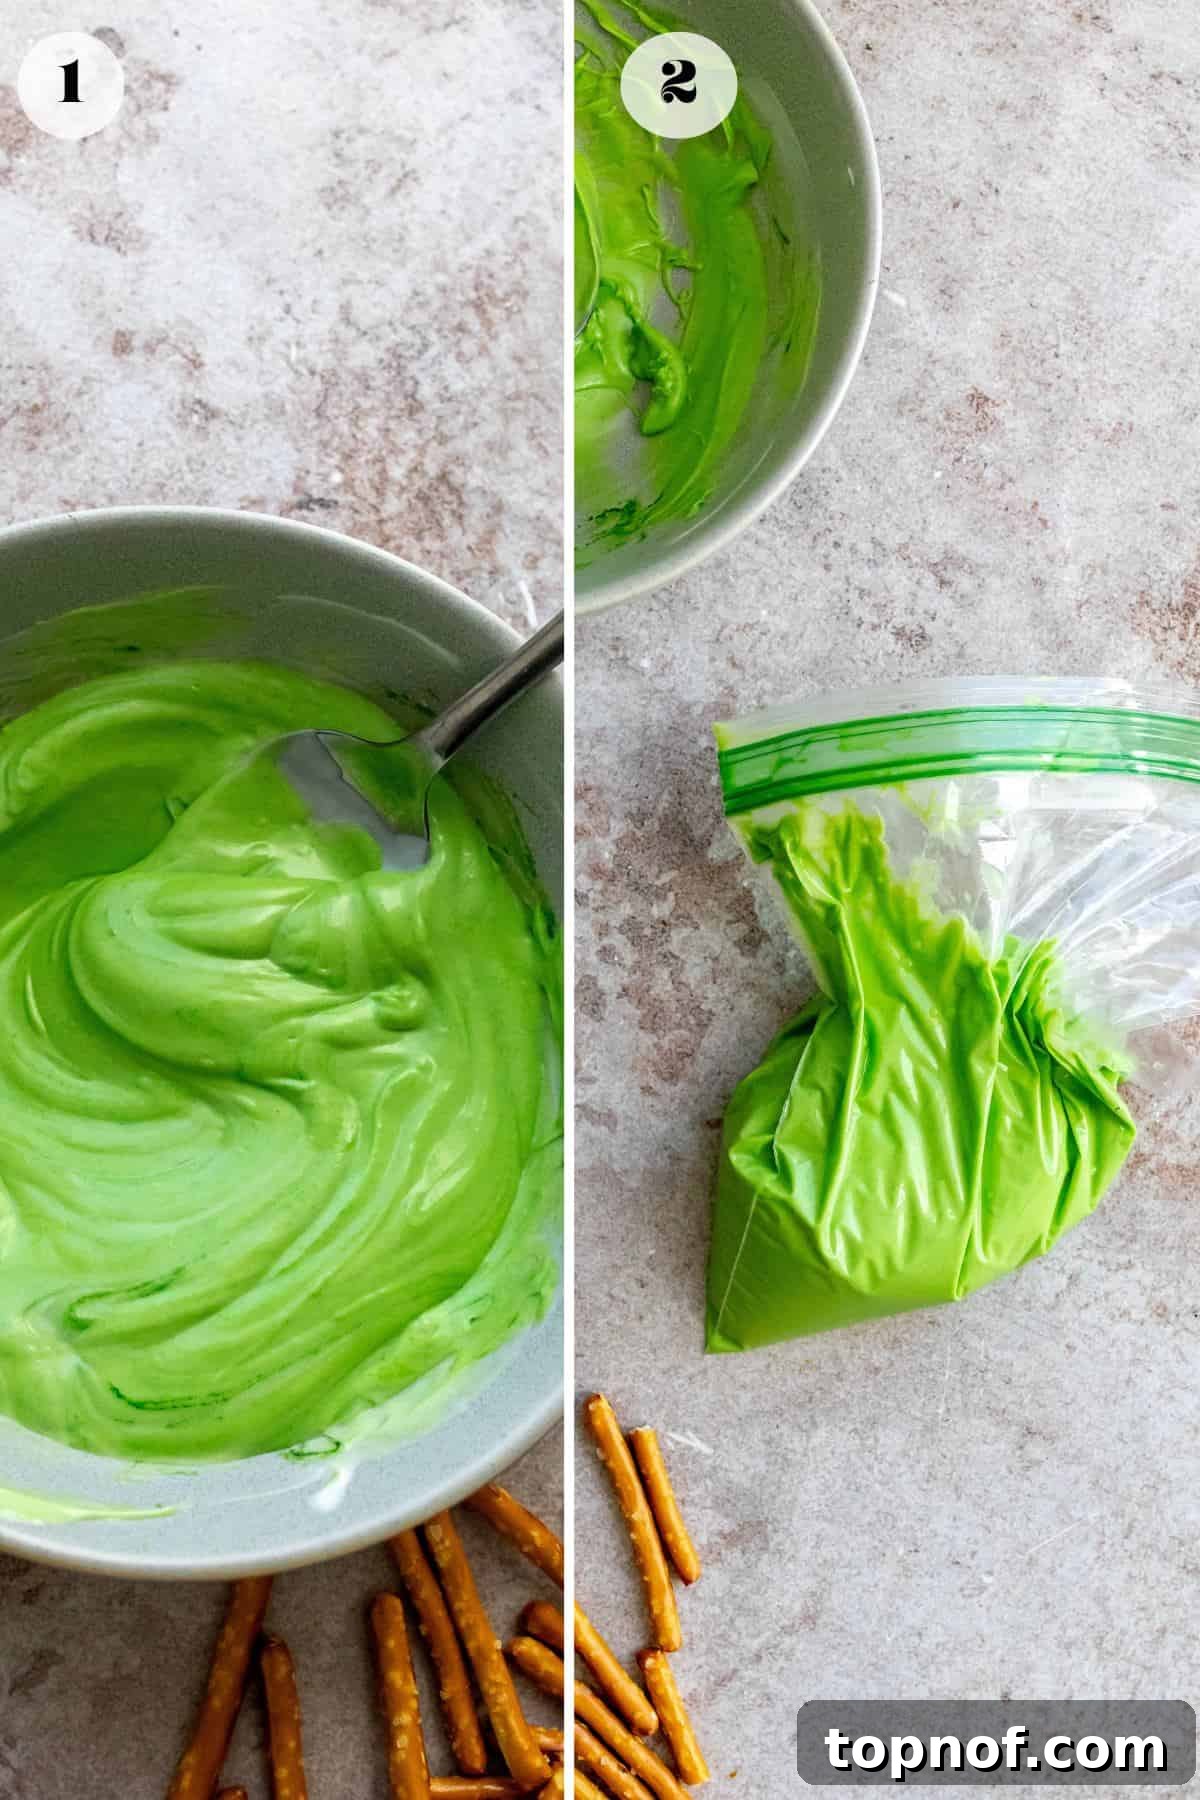
- Step Two: Melt the Chocolate Perfectly. Place the bowl with white chocolate and coconut oil into the microwave. Heat for 1.5 to 2 minutes, stirring well after each minute. The goal is to achieve a smooth, pourable consistency without burning the chocolate. If it’s not fully melted, continue microwaving in short 30-second increments, stirring vigorously after each interval, until completely smooth. Patience is key here; burnt chocolate is unusable.
- Step Three: Color Your Christmas Trees. Once your white chocolate is fully melted and beautifully smooth, it’s time to add the festive green food coloring (if you’re opting for green trees!). Add 5-8 drops of gel food coloring, then mix it thoroughly until the color is consistent and vibrant. You can add more drops if you desire a deeper shade of green. If you prefer white trees, simply skip this step.
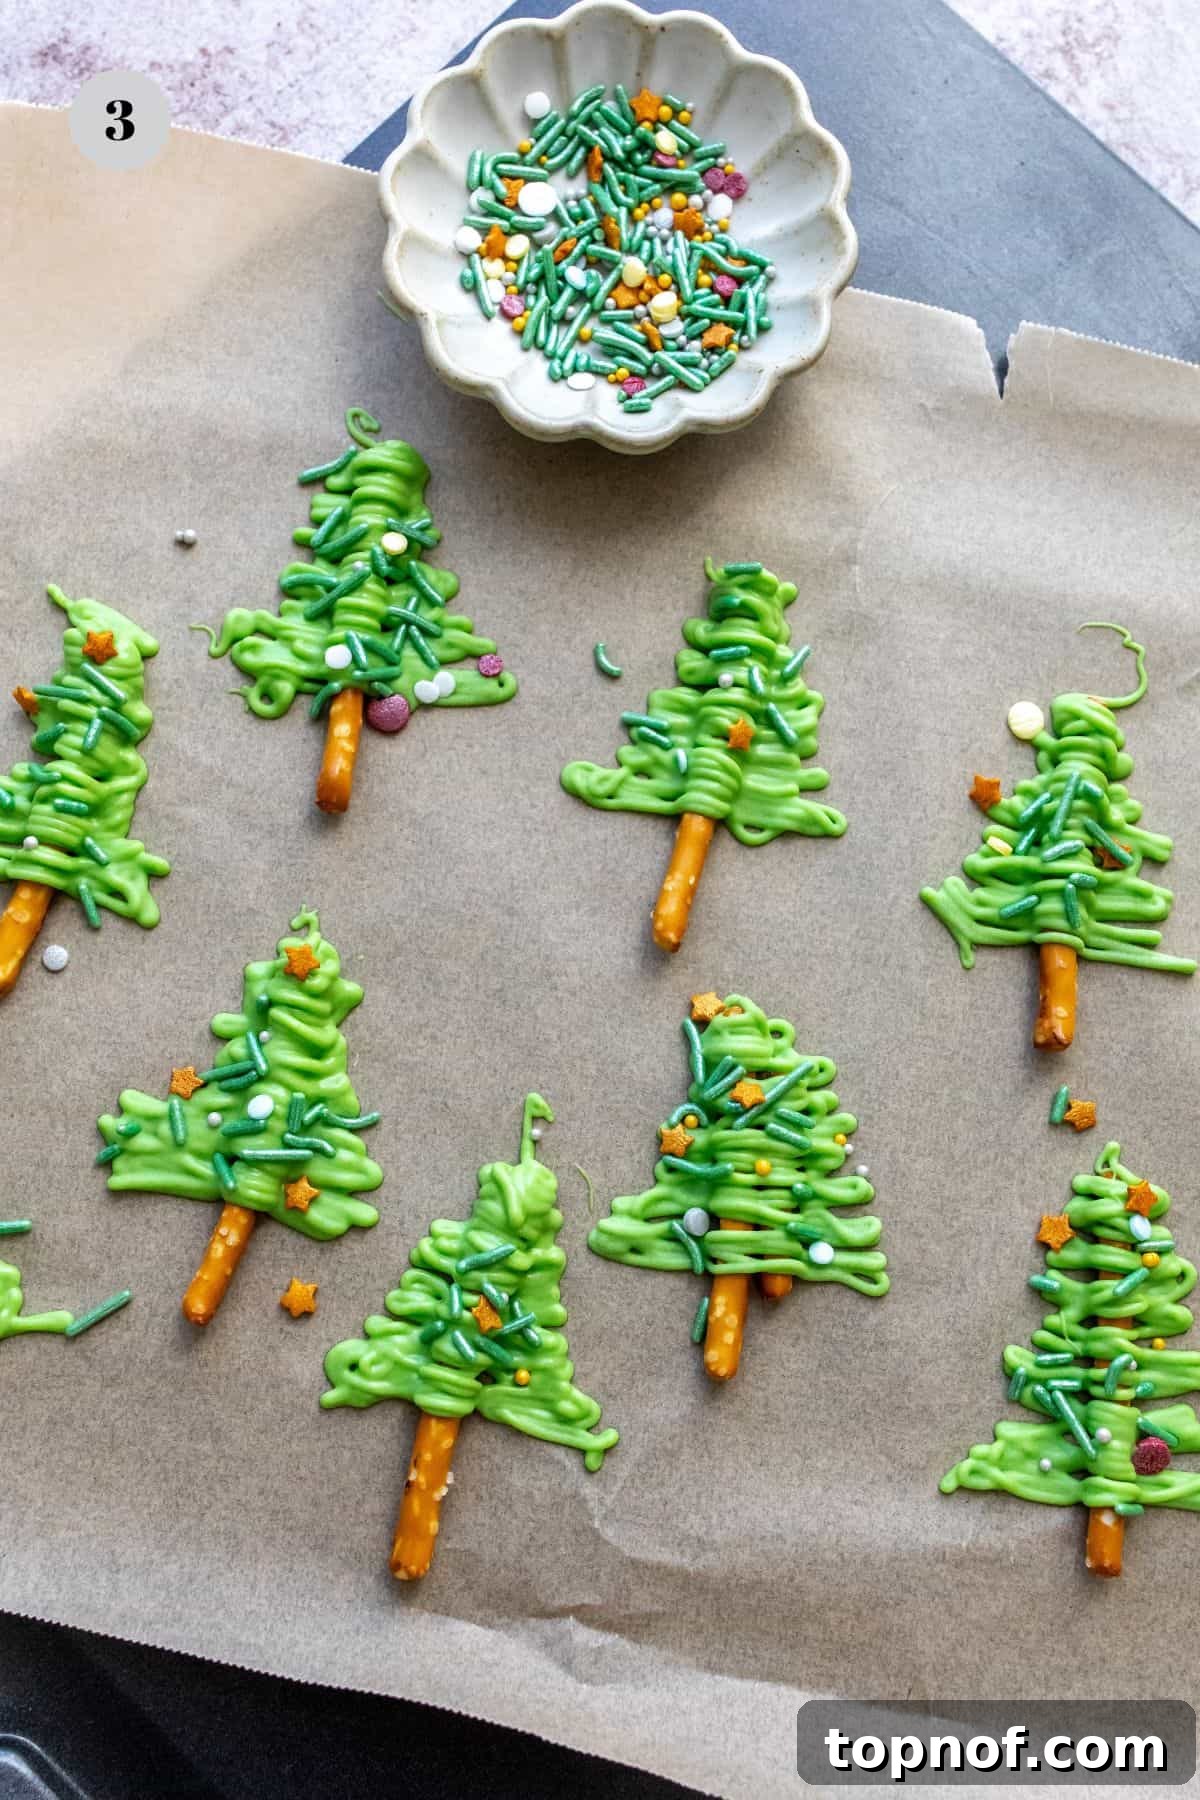
- Step Four: Master the Piping Technique. Carefully spoon the melted green chocolate into a sandwich-size Ziplock bag. Gently push the chocolate down into one corner of the bag, making sure it’s all gathered there. Snip a very, very small hole in the tip of that corner. This is a critical step: start with an extremely tiny hole! You can always make it slightly bigger by squeezing with more pressure, but you cannot make it smaller once cut. A small hole gives you greater control for delicate tree branches.
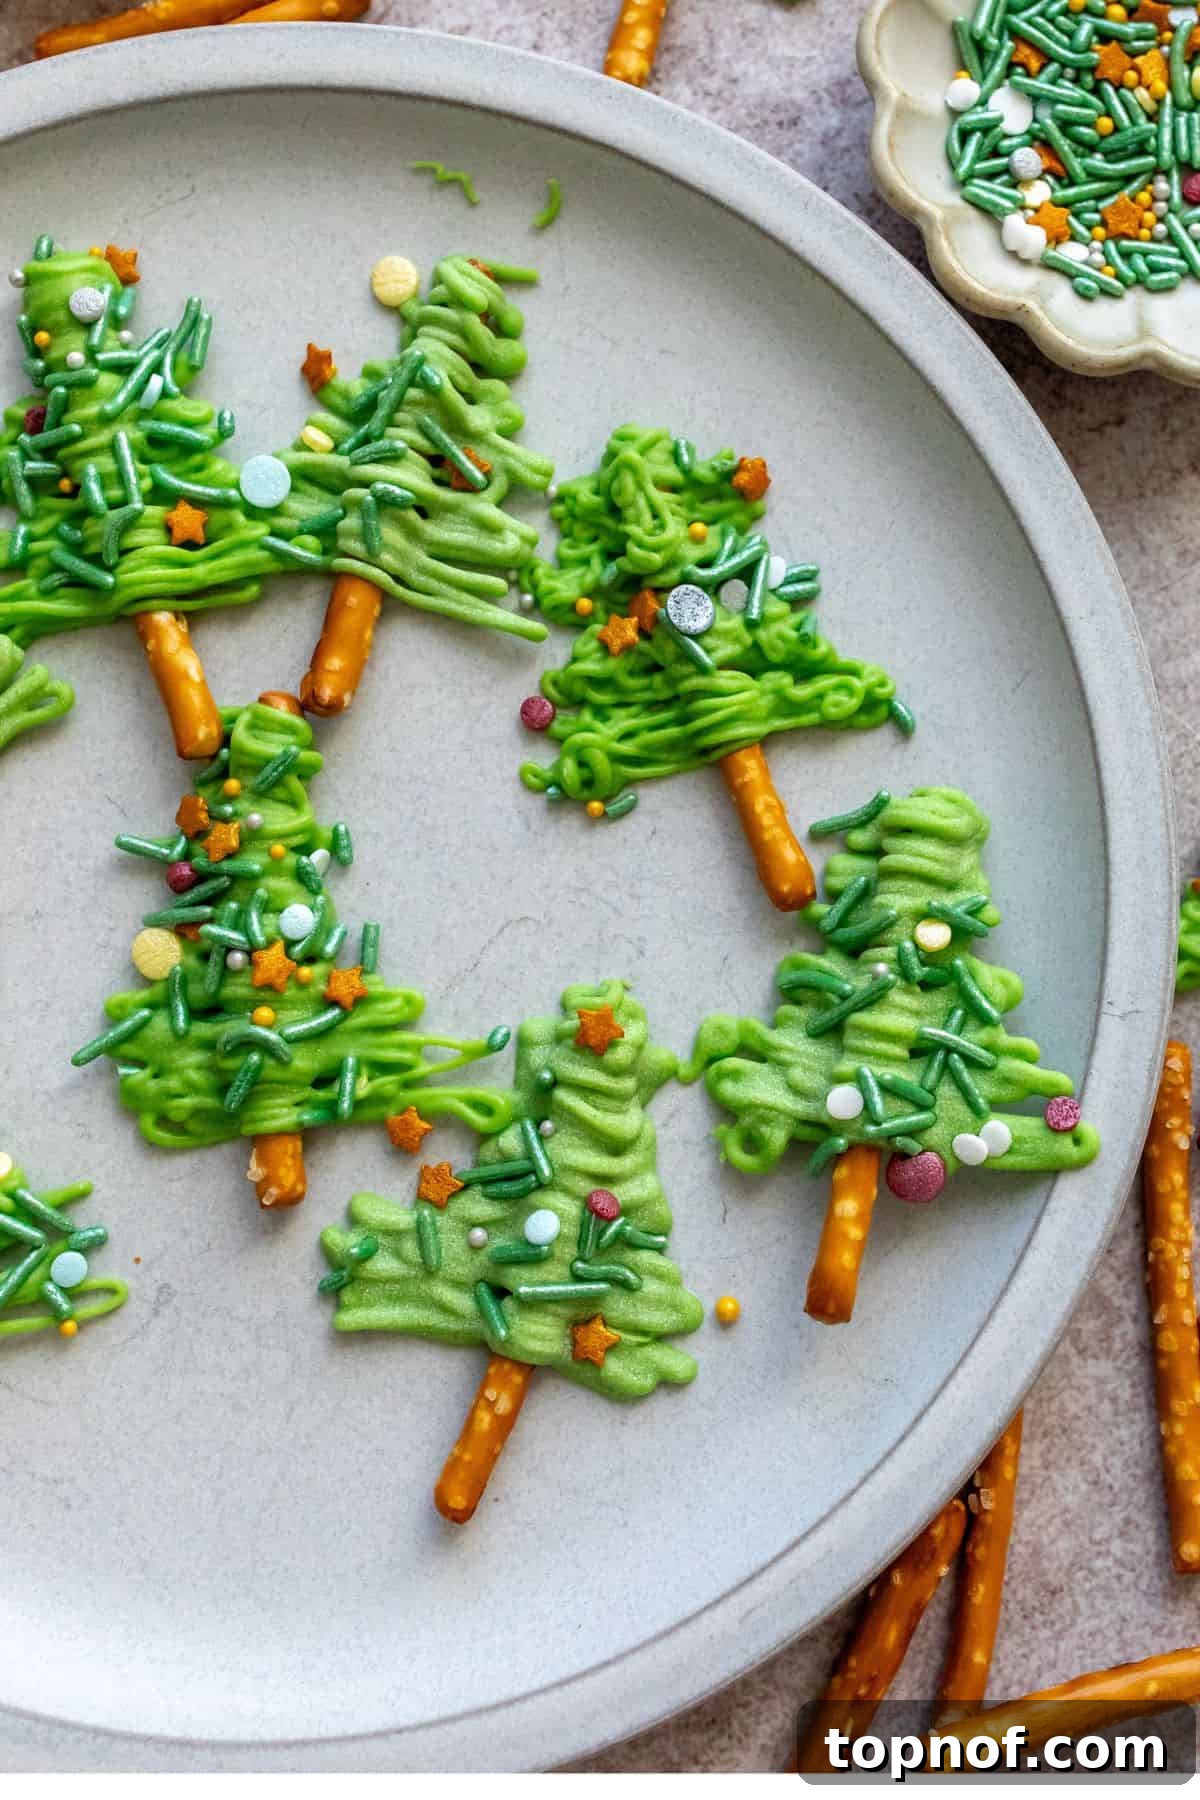
- Step Five: Decorate and Chill. Working quickly before the chocolate sets, hold the bag steady and begin piping a zig-zag pattern over each pretzel stick. Start with a wider base at the bottom, gradually narrowing your zig-zags as you move upwards, creating a classic Christmas tree triangle shape. Immediately after piping each tree, sprinkle it generously with your chosen festive sprinkles. Once all trees are piped and decorated, place the cookie sheet in a cool place to harden. A garage or outside in cold climates works wonders, or simply pop them into the fridge for about 5-10 minutes. Once hardened, carefully peel your beautiful Pretzel Christmas Trees off the parchment paper and enjoy their delightful crunch and festive charm!
Delicious Pairings for Your Holiday Spreads
These delightful Pretzel Christmas Trees are incredibly versatile and make a fantastic addition to almost any holiday gathering. Their charming appearance and sweet-salty crunch mean they pair beautifully with a variety of other festive treats. Here are some ideas to serve them:
- Ultimate Cookie Platter: The most obvious and beloved pairing! Serve these little Christmas trees alongside an assortment of your favorite holiday cookies. They provide a wonderful texture and flavor contrast. My Chocolate Chip Levain Cookies would be a perfect rich complement, or for a softer chew, try Soft Oatmeal Cookies. For a rich, fudgy counterpoint, my Crinkle Brownie Cookies would also be a fantastic choice.
- Hot Beverages: A mug of warm hot chocolate, a spiced latte, or even a classic cup of coffee is wonderfully complemented by the crunchy, sweet trees. They make a great stirrer or a delightful bite in between sips.
- Holiday Gifts: Package them up in clear cellophane bags with a festive ribbon for charming homemade gifts. They’re perfect for teachers, neighbors, co-workers, or as party favors.
- Dessert Boards: Elevate your holiday dessert board by including these pretzel trees alongside fresh fruit, cheese, crackers, and other small sweets.
Expert Tips for Pretzel Christmas Tree Success
- Chocolate Melting Mastery: The key to smooth, pipeable chocolate is gentle heating. Never rush the melting process! Microwave in short bursts (30-second increments after the initial minute), stirring thoroughly each time. Alternatively, use a double boiler over simmering water for a more controlled melting environment, stirring frequently until smooth. Overheated chocolate will become grainy and unworkable.
- The Enemy of Chocolate: Water. White chocolate is particularly sensitive to moisture. Ensure your bowl, spoon, and any other utensils that come into contact with the chocolate are completely dry. Even a single drop of water can cause the chocolate to seize instantly, turning it into a thick, lumpy mess that, unfortunately, cannot be salvaged.
- Personalizing Your Trees: Get creative with your decorations! While green food coloring and festive sprinkles are traditional, consider using other colors. Red, blue, or even white chocolate (without coloring) can create unique themes. You can also experiment with different types of sprinkles – nonpareils, edible stars, or even finely crushed peppermint candies for a minty twist.
- Precision Piping is Key: As mentioned in the steps, cutting a tiny hole in your piping bag (or Ziplock) is crucial. A smaller hole gives you far greater control over the chocolate flow, allowing you to create delicate “branches” and a more defined tree shape. If you cut it too big initially, it’s very difficult to create intricate designs.
- Optimal Storage: To keep your Pretzel Christmas Trees fresh and firm, store any leftovers in an airtight container. Placing them in the refrigerator is best, especially in warmer climates, as it helps prevent the chocolate from melting or becoming too soft. They will remain fresh and delicious for up to 4 days.
Frequently Asked Questions (FAQs) About Pretzel Christmas Trees
Absolutely! You can certainly use milk or dark chocolate if you prefer. While it won’t be possible to color them green, they will still be delicious and festive. Consider adding plenty of colorful sprinkles, crushed candy canes, or a dusting of edible gold glitter to make them look extra celebratory and holiday-themed. Brown trees can be quite charming!
Yes, they can! To make these treats vegan-friendly, simply substitute the regular white chocolate chips with a high-quality vegan white chocolate alternative. Many brands offer delicious plant-based white chocolate that melts beautifully. Ensure your sprinkles are also vegan, as some may contain confectioner’s glaze.
When stored properly in an airtight container in the refrigerator, these festive treats will remain fresh and delicious for up to 4 days. This makes them an excellent make-ahead option for holiday parties or gifting.
This is an ideal recipe for involving children! Kids can help with arranging pretzels, adding food coloring (with supervision for melting chocolate), and especially with sprinkling decorations. It’s a wonderful way to create holiday memories and delicious treats together.
Any festive sprinkles will work beautifully! Classic red and green jimmies, colorful nonpareils, edible glitter, or even small star-shaped sprinkles can add a wonderful touch. For extra sparkle, consider using metallic gold or silver sprinkles.
More Delightful Holiday Treats to Explore
Dessert
Crockpot Peanut Clusters
Breakfast
Date Nut Loaf
Dessert
Pumpkin Pie Spice Cookies
Dessert
Slow Cooker Apple Crisp
We hope you loved creating and enjoying these charming Pretzel Christmas Trees! They’re a simple yet incredibly impactful way to bring extra cheer to your holiday celebrations. If you tried this recipe, we’d love to hear from you. Also, be sure to follow me on Instagram & Pinterest for even more fun and delicious recipes designed to make you feel good from the inside out. Thank you for joining us on this culinary adventure!
Pretzel Christmas Trees
Bailey Rhatigan
20 minutes
20 minutes
6
Rate Recipe
Print Recipe
Equipment
-
cookie sheet
-
parchment paper
-
ziplock bag for piping
Ingredients
-
1
cup
white chocolate chips -
1½
Tbsp
coconut oil -
5-8
drops
green food coloring ,
use more as needed -
20
pretzel sticks ,
more or less as needed depending on the thickness/size of the trees.
Instructions
-
Add parchment paper to a cookie sheet. Line the pretzel sticks on it with about 1-1.5 inch space in-between. In a microwave safe bowl add the white chocolate and coconut oil.
-
Microwave the chocolate for 1.5-2 minutes. Stir it well each minute. Microwave for 30 second increments if needed to melt more. Don’t burn it!
-
Once the white chocolate is melted and smooth, add in the green food coloring (if using). Mix it up well.
-
Carefully spoon the chocolate into the bag. Make sure it’s all in the corner. Cut a tiny, small hole in the corner of the bag. Make sure its super small (you can always make it bigger if needed with pressure but you can’t make it smaller!)
-
Working quickly, zig zag over each pretzel. Start with a wider bottom and work your way up into a triangle ship to resemble a tree. Sprinkle them with sprinkles if using. Set them somewhere cool (a garage or outside in cold climates). You can also pop them in the fridge for about 5-10 minutes. They will harden. Peel them off the parchment and enjoy!
Notes
- Don’t burn the chocolate! Be sure to have some patience and heat it slowly, checking often.
- Do not let any water drip into the white chocolate mix, it will instantly seize and turn hard, and unfortunately be ruined.
- Sprinkles are optional! Green food coloring is also an option, you can leave them white if you want.
- Be SURE to not cut the bag hole too big, make it as small as you can to start. You can always make it bigger with squeezing pressure through it but you cannot make it smaller!
- Store leftovers in an airtight container in the fridge for up to 4 days.
Nutrition
Calories: 198kcal |
Carbohydrates: 19g |
Protein: 2g |
Fat: 13g |
Saturated Fat: 9g |
Polyunsaturated Fat: 0.4g |
Monounsaturated Fat: 3g |
Cholesterol: 6mg |
Sodium: 49mg |
Potassium: 90mg |
Fiber: 0.1g |
Sugar: 18g |
Vitamin A: 9IU |
Vitamin C: 0.2mg |
Calcium: 60mg |
Iron: 0.2mg
Nutrition information is automatically calculated, so should only be used as an approximation.
Additional Info
Bailey Rhatigan
20 minutes
20 minutes
Dessert
American
6
198
Pretzel Christmas Trees
Like this recipe? Leave a comment below!