
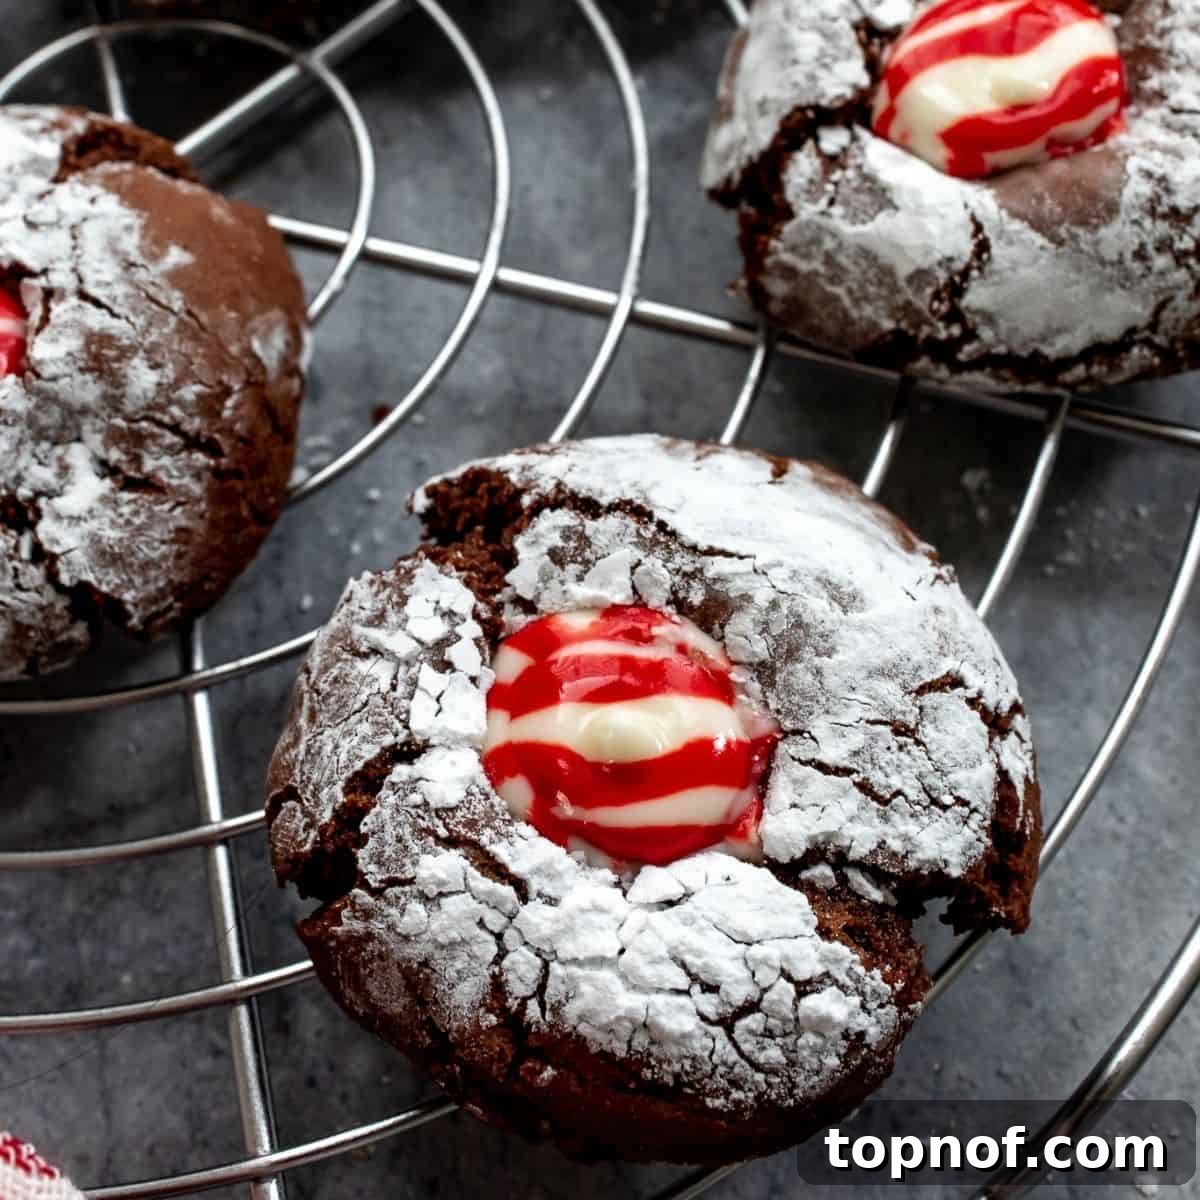
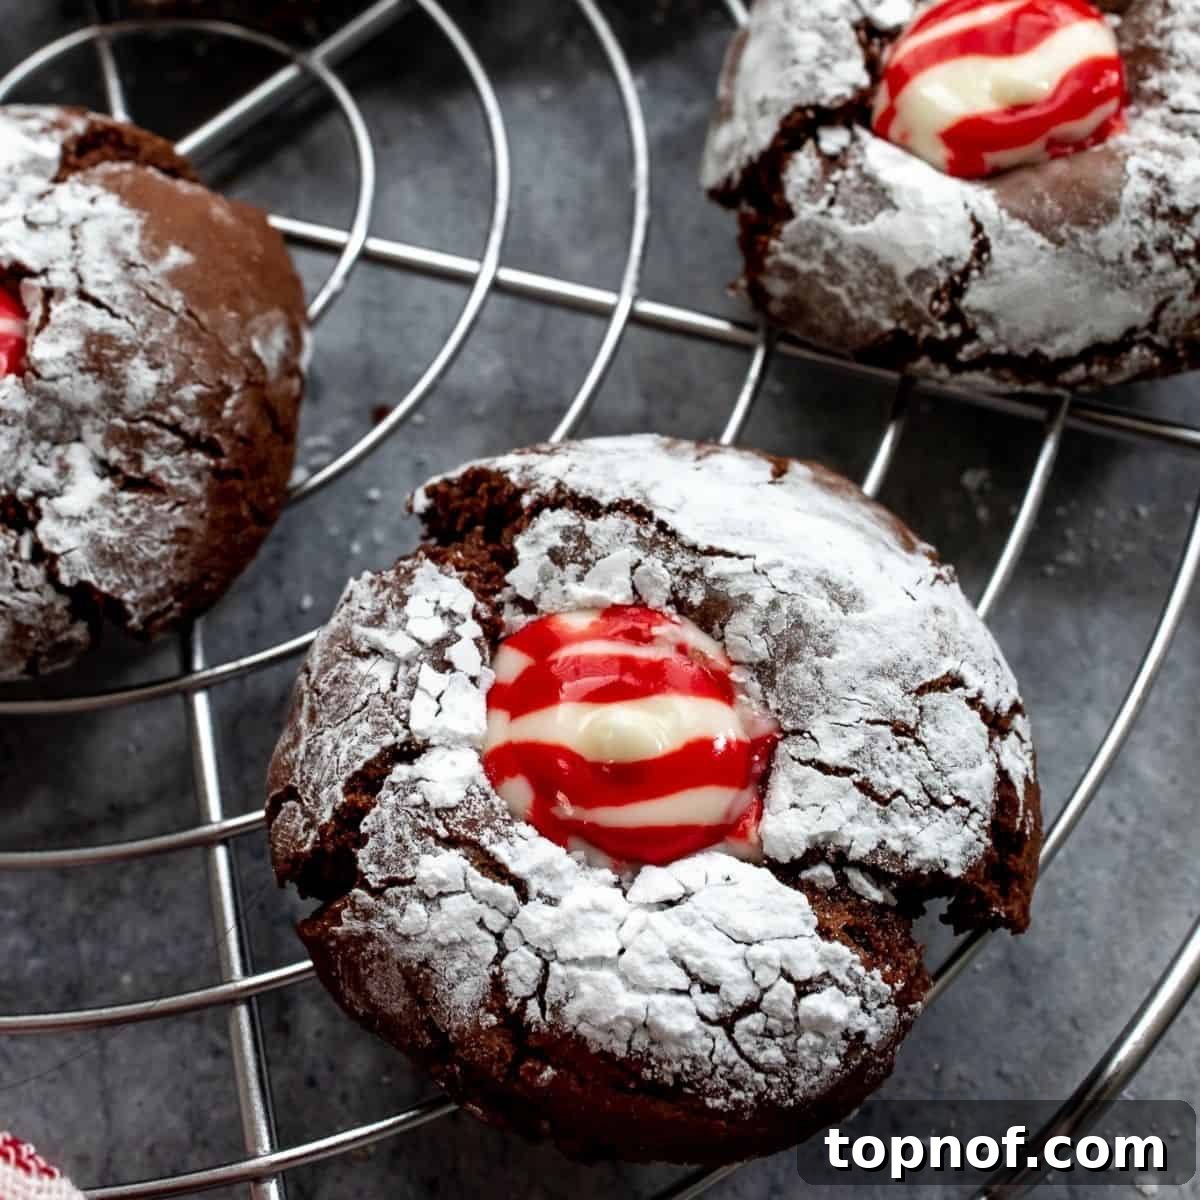
Experience the magic of the holidays with these irresistible peppermint brownie crinkle cookies! Imagine a rich, fudgy brownie transformed into a delightful cookie, complete with a beautiful powdered sugar “crinkle” top and a delightful peppermint candy cane kiss melting in the center. These cookies don’t just taste like Christmas; they look like it too, making them a standout addition to any cookie platter or festive gathering.
There’s something truly special about these festive treats that brings smiles to faces. Their vibrant appearance and delicious flavor profile, combining deep chocolate with cool peppermint, make them an instant hit with friends and family. Crafted with simple, readily available ingredients, this recipe is designed to elevate your holiday baking repertoire, offering a unique twist on classic crinkle cookies that’s both impressive and easy to execute. Get ready to bake a batch of pure joy that will be remembered long after the last crumb is gone!
Why These Peppermint Brownie Crinkle Cookies Are a Must-Bake This Season
Beyond their stunning visual appeal, these peppermint brownie crinkle cookies offer a multitude of reasons to become your new holiday favorite. They are wonderfully chewy, deeply chocolatey, and surprisingly straightforward to prepare, even for novice bakers. Here’s a closer look at what makes this recipe truly exceptional and a perfect choice for your holiday baking needs:
- Effortless Elegance for Any Occasion: Each cookie emerges from the oven with a stunning cracked surface, generously coated in powdered sugar, giving it a rustic yet elegant charm. The striking contrast of the white crinkles against the dark chocolate, coupled with the vibrant red-and-white candy cane kiss, instantly transforms them into festive works of art. They are perfect for holiday parties, cookie exchanges, or simply a cozy evening by the fire.
- Time-Saving Quick Chill: Unlike many traditional crinkle cookie recipes that demand several hours of refrigeration, our recipe offers a shortcut without compromising on texture or flavor. You only need to chill the dough for a mere 45 minutes in the freezer, significantly reducing your waiting time. This means you can whip up a fresh batch much faster when holiday baking schedules get hectic, or when a last-minute craving strikes!
- Melt-in-Your-Mouth Peppermint Bliss: The secret to their festive allure and incredible taste lies in the peppermint candy cane Hershey’s Kisses. As the cookies cool, the kiss gently melts and softens, creating a luscious, gooey peppermint center that perfectly complements the rich, fudgy brownie base. It’s a flavor combination that truly captures the invigorating and cheerful spirit of the season, offering a burst of cool mint with every chocolatey bite.
- Adaptable for Dietary Needs: We understand the importance of inclusivity in baking. This recipe has been thoroughly tested and proven successful with gluten-free all-purpose flour. This means that with a simple flour swap, everyone can enjoy these delightful holiday treats, making them a versatile choice for any gathering, ensuring no one misses out on the festive fun.
- Irresistible Chewy Brownie Texture: Expect a cookie that delivers the best of both worlds: the rich, fudgy chewiness of a classic brownie, but in a convenient, portable cookie form. The crisp, sweet powdered sugar exterior provides a delightful textural contrast to the soft, dense, and moist interior, creating a truly satisfying bite every time.
- Simple Ingredients, Big Flavor: You don’t need exotic ingredients to create something extraordinary. This recipe relies on common pantry staples, making it accessible for everyone. The magic truly happens when these simple ingredients come together to form a cookie that tastes far more elaborate than its preparation suggests.
Essential Ingredients for Perfect Peppermint Brownie Crinkle Cookies
Creating these magical cookies requires a handful of common baking staples, plus one special ingredient for that festive touch. Quality ingredients make a noticeable difference in the final product, so choose wisely and gather everything before you begin your baking adventure!
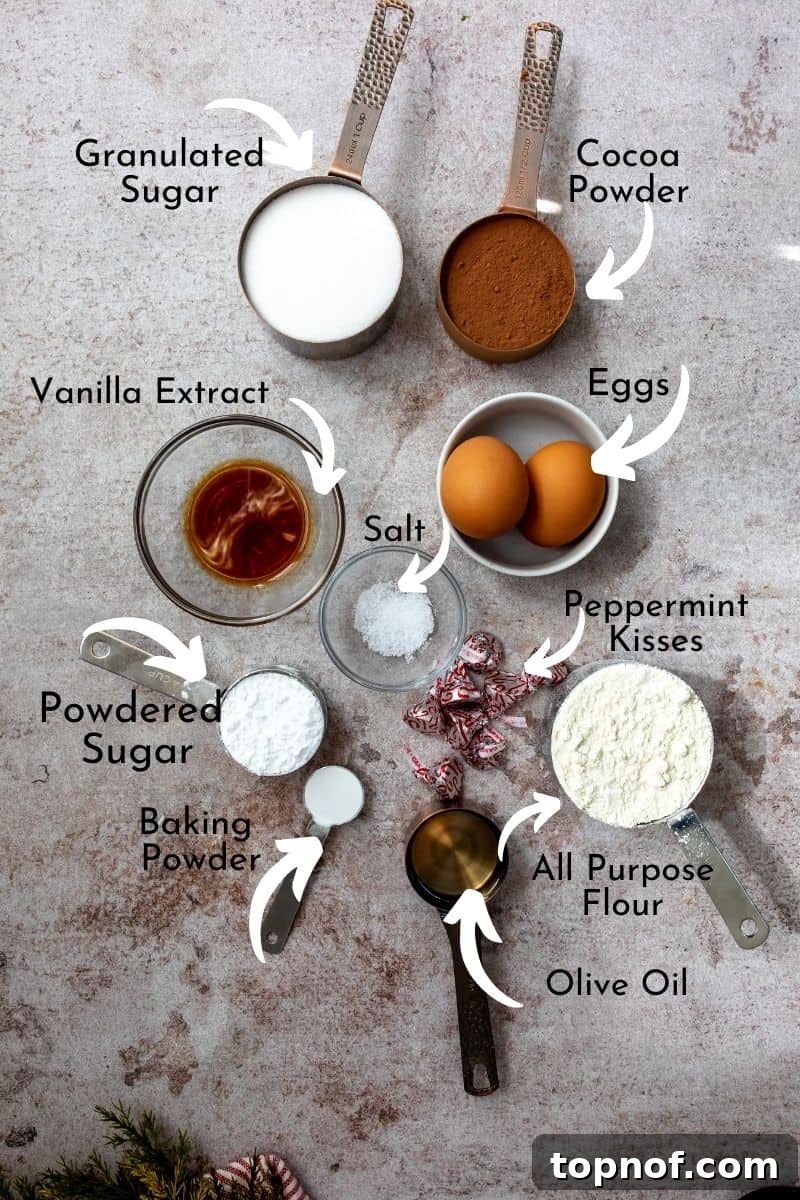
- Granulated Sugar: This provides the primary sweetness to our cookies and also plays a crucial role in achieving that desirable chewy texture characteristic of a good brownie.
- Olive Oil: A high-quality olive oil with a mild, delicate taste is preferred. It contributes significantly to the incredibly fudgy texture of the cookies and can be a fantastic alternative to butter, offering a unique richness and a subtle depth of flavor. If olive oil is not available or preferred, a neutral-flavored vegetable oil like canola oil, sunflower oil, or even melted coconut oil (if you enjoy the coconut flavor profile) can be used as a suitable substitute.
- Unsweetened Cocoa Powder: This is the star ingredient that infuses our cookies with that intense, deep chocolate flavor. For the richest results, opt for a good quality unsweetened cocoa powder. Dutch-processed cocoa powder will yield a darker cookie with a slightly milder, less acidic chocolate flavor, while natural cocoa powder will result in a lighter color and a slightly fruitier chocolate note. Both work well, but Dutch-processed often enhances the “brownie” feel.
- Eggs: Eggs act as an essential binder in this recipe, adding crucial moisture and richness to the dough. They contribute significantly to the chewy, fudgy texture that makes these cookies so irresistible. For optimal incorporation into the batter, ensure your eggs are at room temperature before you begin mixing.
- Vanilla Extract: A crucial aromatic ingredient, pure vanilla extract works wonders to enhance the deep chocolate flavor and adds a warm, inviting depth to the overall taste profile of the cookies. Always use pure vanilla for the best possible flavor.
- Baking Powder: This is our primary leavening agent, responsible for giving the cookies a slight lift and contributing to the formation of those beautiful crinkles. It’s vital to ensure your baking powder is fresh for optimal cookie rise and crack formation. You can test its freshness by adding a teaspoon to a small bowl of hot water; it should fizz vigorously.
- All-Purpose Flour: This forms the structural base of our cookies. For those with dietary restrictions or sensitivities, this recipe is incredibly adaptable! We have personally tested it multiple times with gluten-free all-purpose flour (ensure it’s a 1:1 baking blend that preferably contains xanthan gum, or add a quarter teaspoon per cup), yielding equally delicious and satisfying results.
- Salt: Often underestimated, salt is a crucial ingredient that balances the sweetness of the sugar and intensely deepens the complex chocolate notes, preventing the cookies from tasting flat. Do not skip this humble but mighty flavor enhancer!
- Powdered Sugar: Also widely known as confectioner’s sugar, this ingredient is arguably the most important for achieving the iconic crinkled top. A very generous coating of powdered sugar before baking creates the contrasting white, crackled appearance as the cookie expands. Do not skimp on this part or attempt to substitute it; it’s key to the classic crinkle effect!
- Peppermint Kisses: Specifically, Candy Cane Hershey’s Kisses are the ideal choice for that quintessential festive look and invigorating burst of cool peppermint flavor. If these seasonal kisses are unavailable or out of season, regular Hershey’s Kisses (milk chocolate or dark chocolate) or other small chocolate candies can be used for a different flavor profile, though they won’t have the same peppermint kick or holiday aesthetic.
Step-by-Step Guide to Baking Perfect Peppermint Brownie Crinkle Cookies
Follow these detailed instructions to create your own batch of delightful peppermint brownie crinkle cookies. Precision, proper chilling, and a little patience are key for the most successful and delicious results!
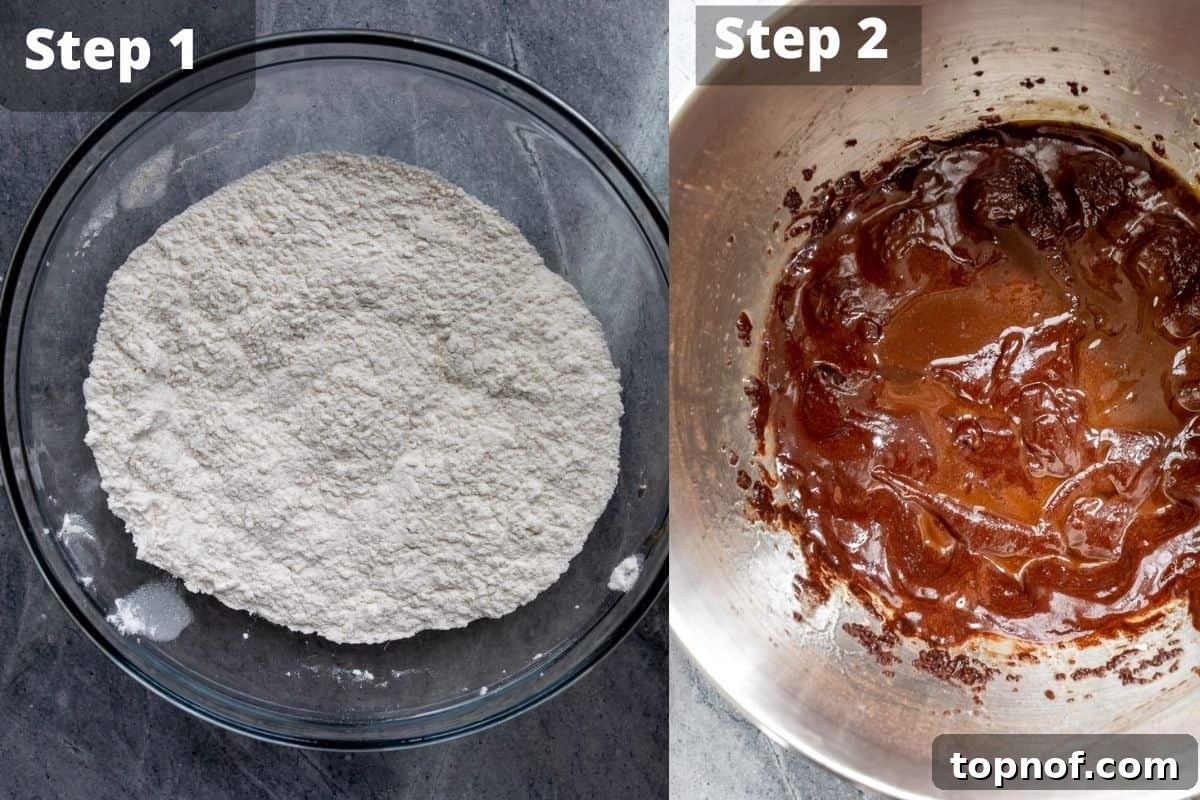
- Prepare the Wet Ingredients: In the large bowl of a stand mixer fitted with the paddle attachment, or in a spacious mixing bowl if using a hand mixer, combine the granulated sugar, rich cocoa powder, olive oil, and aromatic vanilla extract. Beat these ingredients together on medium speed for about 1-2 minutes until they are well combined and smooth, creating a luscious chocolate base. Next, add the eggs one at a time, ensuring each egg is fully incorporated into the mixture before you add the next. Be sure to scrape down the sides of the bowl as needed with a spatula to ensure all ingredients are evenly mixed and no pockets of dry ingredients remain. Set this flavorful wet mixture aside.
- Combine Dry Ingredients: In a separate medium-sized bowl, whisk together the all-purpose flour, baking powder, and salt. Whisk thoroughly for approximately 30 seconds. This step is crucial to ensure that the leavening agent and salt are evenly distributed throughout the flour, which will prevent an uneven rise or flavor in your final cookies.
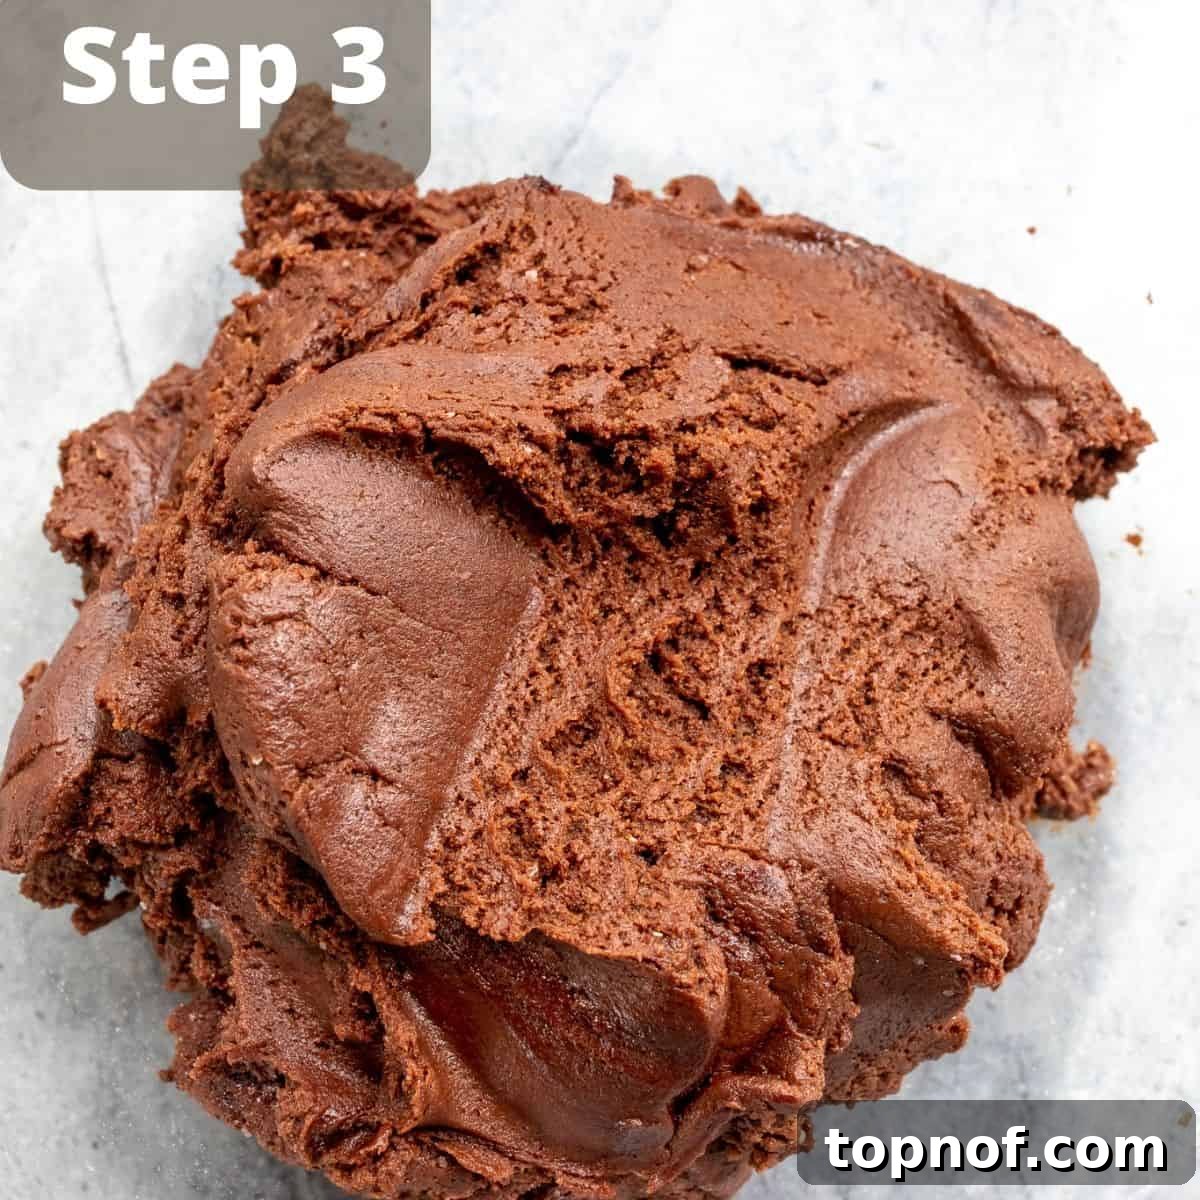
- Form the Cookie Dough: Gradually add the dry flour mixture to the wet chocolate mixture in your stand mixer (or large bowl). Mix on low speed, just until the ingredients are combined. It is absolutely crucial not to overmix the dough at this stage, as overmixing can develop the gluten in the flour, leading to tough and less tender cookies. Mix only until no visible streaks of dry flour remain. The resulting dough should be noticeably thick, sticky, and robust enough to hold its shape.
- Chill the Dough for Perfect Crinkles: Transfer the thick cookie dough into a smaller, clean bowl. Cover the bowl tightly with plastic wrap, pressing the wrap directly onto the surface of the dough to prevent a dry skin from forming. Place the dough into the freezer for approximately 45 minutes to firm up quickly. This rapid chill is vital for the cookies to maintain their shape during baking and for the powdered sugar to adhere properly, contributing to those desirable crinkles. If you prefer, you can refrigerate the dough for about 2 hours instead, allowing for a slightly more gradual chilling process. While the dough is chilling, pour a generous amount of powdered sugar into a shallow bowl and set it aside, ready for coating the cookie dough balls.
- Prepare and Coat Cookies for Baking: Preheat your oven to 350ºF (175ºC). Line two baking sheets with parchment paper; this prevents the cookies from sticking and helps ensure even baking. Using a small cookie scoop (approximately 1 tablespoon in size), portion out the perfectly chilled chocolate brownie dough. Gently roll each portion into a smooth 1-inch ball between your palms. Immediately drop each dough ball into the shallow bowl of powdered sugar. Roll them generously, ensuring each ball is thoroughly coated from all sides – this heavy coating is absolutely critical for creating the beautiful white crinkled effect during baking. Place the generously coated dough balls onto the prepared baking sheets, leaving about 1 inch of space between each cookie to allow for proper spreading. You may need to bake the cookies in two batches if you only have one cookie sheet available.
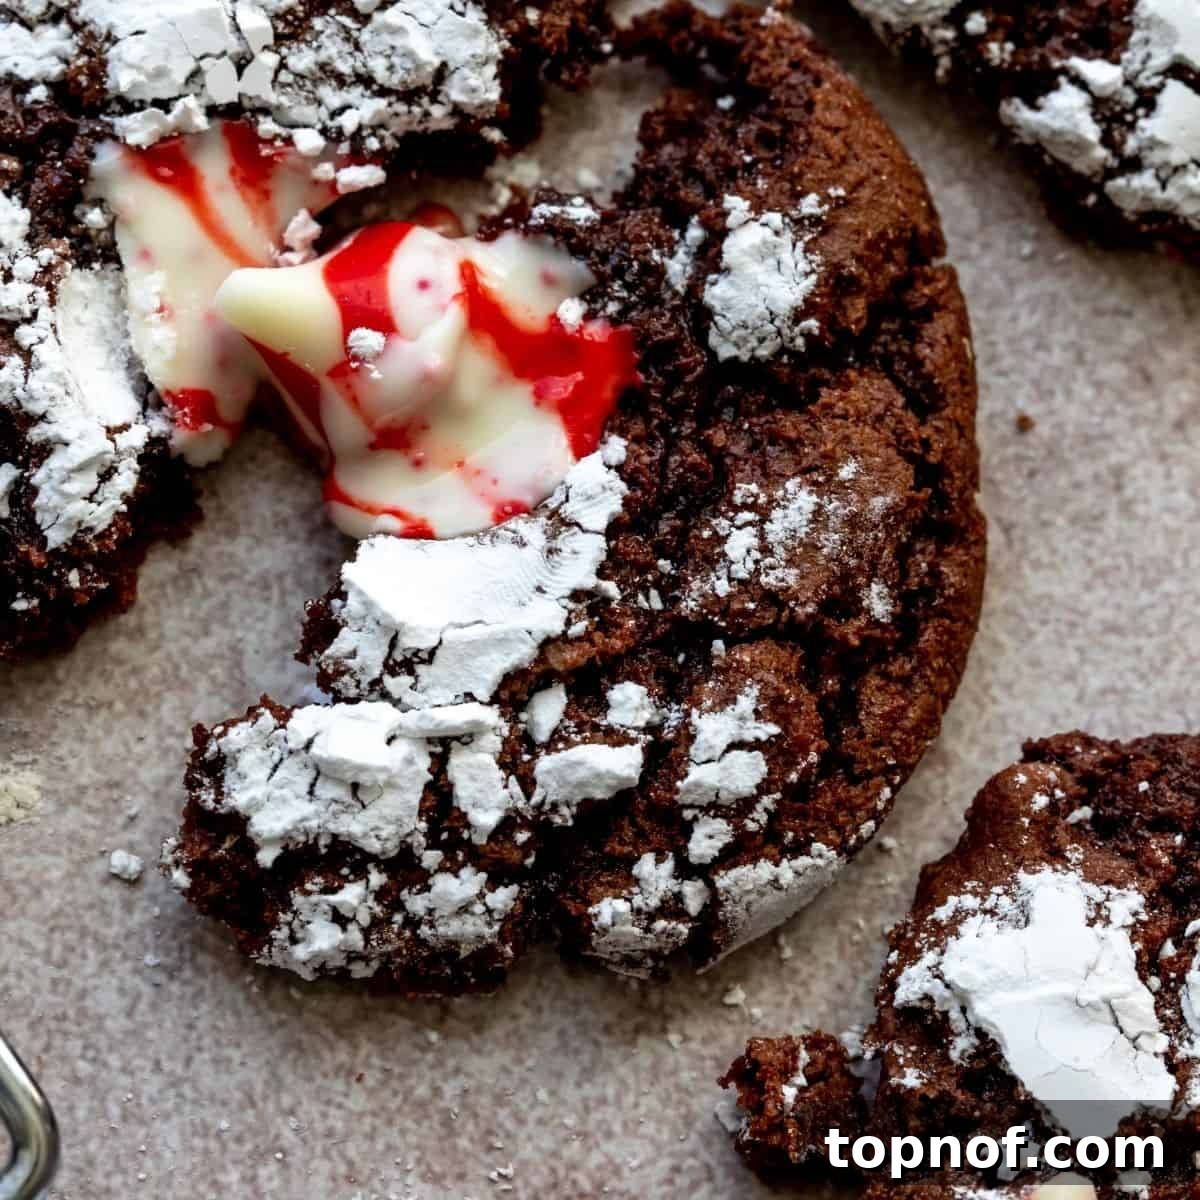
- Bake and Finish with Peppermint Kisses: Carefully transfer the baking sheets to the preheated oven and bake the cookies for approximately 10 minutes. The cookies should appear set around the edges but will still be slightly soft and pliable in the center when you gently press them. It is important to avoid overbaking, as this will result in dry cookies rather than the desired fudgy texture. Once baked, promptly remove the cookie sheets from the oven and let the cookies cool on the sheets for about 5 minutes. This allows them to firm up slightly without drying out. While the cookies are still warm, unwrap the candy cane Hershey’s Kisses. Gently but firmly press one kiss into the very center of each warm brownie crinkle cookie. If a cookie cracks slightly while you’re pressing the kiss into it, don’t worry at all! Simply and gently press the edges back together with your fingers and hold for a few moments; the residual warmth of the cookie will help it seal around the kiss. Allow the cookies to cool completely on a wire rack before serving or storing them, allowing the kisses to fully set.
Recipe Tips and FAQs for Peppermint Brownie Crinkle Cookies
Here are some frequently asked questions and helpful tips to ensure your peppermint brownie crinkle cookies turn out perfectly every time, from preparation to storage.
Making these delicious cookies gluten-free is quite simple and yields fantastic results! You’ll need to use a high-quality 1:1 gluten-free all-purpose flour blend. Many excellent brands are available on the market, but it’s important to ensure the blend you choose already contains xanthan gum. If your chosen blend does not include xanthan gum, you should add about a quarter teaspoon per cup of flour to achieve the best texture and binding properties. This specific recipe has been successfully tested multiple times with gluten-free flour, consistently ensuring delicious results without compromising on the desired fudgy texture or the iconic crinkle effect.
Absolutely! While the candy cane kisses add a wonderful festive touch and a delightful burst of peppermint flavor, they are entirely optional. If you prefer a classic chocolate brownie crinkle cookie, you can simply choose to omit them entirely. Alternatively, feel free to get creative and substitute them with other types of Hershey’s Kisses (such as classic milk chocolate, dark chocolate, or caramel-filled), or even a small square of your favorite chocolate bar. Customizing the center candy allows you to tailor the cookies perfectly to your personal preference or what you have on hand.
The magical crinkle effect, which gives these cookies their distinctive and appealing appearance, is primarily achieved by two key factors. Firstly, ensuring the cookie dough is sufficiently chilled makes it firm enough to handle and prevents excessive spreading during baking. Secondly, and most importantly, it’s the very generous coating of powdered sugar applied to each dough ball before baking. As the cookies bake and naturally expand, the powdered sugar layer cracks, creating that distinct, beautiful white-on-brown crinkled appearance that is the hallmark of these beloved treats. Do not skimp on the powdered sugar coating!
For those moments when you’re short on time but still want perfect cookies, you can significantly speed up the chilling process by placing your cookie dough in the freezer for 30-45 minutes. It’s absolutely crucial to set a timer and keep a close eye on the dough to prevent it from freezing solid, which would make it difficult to roll. Alternatively, the traditional method of refrigerating the dough for about 2 hours also works wonderfully, providing a slightly more gradual and consistent chill. A firmer dough is essential for easier handling and helps prevent excessive spreading during baking, thus promoting the formation of those beautiful crinkles.
To maintain their freshness and delightful texture, store these peppermint brownie crinkle cookies in an airtight container at room temperature for up to 3-4 days. For longer storage, you can freeze the baked cookies. It’s often best to freeze them without the kisses, or add the kisses after thawing, as the kisses can sometimes change texture when frozen and thawed. Place the cookies in a single layer in an airtight freezer-safe container or bag, separating layers with parchment paper, for up to 2 months. Thaw at room temperature before serving. If adding kisses after thawing, gently warm the cookies for a few seconds in the microwave to soften them slightly before pressing in the kisses.
Absolutely! This base recipe is incredibly versatile and open to creative variations. Beyond switching out the Hershey’s Kisses, you can experiment with different extracts to introduce new flavor dimensions, such as a hint of almond extract for a nutty undertone, or even a dash of orange extract for a sophisticated chocolate-orange combination. For added texture and a boost of chocolate, you could also mix in chocolate chips or finely chopped nuts (like walnuts or pecans) into the dough before chilling. Consider adding a pinch of chili powder for a Mexican hot chocolate twist! The possibilities are endless, allowing you to tailor these cookies to any taste preference.
Other Delightful Recipes You May Enjoy
If you loved baking these festive peppermint brownie crinkle cookies and are looking for more delicious treats, you might also enjoy exploring some of these other delightful recipes perfect for any occasion, from cozy weeknights to grand celebrations:
- Chocolate Chip Granola Cookies: A healthier yet equally satisfying cookie packed with wholesome granola and rich chocolate chips, perfect for a quick breakfast or a guilt-free snack.
- 20 Minute Pumpkin Spice Cookies: Quick, easy, and bursting with autumnal flavors, these vegan cookies are incredibly simple to make and are perfect for a cozy treat during the fall season.
- Five Ingredient Crockpot Christmas Crack: An incredibly simple, addictive, and crowd-pleasing holiday candy that comes together effortlessly in your slow cooker, ideal for last-minute party contributions.
Thank you for joining us on this delightful baking adventure! We hope you and your loved ones enjoy these incredible peppermint brownie crinkle cookies as much as we do. If you’ve tried and loved this recipe, we’d be absolutely thrilled to hear about your experience. Don’t forget to follow us on Instagram and Pinterest for even more inspiring and feel-good recipes that nourish you from the inside out and bring joy to your kitchen. Happy baking and happy holidays!

Peppermint Brownie Crinkle Cookies
By Bailey Rhatigan
These brownie crinkle cookies melt in your mouth, offering a rich chocolate flavor with a burst of peppermint, and are adorned with festive candy cane kisses, making them a holiday sensation. Easy to prepare and visually stunning!
Prep Time: 1 hour (includes chilling time)
Cook Time: 10 minutes
Servings: 14 cookies
Pin Recipe |
Rate This Recipe |
Print Recipe
Ingredients
- 1 cup granulated white sugar
- ½ cup unsweetened cocoa powder
- ¼ cup olive oil * (or mild vegetable oil)
- 2 large eggs (room temperature)
- 1½ tsp vanilla extract
- 1¼ tsp baking powder (ensure it’s fresh)
- 1 cup all-purpose flour * (or 1:1 gluten-free baking blend)
- ½ tsp salt
- ⅛ cup powdered sugar (for generous coating)
- 14 candy cane Hershey’s Kisses
Instructions
- Mix Wet Ingredients: In a stand mixer or large bowl, combine granulated sugar, cocoa powder, olive oil, and vanilla extract. Beat until smooth (1-2 mins). Add eggs one at a time, mixing well after each and scraping down the bowl.
- Whisk Dry Ingredients: In a separate medium bowl, whisk together flour, baking powder, and salt until well combined (approx. 30 secs).
- Combine Dough: Gradually add the dry mixture to the wet mixture. Mix on low speed until just combined and no dry streaks remain. Avoid overmixing. The dough will be thick and sticky.
- Chill Dough: Transfer the dough to a smaller bowl, cover tightly with plastic wrap, and freeze for 45 minutes (or refrigerate for 2 hours). While chilling, prepare a shallow bowl with powdered sugar for coating.
- Form and Coat Cookies: Preheat oven to 350°F (175°C). Line baking sheets with parchment paper. Scoop 1-inch balls of chilled dough, roll them generously in powdered sugar to fully coat, and place on baking sheets about 1 inch apart.
- Bake & Add Kisses: Bake for 10 minutes. Cookies should be set at the edges but slightly soft in the center. Let cool on baking sheets for 5 minutes. Unwrap candy cane kisses and gently press one into the center of each warm cookie. If a cookie cracks, gently press it back together. Cool completely on a wire rack.
Notes
- *You may also use neutral vegetable oil (like canola or sunflower oil) if olive oil is not preferred or available.
- *Gluten-free all-purpose flour (a 1:1 baking blend, preferably with xanthan gum) works perfectly as a substitute for traditional flour.
Nutrition (per serving, approximation)
Calories: 166kcal | Carbohydrates: 27g | Protein: 3g | Fat: 6g | Saturated Fat: 2g | Polyunsaturated Fat: 1g | Monounsaturated Fat: 3g | Trans Fat: 1g | Cholesterol: 25mg | Sodium: 135mg | Potassium: 66mg | Fiber: 1g | Sugar: 18g | Vitamin A: 34IU | Calcium: 39mg | Iron: 1mg
Nutrition information is automatically calculated and should be used as an approximation.
Additional Info
Author: Bailey Rhatigan
Prep Time: 1 hour
Cook Time: 10 minutes
Course: Dessert
Cuisine: American
Servings: 14
Calories: 166
Keyword: chocolate, crinkle cookies, gluten free, peppermint, holiday, Christmas