
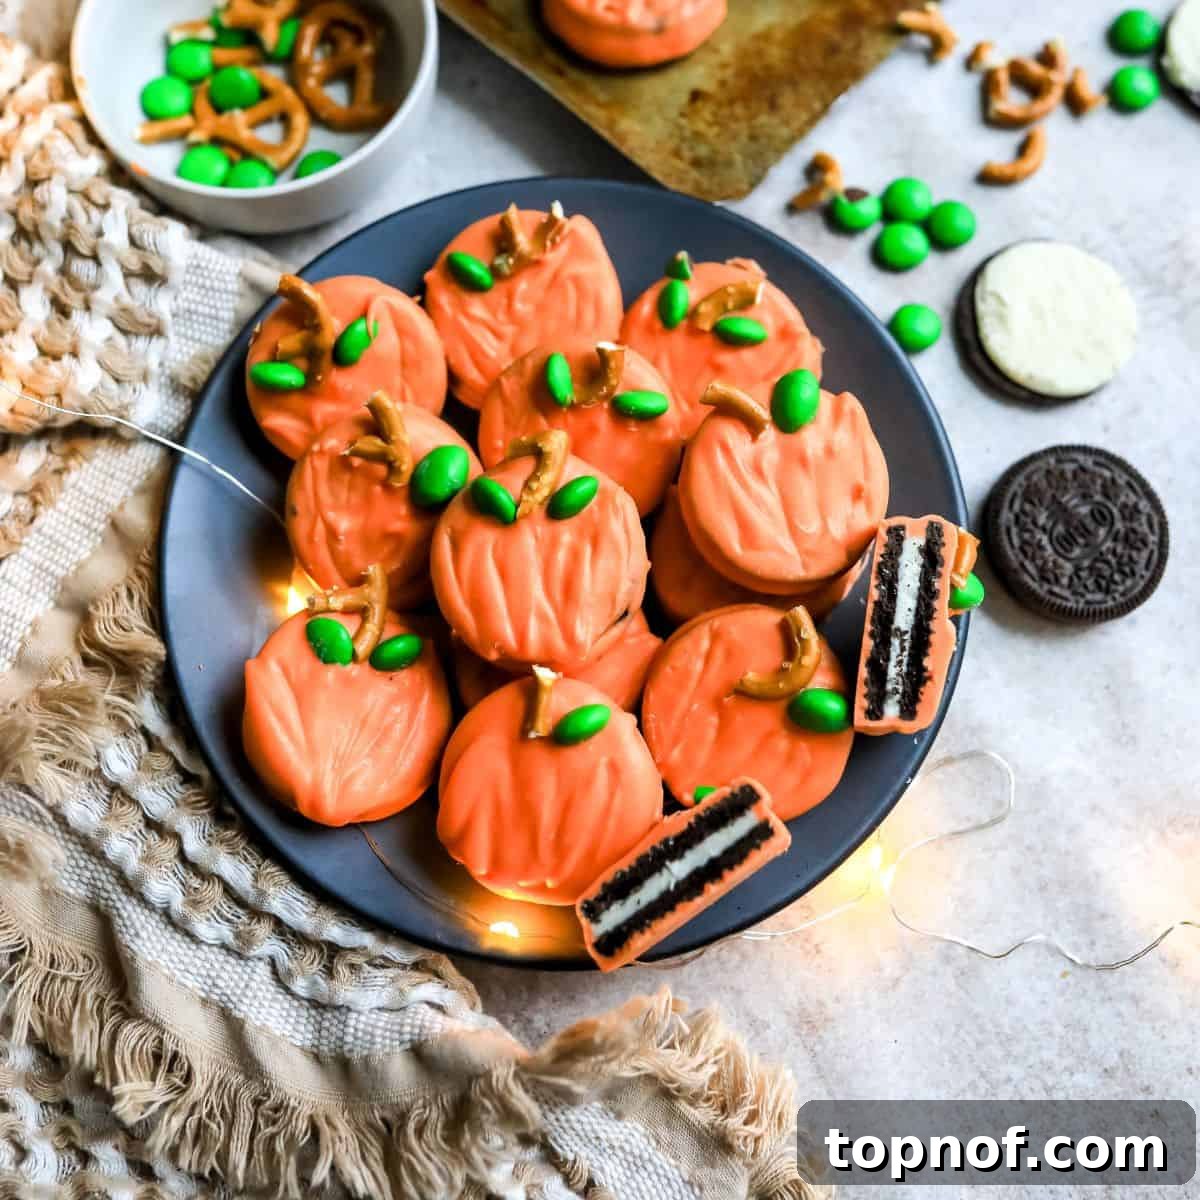
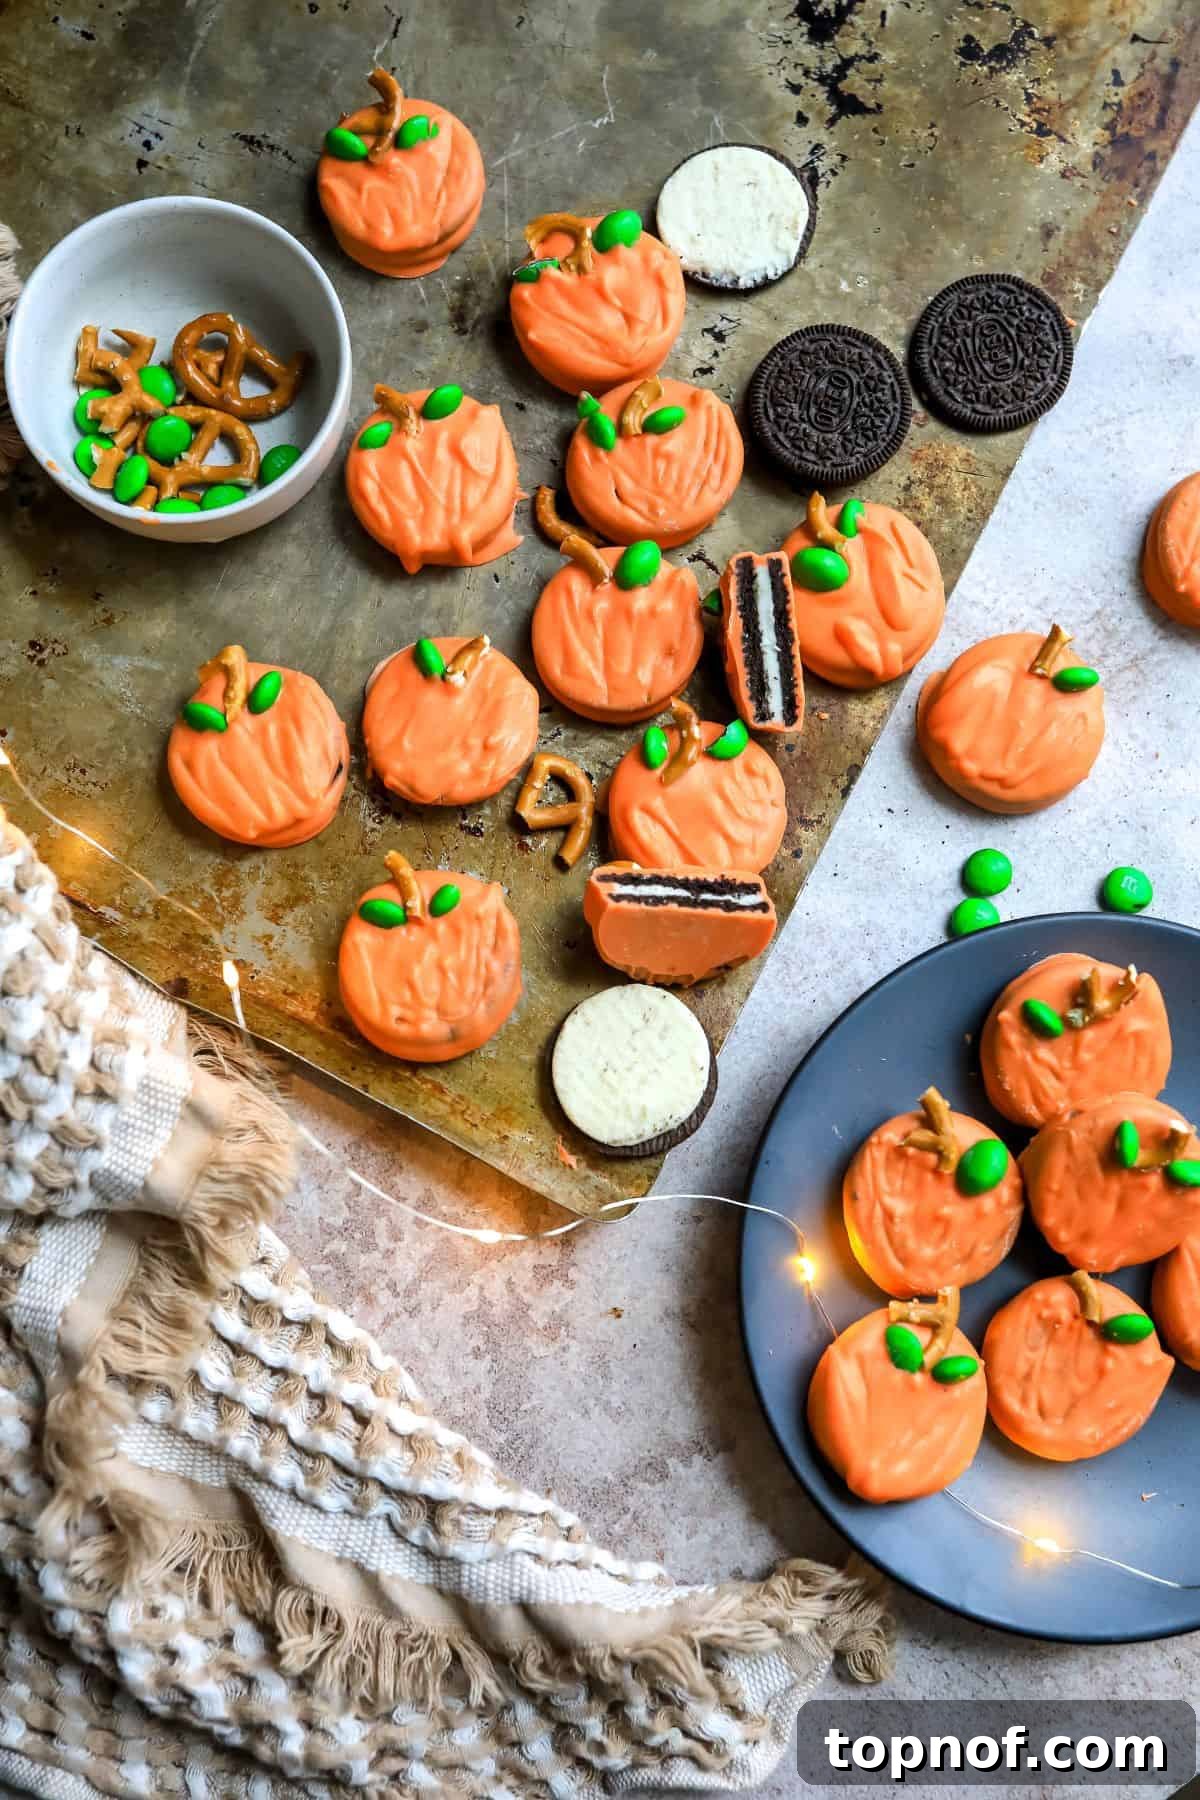
Get ready for the most adorable and effortlessly festive treat of the season: these delightful No-Bake Halloween Pumpkin Cookies! Perfect for fall gatherings, Halloween parties, or simply a fun family activity, these charming pumpkin-shaped cookies are sure to bring smiles to every face. The best part? They require absolutely no baking and can be ready in 20 minutes or less, making them the ultimate last-minute dessert or crafting project with the kids.
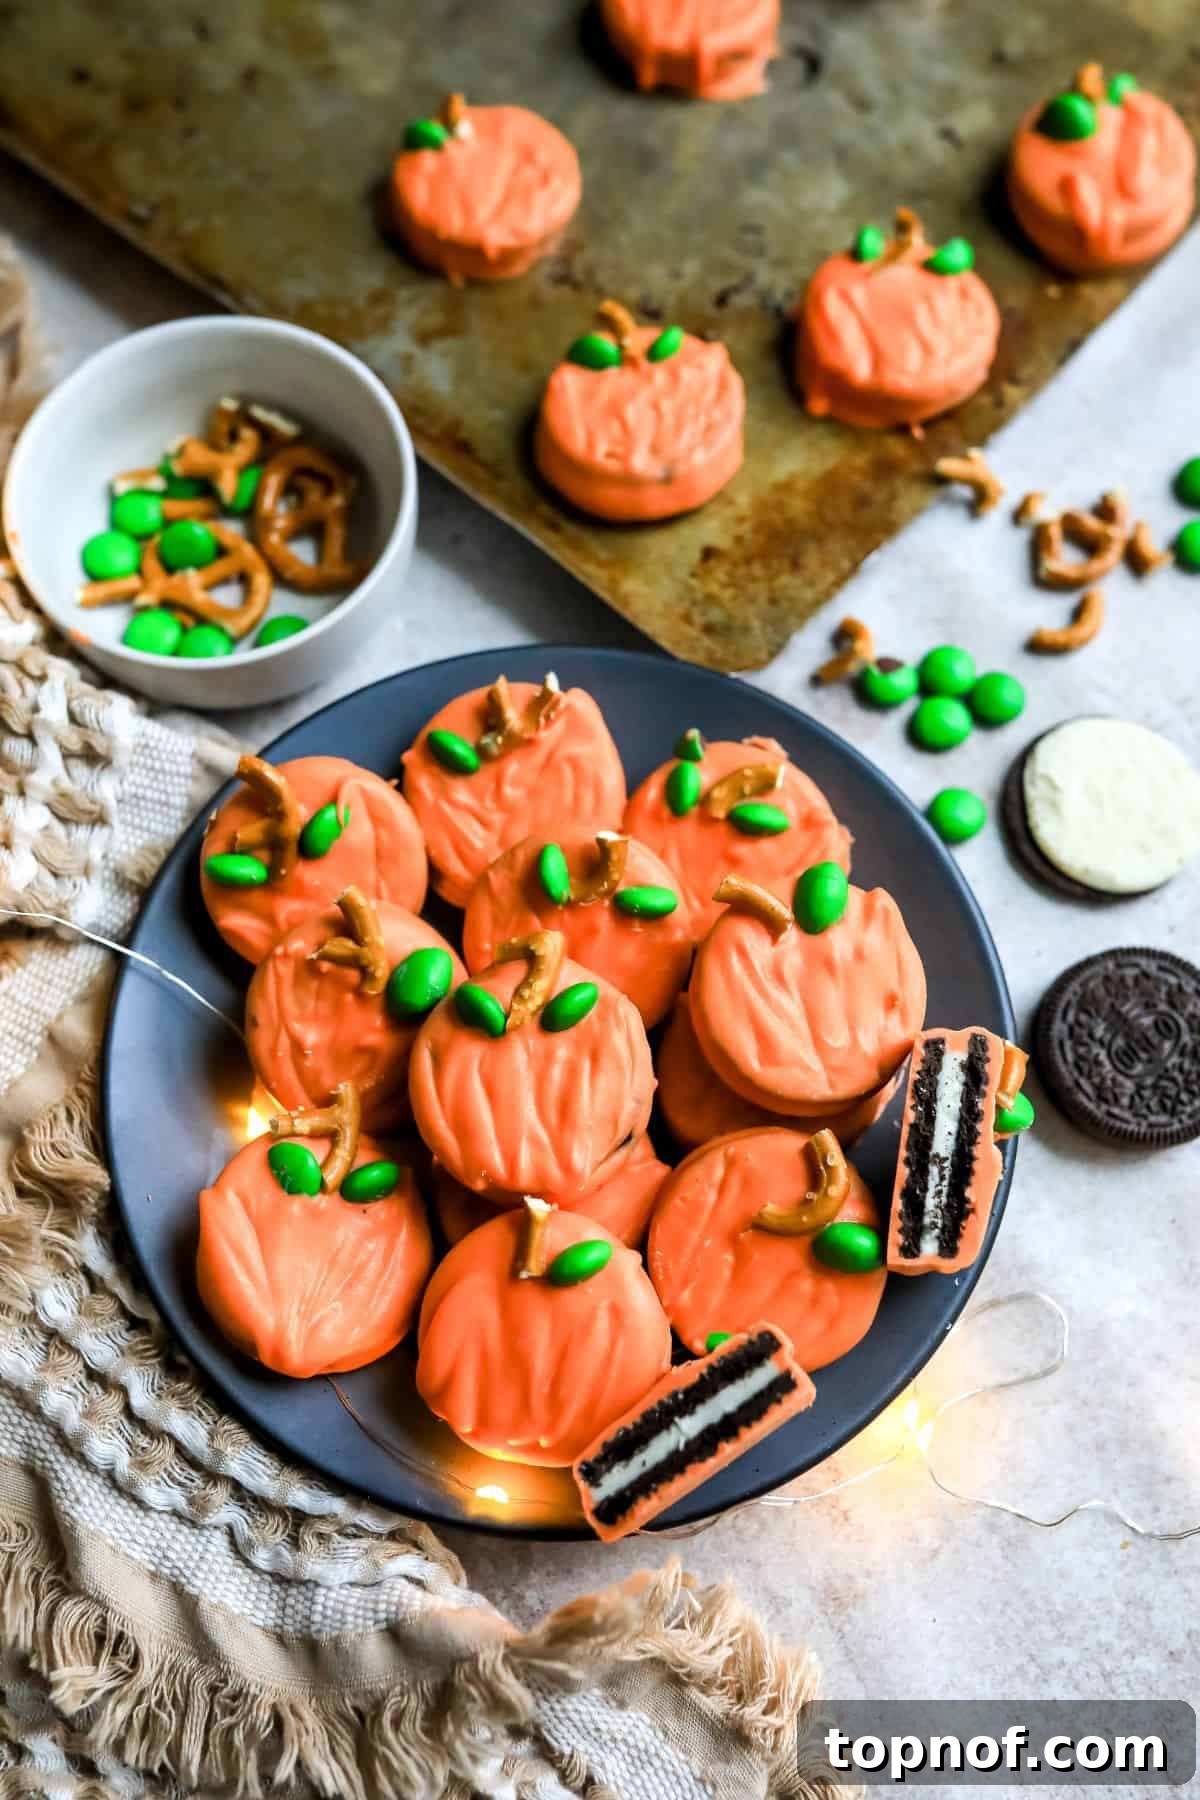
Table of Contents
- Why These No-Bake Halloween Pumpkin Cookies Are a Must-Try
- Essential Ingredients for Your Pumpkin Cookies
- Equipment You’ll Need for No-Bake Success
- Creative Recipe Variations to Customize Your Treats
- Step-by-Step Guide to Making Halloween Pumpkin Cookies
- Expert Tips for Perfect Pumpkin Cookies
- Frequently Asked Questions About Pumpkin Cookies
- Serving and Gifting Your Festive Cookies
- More Sweet Treats to Delight
- Halloween Pumpkin Cookies Recipe
Why These No-Bake Halloween Pumpkin Cookies Are a Must-Try
In the hustle and bustle of the fall season, finding time for elaborate baking can be a challenge. That’s where these incredible Halloween Pumpkin Cookies come in! They embody everything you want in a seasonal treat: simplicity, speed, and undeniable charm. Here’s why they’re about to become your new fall favorite:
- Unbelievably Easy & No Baking Required: Forget about preheating ovens and precise baking times. This recipe cleverly uses store-bought sandwich cookies (like Oreos) as the base, eliminating all baking steps. It’s perfect for beginner bakers, busy parents, or anyone looking for a stress-free dessert.
- Lightning Fast – Ready in 20 Minutes: From start to finish, you can have a batch of these adorable cookies ready in record time. The quick preparation makes them ideal for last-minute party contributions, spontaneous treat cravings, or simply a speedy after-school activity with the kids.
- Fun for All Ages – A Perfect Family Activity: Decorating these pumpkin cookies is where the real fun begins! Kids will love dipping the cookies and adding the pretzel stems and M&M leaves. It’s a wonderful way to bond with family and create delicious memories together without the mess and complexity of traditional baking.
- Versatile Fall Festive Treat: While designed with Halloween in mind, these charming pumpkin cookies are perfect throughout the entire autumn season. Bring them to school parties, fall festivals, or even as a unique and cute addition to your Thanksgiving dessert spread. Their delightful appearance makes them suitable for any fall celebration.
- Customizable & Creative: Don’t just stop at basic pumpkins! These cookies offer a fantastic canvas for creativity. You can easily add different “carved” faces using edible markers or vary the toppings, making each cookie unique.
Looking for more fall inspiration? Be sure to check out my Insanely Easy Apple Pastries and my Healthier Vegan Pumpkin Spice Cookies for other seasonal delights!
Essential Ingredients for Your Pumpkin Cookies
Crafting these adorable pumpkin cookies requires just a handful of readily available ingredients. The beauty of this recipe lies in its simplicity and the delightful results you achieve with minimal effort.
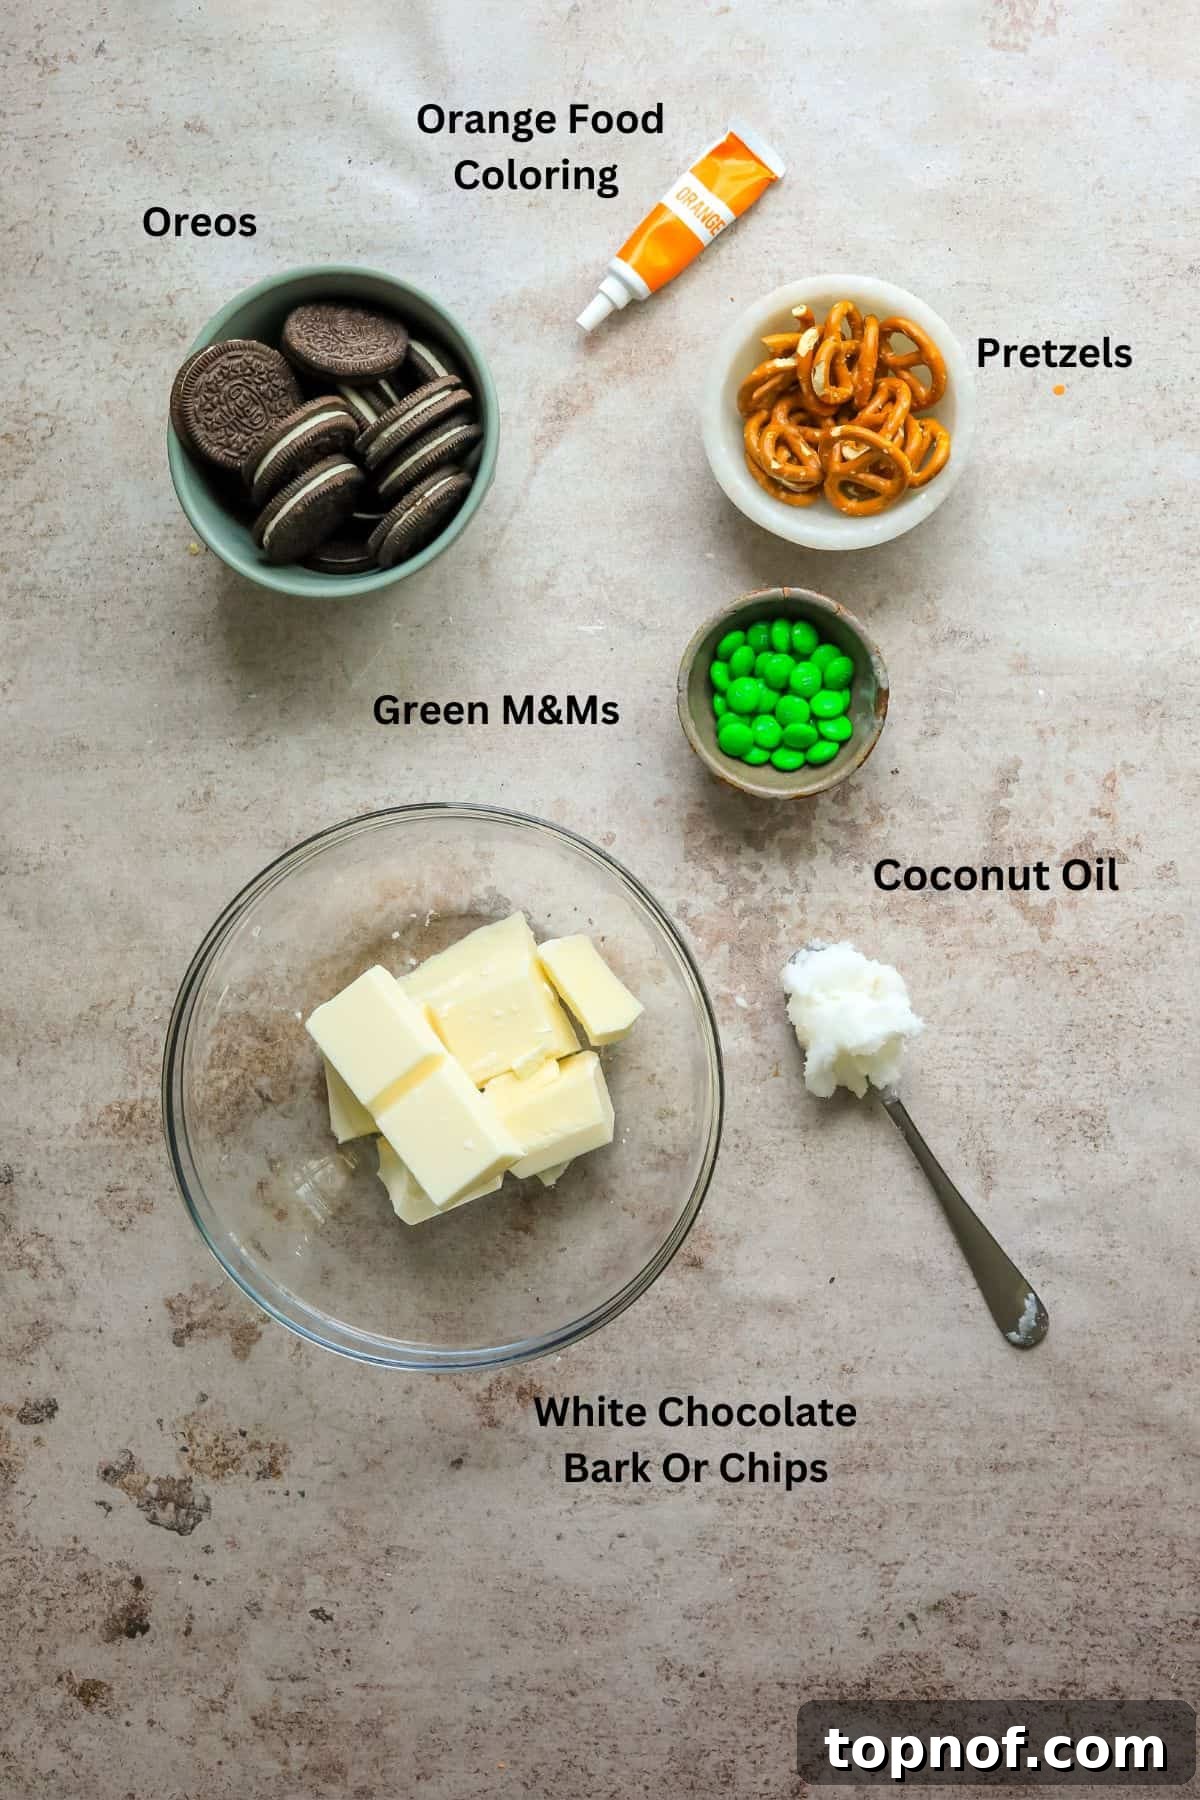
- Oreo Sandwich Cookies (30-40 count): These are the star of our show, forming the base of your pumpkin. Any round sandwich-style cookie will work, but Oreos offer that classic chocolatey crunch. Opt for Double Stuffed Oreos for a thicker, more rounded pumpkin appearance.
- White Chocolate Bark (1¾ cups): White chocolate is crucial here as it provides a neutral base to achieve that vibrant orange color. You can use white chocolate bark, chips, or melting wafers – whatever is easiest to find and melt.
- Coconut Oil (3 Tbsp, plus more as needed): This ingredient is key to achieving a smooth, spreadable consistency for your melted chocolate. It helps thin out the chocolate, making it easier to dip the cookies evenly.
- Orange Food Coloring or Icing Gel (1-2 tsp): To transform your white chocolate into a perfect pumpkin hue! Gel food coloring is often preferred for chocolate as it’s more concentrated and less likely to seize the chocolate compared to liquid food coloring. You’ll find this in the baking aisle of your grocery store.
- Green Milk Candy Coated Chocolates (¼ cup, like M&Ms): These tiny green candies are perfect for creating the illusion of pumpkin leaves. You’ll carefully cut them in half to get that authentic leaf shape.
- Pretzel Pieces (¼ cup): Broken pretzel sticks or small braided pretzels make fantastic, edible pumpkin stems, adding a delightful salty crunch to your sweet treat.
Exact measurements for all ingredients are conveniently located in the detailed recipe card below.
Equipment You’ll Need for No-Bake Success
One of the many benefits of a no-bake recipe is the minimal equipment required. You likely already have most of these items in your kitchen, making these pumpkin cookies even easier to whip up!
- Large Microwave-Safe Mixing Bowl: Essential for melting your white chocolate and coconut oil. A large bowl provides ample space for mixing and dipping.
- Fork: The perfect tool for dipping your cookies into the melted chocolate, allowing excess chocolate to drip off easily.
- Parchment Paper-Lined Baking Sheet: Crucial for placing your coated cookies to harden without sticking. The parchment paper ensures easy removal and cleanup.
- Sharp Knife: For carefully cutting the green M&Ms in half to create those realistic pumpkin leaves.
- Small Bowls: Handy for separating your prepared pretzel stems and M&M leaves before you start assembling.
- Toothpick or Small Knife: For gently scoring lines onto your chocolate-coated cookies to mimic the natural ridges of a pumpkin.
Creative Recipe Variations to Customize Your Treats
While the classic Halloween Pumpkin Cookies are utterly delightful, this recipe is incredibly adaptable, allowing you to get creative and tailor them to your taste or any occasion. Here are some fantastic variations to inspire you:
- Cookie Base Alternatives:
- Oreo Flavors: Experiment with different Oreo flavors! Golden Oreos could give a lighter base, or consider seasonal flavors if you can find them.
- Other Sandwich Cookies: Don’t limit yourself to Oreos. Any round sandwich-style cookie, such as generic chocolate sandwich cookies or even gluten-free alternatives, will work beautifully.
- Peanut Butter Cups: For a completely different flavor profile and texture, try using peanut butter cups as your base. Their rounded shape and sturdy nature make them an excellent no-bake candidate. The combination of peanut butter and chocolate with the orange coating is heavenly!
- Chocolate Coating Options:
- Melting Wafers or Candy Melts: Instead of white chocolate bark or chips, consider using colored candy melts (specifically orange) for an even easier and guaranteed vibrant hue. They often melt more smoothly and harden quickly.
- Dark Chocolate Drizzle: Once the orange coating has set, you could drizzle a little melted dark chocolate over the top for an extra layer of flavor and visual appeal.
- Food Coloring: While orange is classic, you could use green for “slime monsters” or purple for “witches’ brew” treats!
- Oil Alternatives for Thinning Chocolate:
- Canola Oil or Vegetable Oil: While coconut oil is recommended for its quick hardening properties, you can use other neutral oils like canola or vegetable oil. Be aware that the chocolate may take slightly longer to set and might require refrigeration to firm up completely, especially in warmer environments.
- Stems and Leaves Creativity:
- Pretzel Varieties: Use mini pretzel sticks, thin pretzel rods, or even small pieces of broken pretzel knots for the stems.
- Candy Leaves: If green M&Ms are hard to find, green mini chocolate chips, green sprinkles, or even small pieces of green fruit leather cut into leaf shapes can work.
- Chocolate Stems: Dip tiny pretzel pieces into melted brown chocolate before adding them for a more realistic “woody” stem look.
- Decorative Touches:
- Edible Markers or Gel Icing: For the ultimate Halloween look, once your cookies have set, use a black edible food marker or black icing gel to draw spooky pumpkin faces – triangles for eyes, a jagged mouth, or even a friendly smile!
- Sprinkles: Add a sprinkle of orange, black, or even autumn-themed sprinkles to the wet chocolate for extra sparkle and texture.
- Candy Eyes: Tiny edible candy eyes can instantly turn your pumpkin into a whimsical monster!
- Cinnamon or Pumpkin Spice: A tiny pinch of cinnamon or pumpkin pie spice added to the melted white chocolate can infuse a subtle, warm fall flavor.
These variations prove that these no-bake pumpkin cookies are not just easy but also incredibly versatile, allowing you to unleash your inner pastry artist!
Step-by-Step Guide to Making Halloween Pumpkin Cookies
Creating these festive pumpkin cookies is a straightforward and enjoyable process. Follow these simple steps to ensure your no-bake treats turn out perfectly every time.
- Prepare Your Toppings and Chocolate:
- First, gather all your ingredients to ensure a smooth workflow.
- Carefully take your green M&Ms and cut them in half with a sharp knife. Set these aside in a small bowl; they will be your pumpkin leaves.
- Break your pretzels into small “stems” – aim for pieces about ½ to 1 inch long. Place these in another small bowl.
- In a large microwave-safe bowl, combine the white chocolate bark (or chips/wafers) and the coconut oil.
- Microwave this mixture for 30 seconds. Remove and stir well.
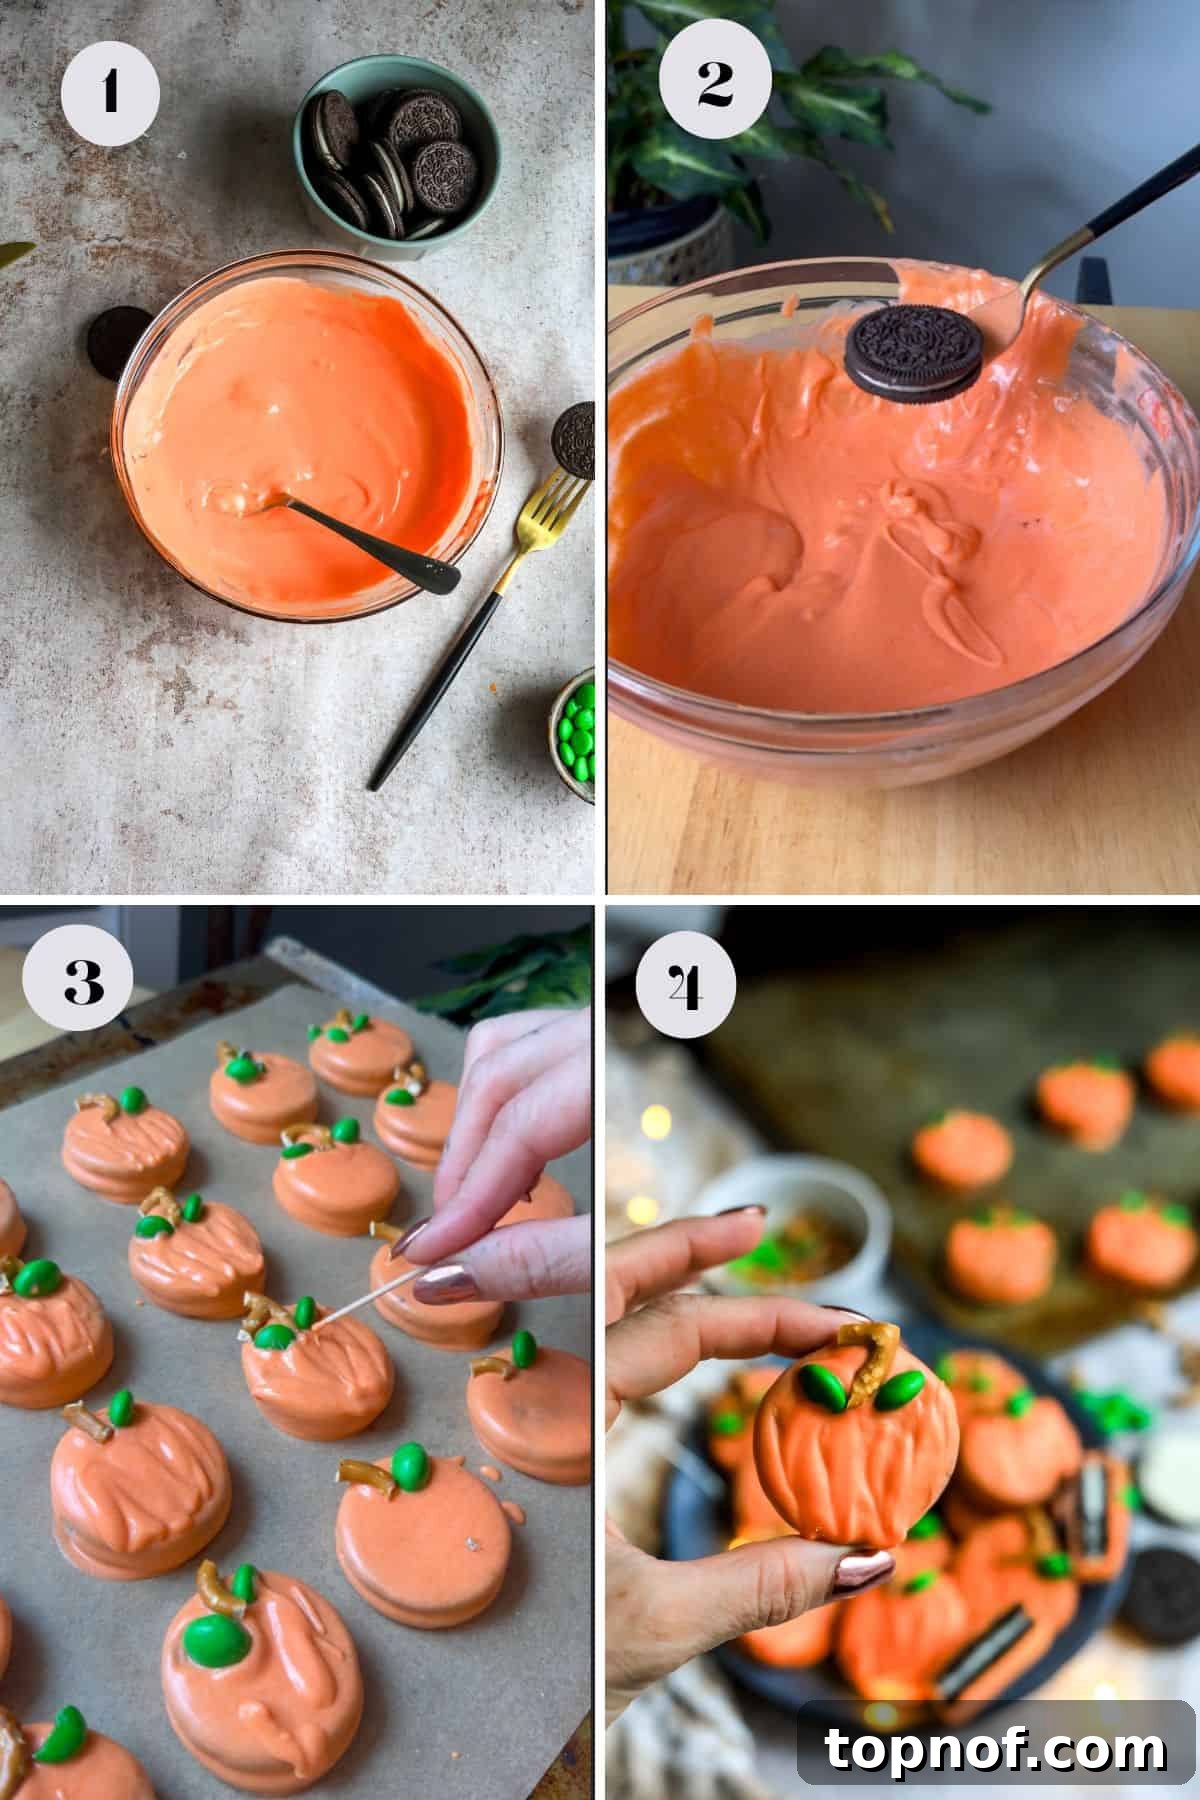
- Add 1 teaspoon of the orange food coloring or icing gel to the chocolate mixture. Stir thoroughly until the color is evenly distributed.
- Continue microwaving in 30-second increments, stirring vigorously after each, until the chocolate is nicely melted, thin, and runny. If the color isn’t vibrant enough, add a little more food coloring, a few drops at a time, until you reach your desired pumpkin orange. If the chocolate becomes too thick, add another ½ to 1 tablespoon of coconut oil and stir until smooth.
- Dip the Cookies:
- Prepare a baking sheet by lining it with parchment paper; keep it close by.
- Take an Oreo cookie and carefully place it on a fork.
- Gently immerse the cookie into the melted orange chocolate, ensuring it’s fully coated.
- Carefully lift the fork with the coated cookie out of the chocolate. Gently tap the fork against the edge of the bowl to shake off any excess chocolate. This step is crucial for a smooth finish and prevents puddles of chocolate on your parchment paper.
- Before placing the cookie down, run the bottom of the fork along the bowl’s rim to clean off any remaining drips.
- Carefully transfer the chocolate-coated cookie onto the prepared parchment-lined baking sheet.
- Decorate and Set:
- Continue dipping and placing all your cookies onto the parchment paper. Work relatively quickly while the chocolate is still wet enough for decorations to adhere.
- Once a cookie is on the parchment, immediately place a small pretzel piece at the top center of the cookie to create the pumpkin stem.
- Next, very carefully add two green M&M halves to either side of the pretzel stem, near the top, to represent the leaves.
- While the chocolate is still soft, use a toothpick or the tip of a small knife to gently “rough up” or score lines into the orange coating, mimicking the natural ridges of a pumpkin.
- Once all cookies are dipped and decorated, carefully transfer the baking sheet to the refrigerator or freezer for about 10-15 minutes. This chilling time allows the chocolate to harden quickly, ensuring your decorations are set.
- Once firm, your beautiful no-bake Halloween Pumpkin Cookies are ready to be enjoyed!
Expert Tips for Perfect Pumpkin Cookies
Achieving perfectly adorable and delicious no-bake pumpkin cookies is simple with a few insider tricks. Keep these tips in mind to ensure your treats are a smashing success!
- Choose Your Cookies Wisely: Whenever possible, opt for Double Stuffed Oreos. Their thicker filling provides a more rounded, plump base, which lends itself beautifully to the pumpkin shape. If Oreos aren’t your preference, consider using peanut butter cups as an alternative base for a different flavor and texture.
- Mastering Chocolate Melting: The key to a smooth, dippable coating is in the chocolate.
- Add Color Early: Always incorporate the orange food coloring *before* your white chocolate is completely melted. This allows the color to disperse evenly and reduces the risk of the chocolate seizing or thickening prematurely, which can happen if liquid coloring is added to fully melted chocolate.
- Microwave in Increments: Microwave the chocolate and coconut oil in short bursts (30 seconds at a time), stirring thoroughly after each. This prevents the chocolate from overheating and burning. If the chocolate becomes too thick, add a small amount of extra coconut oil (½ to 1 tablespoon) and stir until you achieve a smooth, runny consistency.
- Efficient Preparation is Key: To ensure your chocolate doesn’t harden before you’ve finished decorating, have all your embellishments prepped and ready. Slice your green M&Ms, break your pretzels into stems, and line your cookie sheet with parchment paper *before* you start melting the chocolate. This workflow allows you to dip and decorate each cookie while the coating is still wet and pliable.
- Work with Patience: While these cookies are quick to make, taking a moment of care for each one will yield the best results. Gentle tapping to remove excess chocolate and careful placement of toppings makes a big difference in the final look.
- Storage Matters: Once hardened, store your pumpkin cookies in an airtight container at room temperature if your climate is cool and dry. If you live in a warmer, humid environment (like Florida), refrigerate them to prevent the coconut oil from melting and making the coating sticky.
- Make Ahead Option: These cookies hold up wonderfully, making them a fantastic make-ahead treat. Prepare them a day or two in advance and store them properly until your event.
Frequently Asked Questions About Pumpkin Cookies
It depends on your climate. If you live in a cooler, dry climate, refrigeration is generally not necessary, and they can be stored in an airtight container at room temperature. However, if you’re in a warm or humid environment (like Florida), it’s best to refrigerate them. This prevents the coconut oil in the chocolate coating from melting and becoming sticky, ensuring your cookies stay firm and presentable.
The main culprit for seizing chocolate is often moisture or overheating.
First tip: Always add your food coloring (especially gel-based) *before* the chocolate is completely melted. Adding it to fully melted chocolate can sometimes cause it to seize up and thicken instantly.
Next: If your chocolate is still too thick even after adding the coloring, simply add more coconut oil, about 1 tablespoon at a time. Stir it in thoroughly and microwave for another 15-20 seconds if needed, until you reach a smooth, dippable consistency. Patience and incremental additions are key.
Absolutely! Adding faces is a fantastic way to make them even more festive and personalized. Once the orange chocolate coating has fully hardened, use a black edible food marker or black edible styling gel (often found in the baking aisle) to draw cute, spooky, or silly pumpkin carved faces. Let the faces dry completely before stacking or storing.
Yes, these adorable pumpkin cookies are perfect for Thanksgiving! Their charming pumpkin shape and festive fall colors make them a delightful addition to any autumn celebration, including your Thanksgiving dessert table. They offer a light, fun alternative or complement to traditional pies.
When stored in an airtight container, these cookies will typically last for up to 5-7 days at room temperature (in a cool, dry climate) or up to 2 weeks in the refrigerator. For best quality and freshness, it’s recommended to consume them within a week.
Serving and Gifting Your Festive Cookies
Once your charming Halloween Pumpkin Cookies have hardened, they’re ready to be shared and enjoyed! Here are some ideas for serving and gifting them:
- Party Platter Perfection: Arrange them artfully on a Halloween-themed platter alongside other fall treats like candy corn, mini chocolate bars, or apple slices. Their vibrant orange color makes them a standout centerpiece.
- Individual Treat Bags: For school parties, trick-or-treaters, or party favors, place 1-2 cookies in clear cellophane bags, tie with an orange or black ribbon, and add a small custom tag.
- Coffee & Hot Chocolate Companion: These sweet treats pair wonderfully with a warm mug of coffee, hot chocolate, or a pumpkin spice latte.
- Gifting to Neighbors and Friends: Pack a small box or tin with an assortment of your pumpkin cookies. They make a thoughtful, homemade gift that captures the spirit of the season.
- Dessert Table Addition: At Thanksgiving or other fall gatherings, stack them on a cake stand or scatter them around larger desserts for an extra festive touch.
More Sweet Treats to Delight
If you loved making these easy no-bake pumpkin cookies, you’re in for a treat! Explore more delightful recipes that are perfect for satisfying your sweet tooth and impressing your guests with minimal effort.
Discover More Delicious Desserts
Dessert
No Bake Peanut Butter Pie
Indulge in a rich, creamy, and incredibly easy peanut butter pie that requires no oven time!
Breakfast
Chocolate Chip Bread Pudding
A comforting classic, this chocolate chip bread pudding is perfect for breakfast or dessert, offering a cozy and sweet delight.
Dessert
Biscoff Blondies
Experience the unique spiced cookie butter flavor in these chewy and irresistible Biscoff blondies.
Dessert
Strawberry Cheesecake Cookies
Soft, chewy, and bursting with the sweet tang of strawberry and creamy cheesecake flavor.
We hope you enjoy creating these easy and festive Halloween Pumpkin Cookies as much as we do! If you loved this recipe, please let us know in the comments below. Also, be sure to follow us on Instagram & Pinterest for even more fun recipes to make you feel good from the inside out. Thanks for being here and happy fall baking (or no-baking)!

No-Bake Halloween Pumpkin Cookies
Bailey Rhatigan
20 minutes
15 servings
Rate Recipe
Print Recipe
Equipment
-
fork
-
mixing bowls
-
Parchment paper-lined baking sheet
-
Sharp knife
-
Toothpick or small knife
Ingredients
-
30-40
Oreo cookies, *see notes for variations -
1¾
cup
white chocolate bark , or chips/melting wafers -
1-2
tsp
orange food coloring, gel recommended -
3
Tbsp
coconut oil , *see notes, more as needed -
¼
cup
green milk candy coated chocolates , *like M&Ms, cut in half -
¼
cup
pretzel pieces , for stems
Instructions
-
Gather all ingredients. Carefully cut the green M&Ms in half with a sharp knife and set them aside. Break pretzels into small “stems” and set aside. In a large bowl, combine white chocolate and coconut oil. Microwave for 30 seconds, stir, then add orange food coloring. Continue microwaving in 30-second increments, stirring after each, until the chocolate is smooth, thin, and desired color; add more coconut oil or coloring if needed.
-
Line a cookie sheet with parchment paper. Place an Oreo on a fork and gently dunk it into the orange chocolate, ensuring full coverage. Gently tap the fork on the bowl’s edge to remove excess chocolate. Wipe the bottom of the fork along the bowl’s rim before carefully placing the coated cookie onto the parchment paper. Repeat for all cookies.
-
Immediately place a small pretzel piece on top of each cookie for the stem. Carefully add green M&M halves to either side of the pretzel. Using a toothpick or small knife, gently score lines onto the chocolate to mimic pumpkin ridges. Transfer the cookie sheet to the fridge or freezer for about 10-15 minutes to harden. Enjoy your festive pumpkin cookies!
Notes
*The number of Oreos you can coat may vary depending on how thick or thin your white chocolate mixture is.
*You may need slightly more or less coconut oil to achieve the right consistency; please read the instructions carefully. While coconut oil is best for quick setting, you can use canola oil, but the chocolate may not solidify as easily and will likely require refrigeration.
Nutrition
Serving:
2
cookies
|
Calories:
240
kcal
|
Carbohydrates:
30
g
|
Protein:
2
g
|
Fat:
13
g
|
Saturated Fat:
7
g
|
Polyunsaturated Fat:
1
g
|
Monounsaturated Fat:
4
g
|
Trans Fat:
0.02
g
|
Cholesterol:
4
mg
|
Sodium:
126
mg
|
Potassium:
103
mg
|
Fiber:
1
g
|
Sugar:
21
g
|
Vitamin A:
13
IU
|
Vitamin C:
0.1
mg
|
Calcium:
40
mg
|
Iron:
3
mg
Nutrition information is automatically calculated, so should only be used as an approximation.
Additional Info
Bailey Rhatigan
20 minutes
Dessert, Snack
American
15
240
20 minute, Cookies, dessert, Halloween, No-Bake, Pumpkin
Like this recipe? Leave a comment below!