
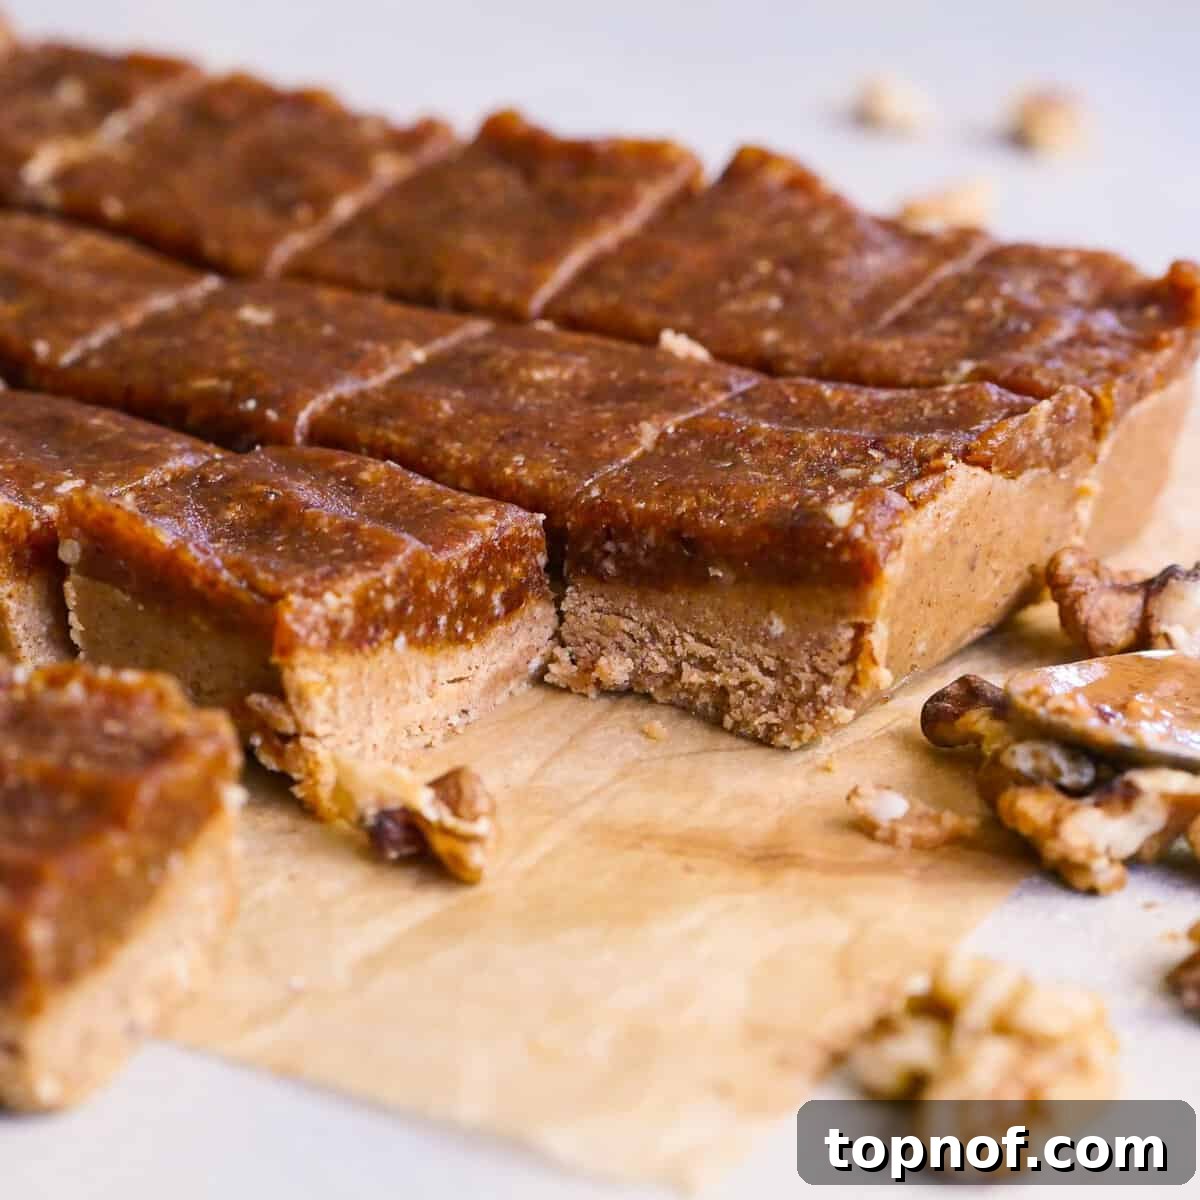
Discover the ultimate guilt-free indulgence with these incredibly chewy no-bake blondies. A true summer sensation, these delightful date bars are packed with wholesome ingredients, require minimal effort, and deliver an unforgettable taste experience. If you’re searching for a healthy treat that satisfies your sweet tooth without the need for an oven, look no further!
These no-bake blondies brilliantly capture the essence of a decadent candy bar, offering a perfect harmony of sweet and salty notes. Their texture is wonderfully soft and delightfully chewy, making each bite a pure pleasure. The natural sweetness of dates shines through, imparting a rich, balanced flavor reminiscent of caramel – truly captivating for any dessert lover. Complemented by the satisfying crunch and nutty aroma of walnuts, these bars are a textural masterpiece. It’s no wonder they become an instant household favorite; once you try them, you’ll find yourself reaching for another batch almost immediately.
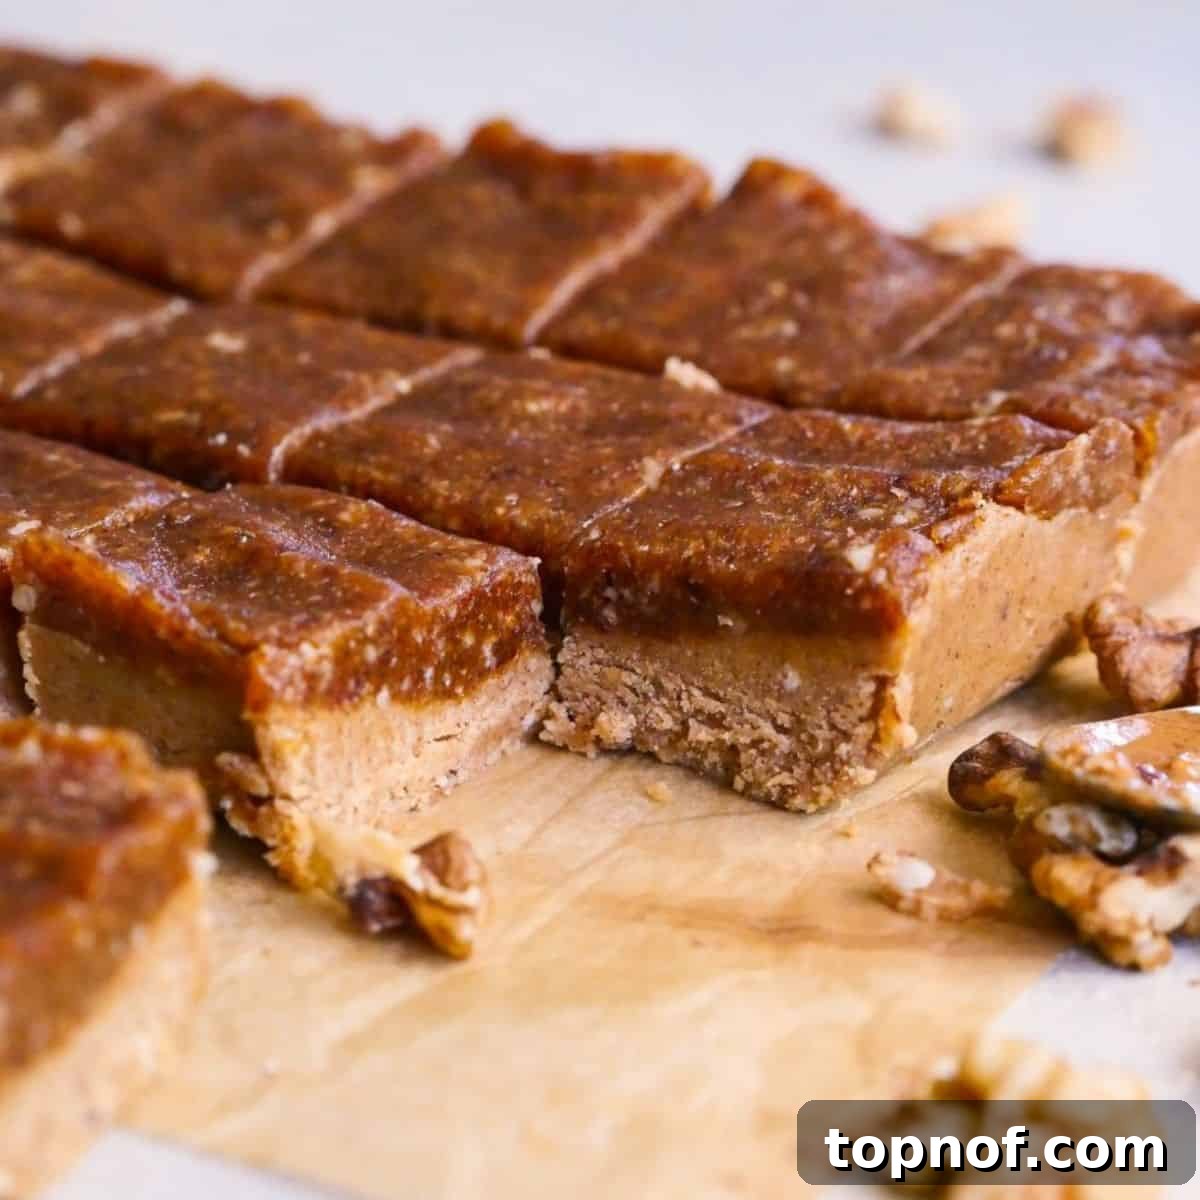
Table of Contents
- Why Make These Chewy No Bake Blondies
- Ingredients for Irresistible Blondies
- Crafting Your No-Bake Blondies: Step-by-Step
- Pro Tips for Perfect No-Bake Blondies
- Make Ahead & Storage Guidelines
- Frequently Asked Questions
- Other Delightful Dessert Recipes to Explore
Why Make These Chewy No Bake Blondies
In a world of complex recipes and oven-bound desserts, these chewy no-bake blondies stand out as a beacon of simplicity and flavor. They’re not just easy; they’re a smart choice for anyone looking for a wholesome yet delicious treat. Here’s why these blondies will become your new go-to recipe:
Effortless Preparation: No Oven Required!
The most compelling reason to whip up a batch of these blondies is their incredible ease of preparation. Forget preheating your oven or painstakingly monitoring baking times. These bars come together in approximately 10 minutes of active prep time, making them ideal for busy schedules, warm weather, or when you simply don’t want to spend hours in the kitchen. All you need are a few common kitchen tools and a desire for something sweet.
Allergy-Friendly & Wholesome Ingredients
Catering to various dietary needs has never been more delicious! These blondies are naturally:
- Plant-Based: Made entirely from plant-derived ingredients, they are perfect for vegans or those looking to incorporate more plant-based foods into their diet.
- Gluten-Free: Utilizing almond flour as the base, these bars are naturally free of gluten, making them a safe and enjoyable option for individuals with gluten sensitivities or celiac disease.
- Refined Sugar-Free: Sweetness comes exclusively from natural sources – dates and maple syrup. This means no artificial sweeteners or processed sugars, just pure, wholesome goodness. Dates, in particular, offer a rich sweetness along with fiber and essential nutrients, contributing to a truly healthy dessert option.
This commitment to clean ingredients ensures that you can indulge without the guilt, enjoying a treat that truly nourishes your body.
Quick to Create, Long-Lasting Freshness
Beyond their speedy preparation, these blondie bars are incredibly practical. Once assembled, they firm up beautifully in the refrigerator or freezer. In the fridge, they maintain their perfect chewy texture for about a week, providing a convenient grab-and-go snack or dessert throughout your busy week. For longer enjoyment, simply store them in an airtight container in the freezer, where they can last for several weeks. This make-ahead capability is a lifesaver for meal prepping or unexpected cravings.
Ingredients for Irresistible Blondies
The magic of these no-bake blondies lies in a concise list of simple, wholesome ingredients that work in harmony to create their delightful flavor and texture. Each component plays a crucial role:
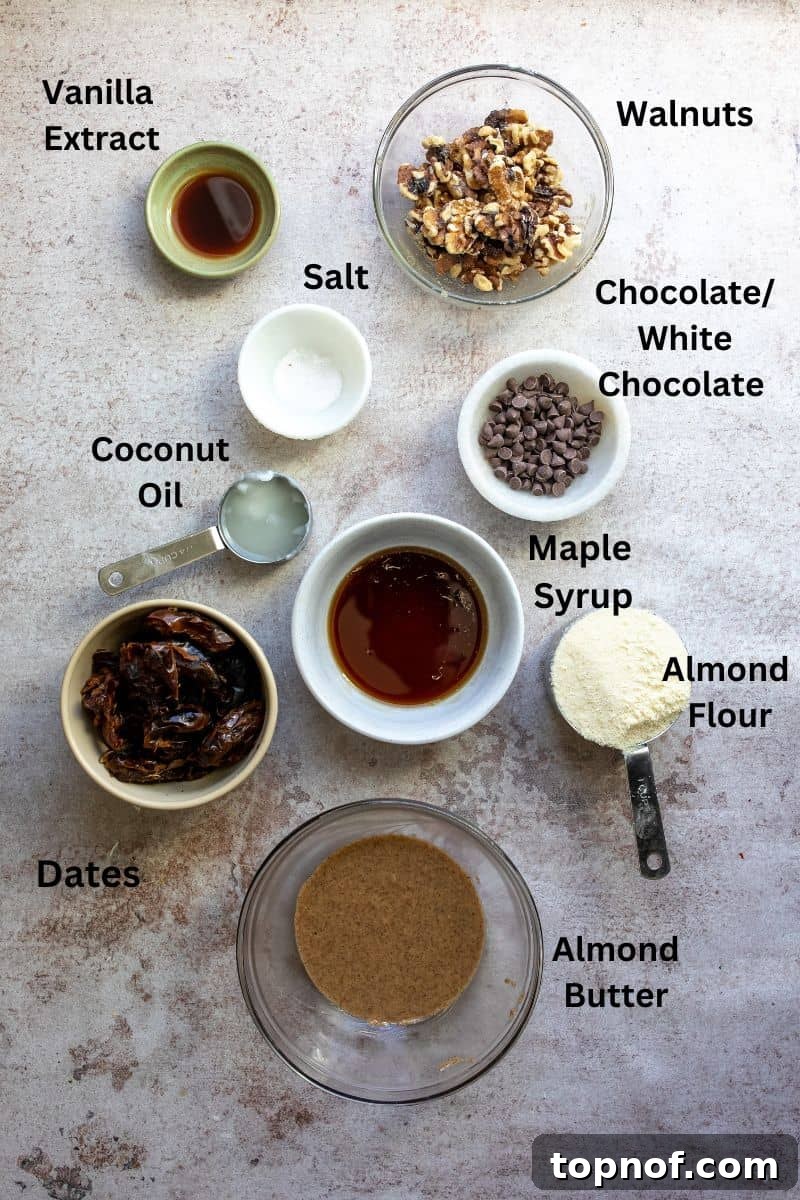
- Almond Flour: This forms the foundational layer, providing a wonderfully firm yet tender base that’s easy to bite into. Unlike other flours, almond flour maintains a soft, pliable texture even when uncooked, making it ideal for no-bake applications. It also contributes healthy fats and protein, enhancing the nutritional profile of the bars.
- Almond Butter: Chosen for its mild, creamy flavor, almond butter acts as a binder and adds richness without overpowering the delicate taste of dates and walnuts. It ensures the base layer holds together beautifully. While peanut butter can be used, its stronger flavor profile might dominate, so stick with almond butter for the intended nuanced taste.
- Coconut Oil (Melted): Essential for binding the base ingredients and helping the bars set firmly when chilled. Make sure it’s melted for easy incorporation and a smooth mixture. Coconut oil also contributes a subtle, natural sweetness and healthy medium-chain triglycerides.
- Vanilla Extract: A touch of vanilla extract is a game-changer, enhancing all the other flavors and adding a comforting, sweet aroma. It gives the blondies a richer, more complex taste that elevates them from simple date bars to a sophisticated dessert.
- Maple Syrup: This natural liquid sweetener not only binds the ingredients but also infuses the bars with a delightful, nutty sweetness. Its distinct flavor pairs perfectly with walnuts and dates, creating a truly irresistible treat. Opt for pure maple syrup for the best flavor and nutritional benefits.
- Salt: A pinch of sea salt is critical for balancing the sweetness and intensifying all the other flavors. It brings out the inherent richness of the dates and the nutty notes of the walnuts, transforming the blondies from merely sweet to truly complex and satisfying. Don’t skip this ingredient, as it adds that essential “pop” that makes these bars so addictive.
- Walnuts: These provide a fantastic textural contrast and a robust nutty flavor to the top layer. Their natural oils and slight bitterness complement the sweetness of the dates perfectly. If you prefer, other nuts like pecans or cashews can be used, but ensure they are easy to blend and chew for the best experience.
- Dates: The star of the show! Dates are the primary natural sweetener and binder for the top layer. When processed, they create a sticky, caramel-like paste that gives the blondies their signature chewy texture and rich, deep sweetness. Medjool dates are highly recommended for their soft, plump texture and intense flavor.
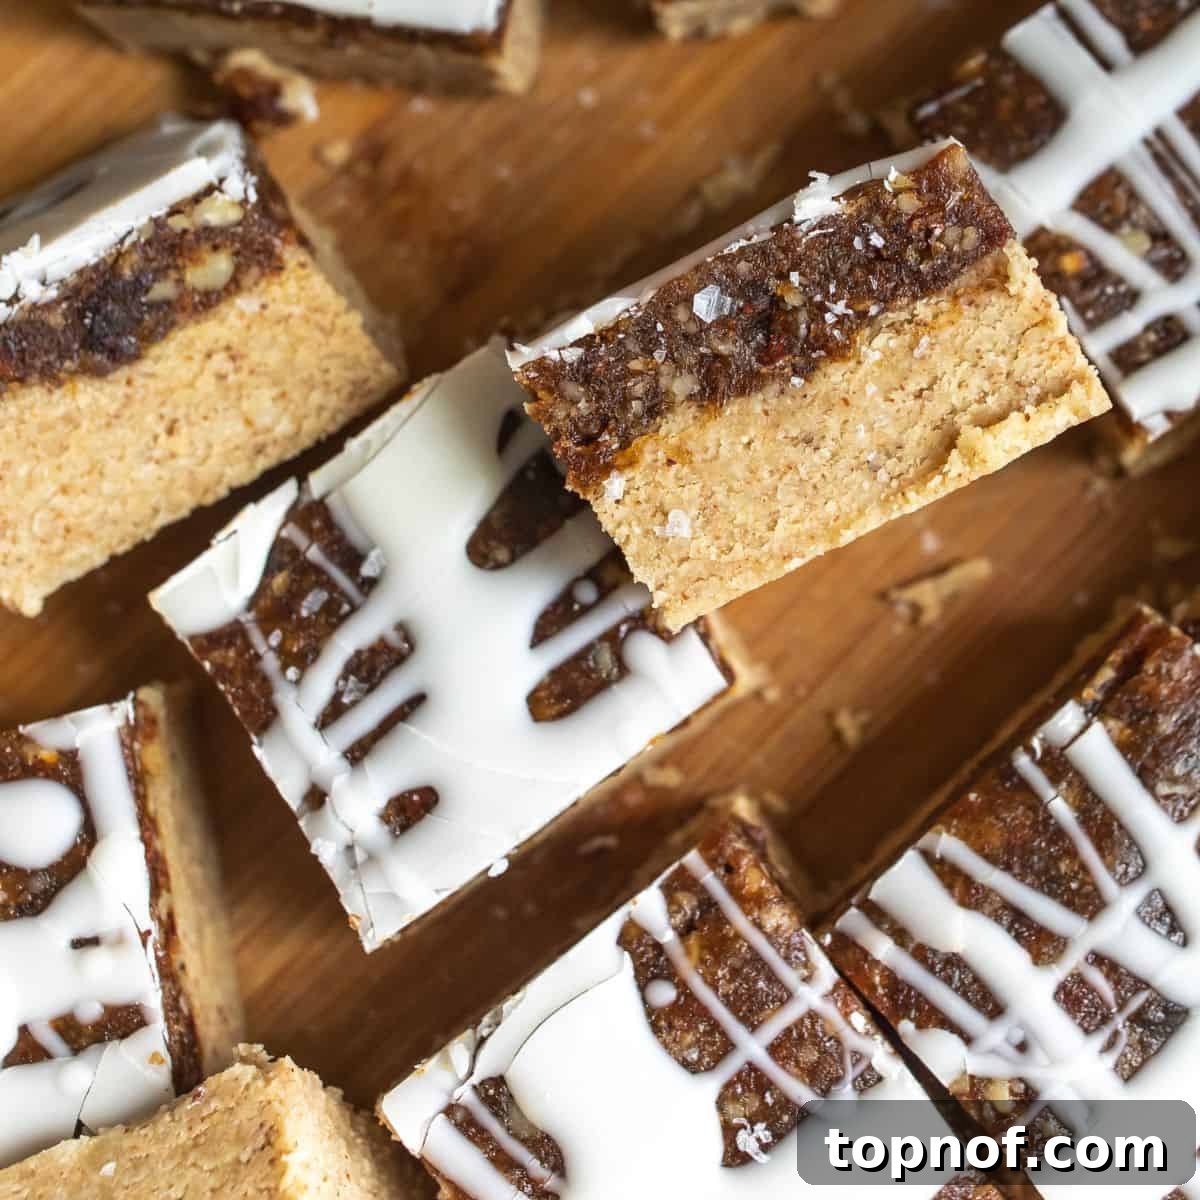
- White or Milk Chocolate Chips (Optional): For an extra touch of indulgence, a melted chocolate drizzle takes these blondies to the next level. It adds another layer of sweetness and a beautiful visual appeal, making them even more dessert-like. Choose your favorite type of chocolate to customize your treat.
Crafting Your No-Bake Blondies: Step-by-Step
Making these chewy no-bake blondies is a straightforward process, broken down into a few simple steps. You’ll be amazed at how quickly you can create such a delicious and impressive dessert.
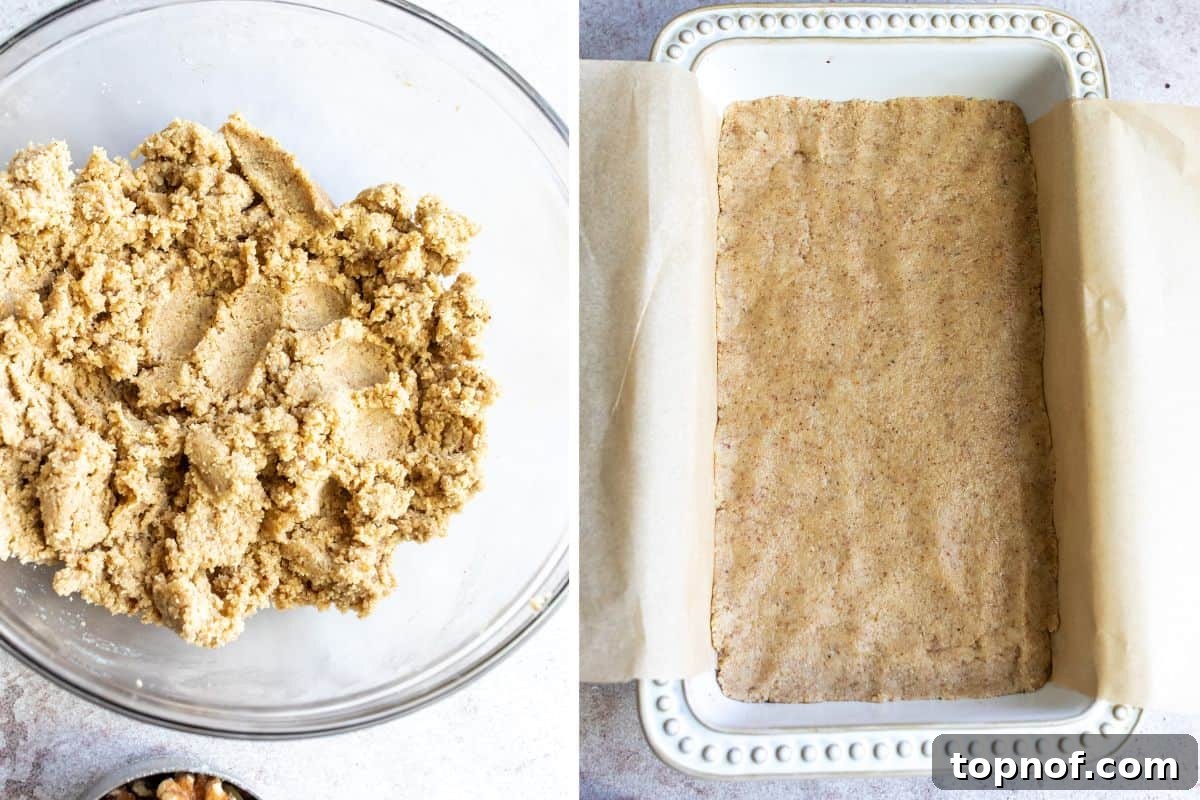
- Prepare the Base Layer: In a medium-sized mixing bowl, combine the almond flour, almond butter, melted coconut oil, maple syrup, and vanilla extract. Stir these ingredients thoroughly until a thick, uniform dough forms. The consistency should be firm enough to press. Line a standard bread loaf pan (approximately 9×5 inches) with parchment paper, leaving an overhang on the sides for easy lifting later. Press the base mixture firmly and evenly into the bottom of the prepared pan, ensuring it’s smooth and without large lumps. This layer should be roughly as thick as depicted in the photos. Place the pan in the freezer for about 10 minutes while you prepare the next layer. This chilling step helps the base firm up, preventing it from mixing with the top layer.
- Soften the Dates: If your dates are firm or appear dried out, it’s crucial to soften them. Place the pitted dates in a heat-proof bowl and cover them with boiling water. Let them soak for about 5 minutes until they become plump and tender. Drain the water and allow the dates to cool slightly before handling. Fresh, soft dates are naturally sticky and much easier to process, so this step ensures the best texture for your top layer.
- Create the Date-Walnut Top Layer: Transfer the softened (and pitted) dates, raw walnuts, and sea salt into a food processor. Pulse the ingredients on high speed until everything is finely chopped and blended into a cohesive, sticky paste. You might need to scrape down the sides of the food processor a few times with a spatula to ensure an even blend. The mixture should be thick and slightly sticky, resembling a coarse nut butter.
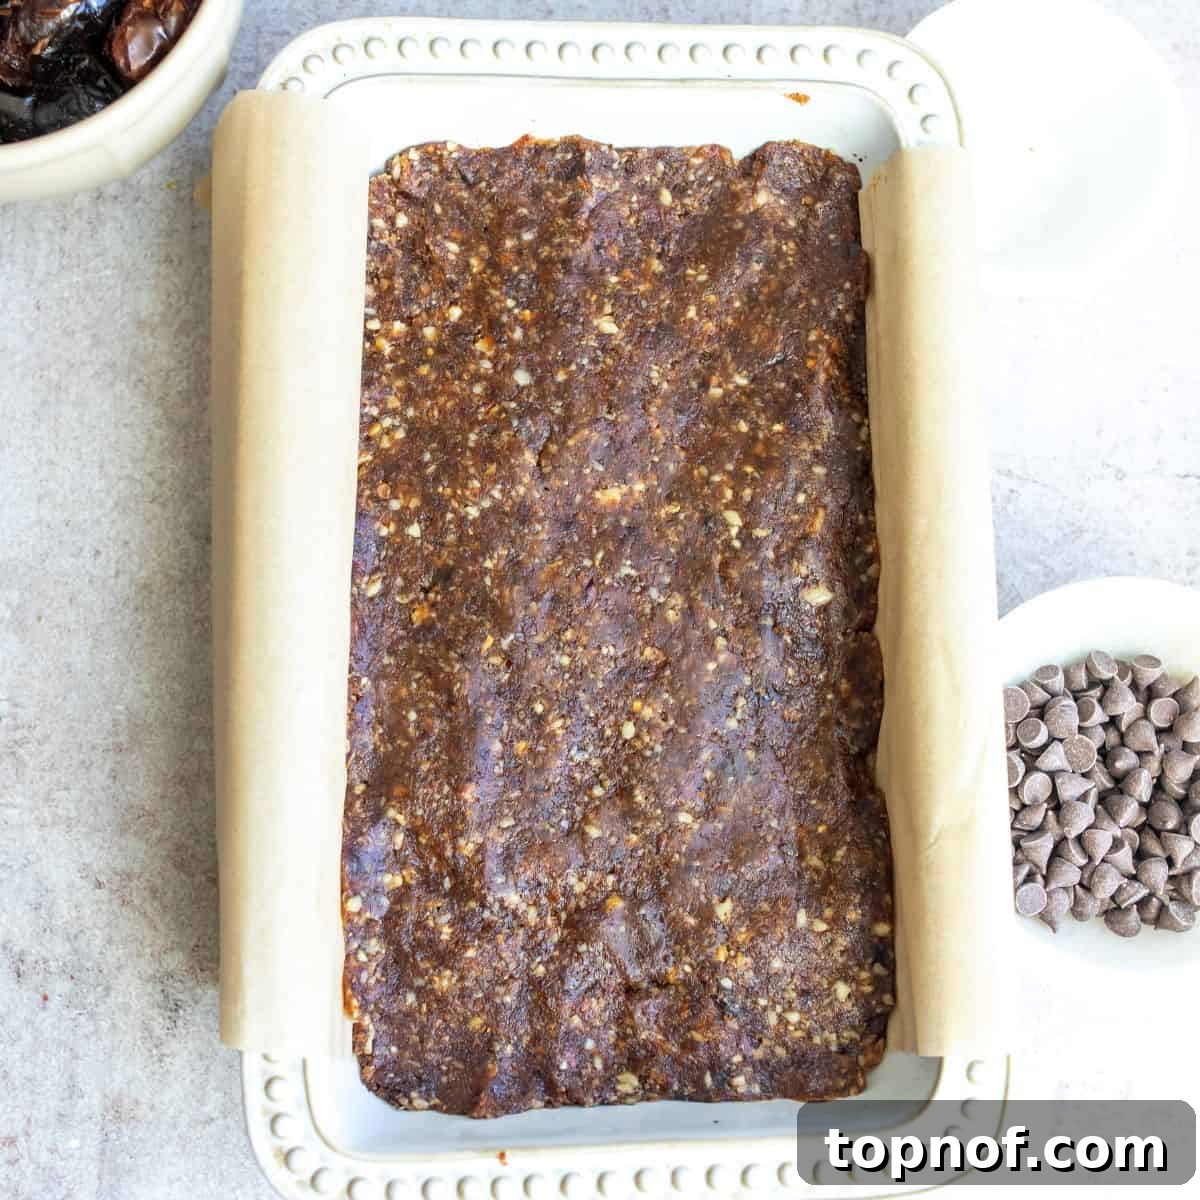
- Assemble the Layers: Retrieve the chilled base layer from the freezer. Spoon the date-walnut mixture over the almond flour base. Break the date mixture into smaller pieces and evenly disperse it across the base. Then, using your hands or the back of a spoon, firmly press the date-walnut layer onto the base. Take your time to ensure it’s spread smoothly and covers the entire base layer evenly. This layer will be thinner than the base but should adhere well. Once pressed, return the pan to the freezer for another 10 minutes to allow both layers to set further. This is also a good time to prepare your optional chocolate drizzle.
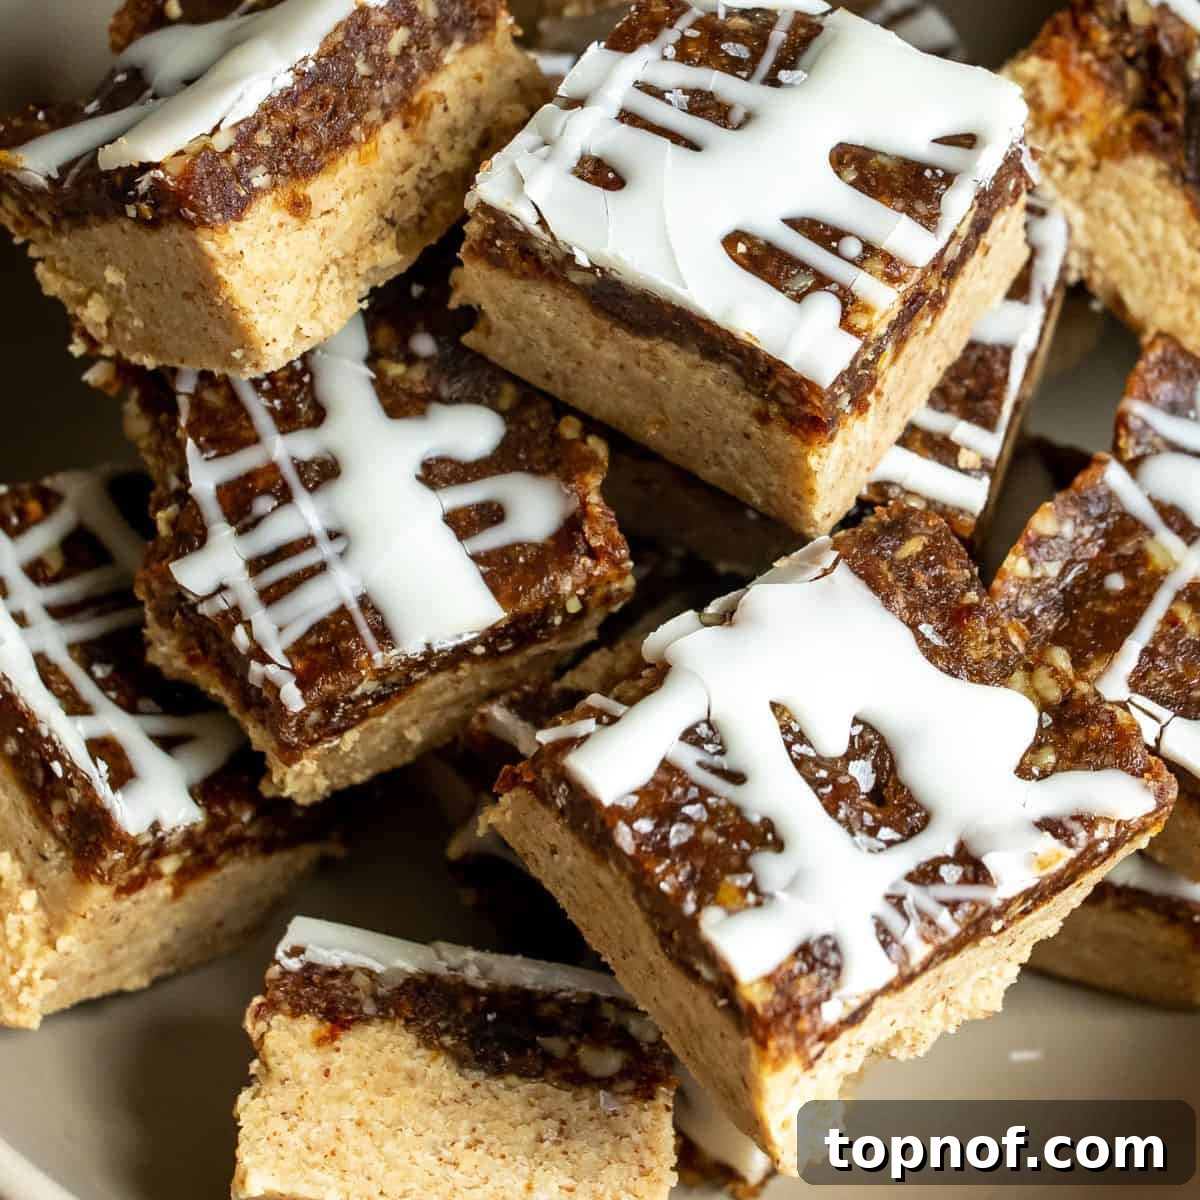
- Add the Optional Chocolate Drizzle and Serve: If adding chocolate, place your chosen chocolate chips (white or milk) and a small amount of coconut oil into a microwave-safe bowl. Heat on medium power for approximately 45 seconds. Stir well, and if needed, continue heating in 15-second intervals, stirring after each, until the chocolate is completely melted and smooth. Remove the blondies from the freezer and drizzle the melted chocolate evenly over the top. Allow the chocolate to set briefly in the fridge or freezer until firm. Once set, carefully lift the blondies out of the pan using the parchment paper overhang. Slice into bars of your desired size, and enjoy your delicious, healthy no-bake treat!
Pro Tips for Perfect No-Bake Blondies
While this recipe is incredibly simple, a few expert tips can elevate your no-bake blondies from good to absolutely perfect:
The Magic of Parchment Paper
Always, always, always line your loaf pan with parchment paper. This isn’t just for easy cleanup; it’s essential for the structural integrity of your no-bake bars. By leaving an overhang on the sides, you create handles that allow you to effortlessly lift the entire slab of blondies out of the pan once chilled. This ensures neat, clean cuts and prevents any sticking, making the serving process a breeze. It’s a small step that makes a huge difference!
Achieving the Perfect Set
No-bake recipes rely on chilling to set their structure. For these blondies, you’ll be chilling them in two stages. This allows the base layer to firm up sufficiently before the top layer is added, preventing them from merging. Make sure to find a flat, undisturbed spot in your freezer or refrigerator for the pan. This prevents tilting or uneven setting, ensuring your bars are uniformly firm and easy to slice. While a few minutes in the freezer after each layer is sufficient for assembly, a longer chill (30-60 minutes) before slicing will yield the cleanest cuts and best texture.
Date Preparation is Key
The quality and moisture content of your dates significantly impact the texture of your top layer. Medjool dates are often preferred for their naturally soft and sticky consistency. However, if your dates feel a bit dry or hard to the touch, don’t despair! Soaking them in boiling water for about 5 minutes will rehydrate them, making them perfectly pliable and easy to blend into a smooth, caramel-like paste in your food processor. Ensure you pit them before soaking if they aren’t already pitted.
Sweetness Adjustment and Flavor Variations
These bars are indeed wonderfully sweet, thanks to the natural sugars in dates and maple syrup, making them an excellent rich dessert or a satisfying snack. However, sweetness preferences vary. Feel free to slightly adjust the amount of maple syrup in the base layer if you prefer a less sweet profile, or add an extra tablespoon for more decadence. For added flavor, consider incorporating a pinch of cinnamon or nutmeg into the date-walnut layer, or a dash of orange zest for a bright, citrusy note.
Clean Cuts for Presentation
For beautifully neat slices, chill the blondies thoroughly until very firm. When ready to cut, use a sharp knife that has been run under hot water and wiped clean between each slice. This technique helps glide through the sticky layers without dragging, giving you perfect, clean edges every time.
Make Ahead & Storage Guidelines
These chewy no-bake blondies are fantastic for meal prepping or preparing in advance, ensuring you always have a wholesome treat on hand. Proper storage is key to maintaining their delicious texture and freshness.
Refrigeration
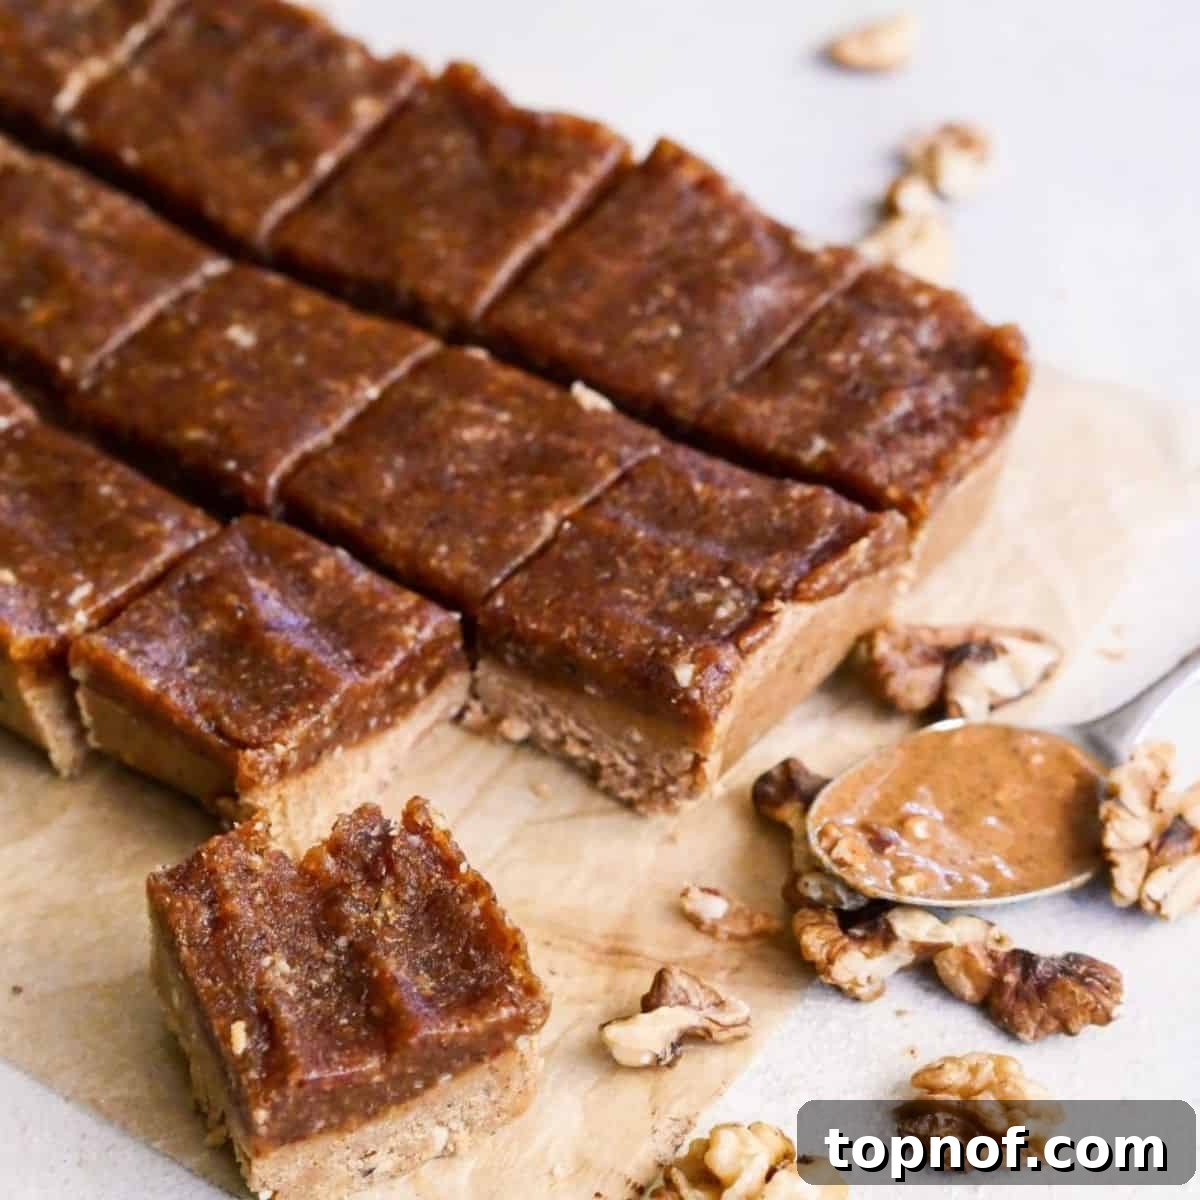
For immediate enjoyment and a perfectly chewy texture, store your blondies in an airtight container in the refrigerator. They will remain fresh and delicious for up to one week. The cool temperature keeps them firm and prevents them from becoming too soft.
Freezing for Longer Freshness
If you wish to extend their shelf life, these blondies freeze exceptionally well. Place them in a single layer on a parchment-lined tray to freeze solid for about an hour, then transfer them to an airtight freezer-safe container or a heavy-duty freezer bag. Separating layers with parchment paper can prevent sticking. Frozen blondies will maintain their quality for up to several months. To enjoy, simply remove a bar from the freezer and let it thaw for a few minutes at room temperature, or enjoy it chilled for a firmer bite.
Frequently Asked Questions
Are these bars really sweet?
Yes, these bars offer a delightful and satisfying sweetness that comes entirely from natural sources – dates and maple syrup. The dates provide a rich, caramel-like sweetness, while maple syrup adds a subtle, nuanced flavor. They make an excellent rich dessert that feels indulgent, yet also serve as a hearty, energizing snack between meals without the sugar crash associated with refined sugars. If you prefer them less sweet, you can slightly reduce the maple syrup in the base layer.
Why is almond flour used in this no-bake recipe?
Almond flour is an absolute star in no-bake treats! Its fine, moist texture blends beautifully with wet ingredients, creating a soft, tender base that doesn’t become crumbly or hard when chilled. Unlike traditional flours, almond flour is delicious and safe to consume raw, offering a pleasant nutty flavor. When refrigerated or frozen, it sets into a perfect, chewy consistency, making it the ideal choice for achieving that desired no-bake blondie texture. It also adds a boost of protein and healthy fats, contributing to the nutritional value of the bars.
What if my dates are really dried out?
Dried out dates can be a common challenge, but it’s easily remedied! If your dates feel hard or lack their natural stickiness, you absolutely need to soak them. Place your pitted dates in a bowl and cover them with boiling water. Let them sit for about 5-10 minutes until they soften and plump up. This process rehydrates them, making them sticky and pliable enough to blend into a smooth paste in your food processor. Fresh, soft dates are always easier to work with, but soaking ensures that even tougher batches yield a perfect top layer.
Can I make these blondies nut-free?
Yes, with a few substitutions! For the base layer, you can replace almond butter with a seed butter like sunflower seed butter (SunButter). Be aware that sunflower seed butter can sometimes react with baking soda (though not an issue here) or turn greenish when exposed to certain ingredients or left over time, but it’s generally safe. For the walnuts in the top layer, you could use roasted sunflower seeds or pumpkin seeds for a similar crunch and texture. Always check labels to ensure your chosen ingredients are certified nut-free if severe allergies are a concern.
Are these blondies genuinely healthy?
These no-bake blondies are certainly a healthier alternative to many traditional desserts. They are free from refined sugars, gluten, and dairy, relying on whole, plant-based ingredients. Dates provide natural sweetness along with fiber, potassium, and antioxidants. Walnuts offer healthy omega-3 fatty acids, protein, and fiber. Almond flour contributes protein and healthy fats. While they are calorie-dense due to the nuts and dates, they offer sustained energy and nutritional benefits, making them a much better choice for a sweet treat compared to highly processed options.
Other Delightful Dessert Recipes to Explore
If you’ve fallen in love with these wholesome no-bake blondies, you might enjoy exploring other delicious recipes that cater to similar tastes and dietary preferences:
- Strawberry Cheesecake Cookies
- Biscoff Blondies
- Date And Walnut Loaf
I genuinely hope you love this recipe as much as I do! Your feedback means the world to me. Don’t forget to follow me on Instagram & Pinterest for even more fun and delicious recipes designed to make you feel good from the inside out. Thank you for joining me on this culinary journey!
No Bake Blondie Bars
Easy, quick, and incredibly tasty treats. They are better than traditional blondies and require no baking, making them a perfect plant-based, crowd-pleasing dessert.
By: Bailey Rhatigan
Prep Time: 10 mins
Servings: 18 servings
Ingredients
Base Layer
- ½ cup Almond Butter
- ¼ cup coconut oil (melted)
- 2 cups almond flour
- 2 tbsp vanilla extract
- ¼ cup maple syrup
- 2 tbsp maple syrup (yes, both this and the ¼ cup for extra sweetness)
Top Layer
- ¾ cup raw walnuts
- 10 pitted dates
- ¼ tsp sea salt
Instructions
Base Layer
- In a large bowl, mix together the almond butter, melted coconut oil, maple syrup, vanilla extract, and almond flour. The mixture should have a thick consistency. Line a bread loaf pan with parchment paper and firmly press the base layer into the bottom. Ensure it’s evenly spread and smooth. Place into the freezer for 10 minutes while you prepare the second layer.
Top Layer
- In a food processor, add the raw walnuts, pitted dates, and sea salt. Pulse on high until everything is finely chopped and blended into a sticky paste. You might need to use a spatula to scrape down the sides a few times to ensure even blending. Once the base layer has firmed up, remove it from the freezer and gently press the top layer evenly over the base. This layer will be thinner; work it carefully to ensure full coverage. Return to the freezer for a few minutes to set before slicing and serving.
Nutrition
Nutrition information is automatically calculated, so should only be used as an approximation.
- Calories: 204 kcal
- Carbohydrates: 12g
- Protein: 5g
- Fat: 16g
- Saturated Fat: 4g
- Sodium: 34mg
- Potassium: 116mg
- Fiber: 3g
- Sugar: 8g
- Vitamin A: 1IU
- Vitamin C: 1mg
- Calcium: 64mg
- Iron: 1mg
Additional Info
Author: Bailey Rhatigan
Prep Time: 10 minutes
Course: Dessert, Snack
Cuisine: American
Servings: 18 servings
Calories: 204
Keyword: plant based, vegan