
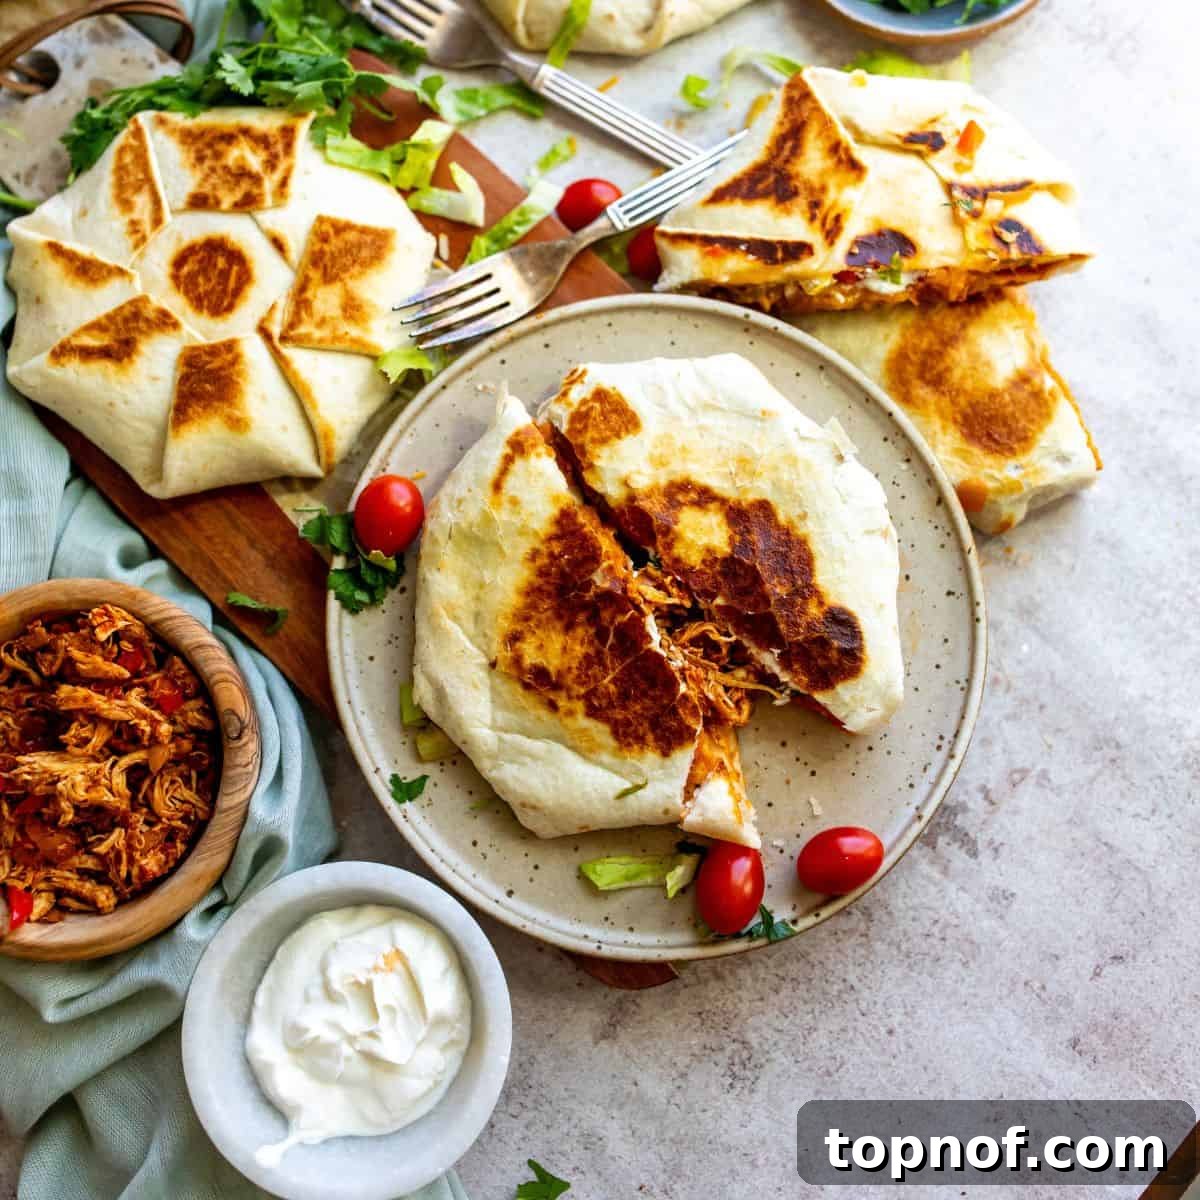
Chicken Crunch Wrap Supremes are not just a meal; they’re an experience! Imagine a perfect blend of seasoned, juicy shredded chicken, fresh vibrant vegetables, creamy sauces, and a satisfyingly crunchy tostada, all enveloped in a warm, toasted tortilla. This ultimate homemade version promises a fun, flavorful dinner or lunch that’s significantly healthier and more fulfilling than any takeout option. Forget the drive-thru; elevate your mealtime with this easy-to-make, crowd-pleasing recipe that brings gourmet taste right to your kitchen.
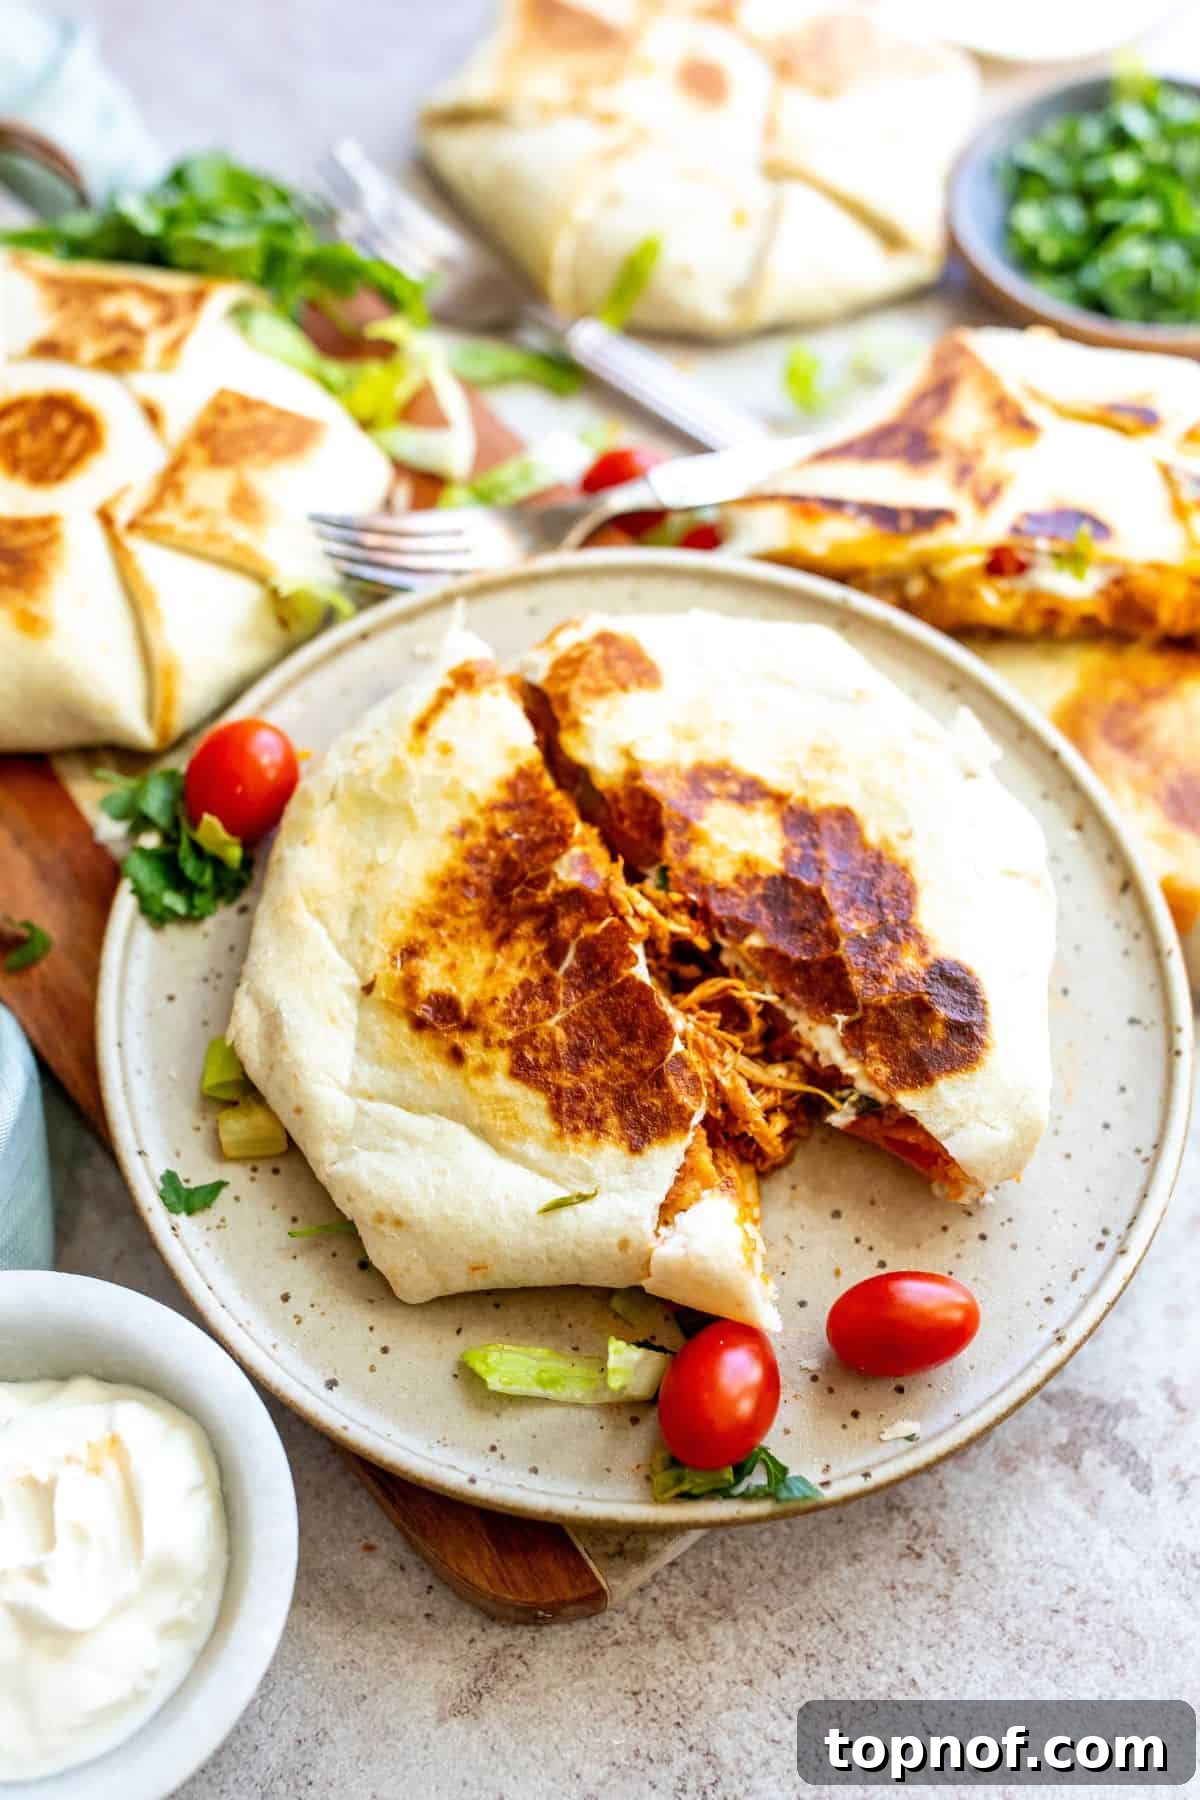
Table of Contents
- Why Make These Homemade Chicken Crunch Wrap Supremes?
- Essential Ingredients for Your Crunch Wrap
- Customize Your Crunch Wrap: Recipe Variations
- Step-by-Step Guide to Prepare the Chicken Filling
- Mastering the Art of Building Crunch Wraps
- Frequently Asked Questions About Chicken Crunch Wraps
- Pro Tips for the Perfect Crunch Wrap
- Delicious Pairings for Your Crunch Wrap Supreme
- Other Easy and Flavorful Meals to Try
- Homemade Chicken Crunch Wrap Supremes: Full Recipe
Why Make These Homemade Chicken Crunch Wrap Supremes?
In a world full of fast-food cravings, the Chicken Crunch Wrap Supreme stands out as a beloved choice for its irresistible combination of flavors and textures. But why settle for a drive-thru version when you can craft an even more delicious, healthier, and satisfying one right in your own kitchen? Our homemade rendition takes everything you love about this iconic dish and elevates it, offering numerous benefits that make it an instant family favorite.
Firstly, **these crunch wraps are incredibly easy to make!** You might be surprised at how simple it is to recreate this popular fast-food item at home. With a few staple ingredients and straightforward steps, you can have a gourmet meal on the table faster than you can say “Supreme.” This makes it an ideal choice for busy weeknights when you want something satisfying without a lengthy cooking process.
Beyond ease, our homemade Chicken Crunch Wrap Supremes are **significantly more affordable** than their fast-food counterparts. Buying ingredients in bulk and preparing them yourself slashes the cost per serving, allowing you to enjoy this delicious meal more frequently without breaking the bank. It’s a smart economic choice for families and meal preppers alike.
What truly sets this recipe apart is its commitment to **wholesome ingredients and superior flavor.** Unlike commercial versions that can be laden with preservatives and unhealthy fats, our recipe prioritizes fresh vegetables, lean chicken, and control over seasonings. This means you’re not only enjoying a tastier meal but also nourishing your body with better quality food. The robust flavors come from carefully selected spices and fresh produce, creating a vibrant taste that fast food simply can’t match.
Moreover, **these crunch wraps are endlessly customizable.** Dietary preferences, allergies, or simply a desire for variety are easily accommodated. Don’t like a particular ingredient? Skip it! Want to boost the fiber or vitamin content? Load up on extra veggies! The possibilities are vast, from swapping out proteins to adjusting the spice level. If you’re looking for a fantastic vegetarian alternative, consider trying a Black Bean Crunch Wrap Supreme – proving just how versatile this concept can be.
Finally, the unique hexagonal shape of the crunch wrap isn’t just for aesthetics; it makes it **remarkably easy to hold and enjoy on the go.** Whether you’re heading to work, tackling errands, or embarking on a road trip, this portable meal ensures you don’t compromise on taste or quality. It’s a convenient, mess-free solution for delicious eating wherever your day takes you.
Essential Ingredients for Your Crunch Wrap
Crafting the perfect Chicken Crunch Wrap Supreme starts with a selection of fresh, high-quality ingredients. Each component plays a vital role in creating that signature flavor and satisfying texture. Here’s a detailed look at what you’ll need to gather:
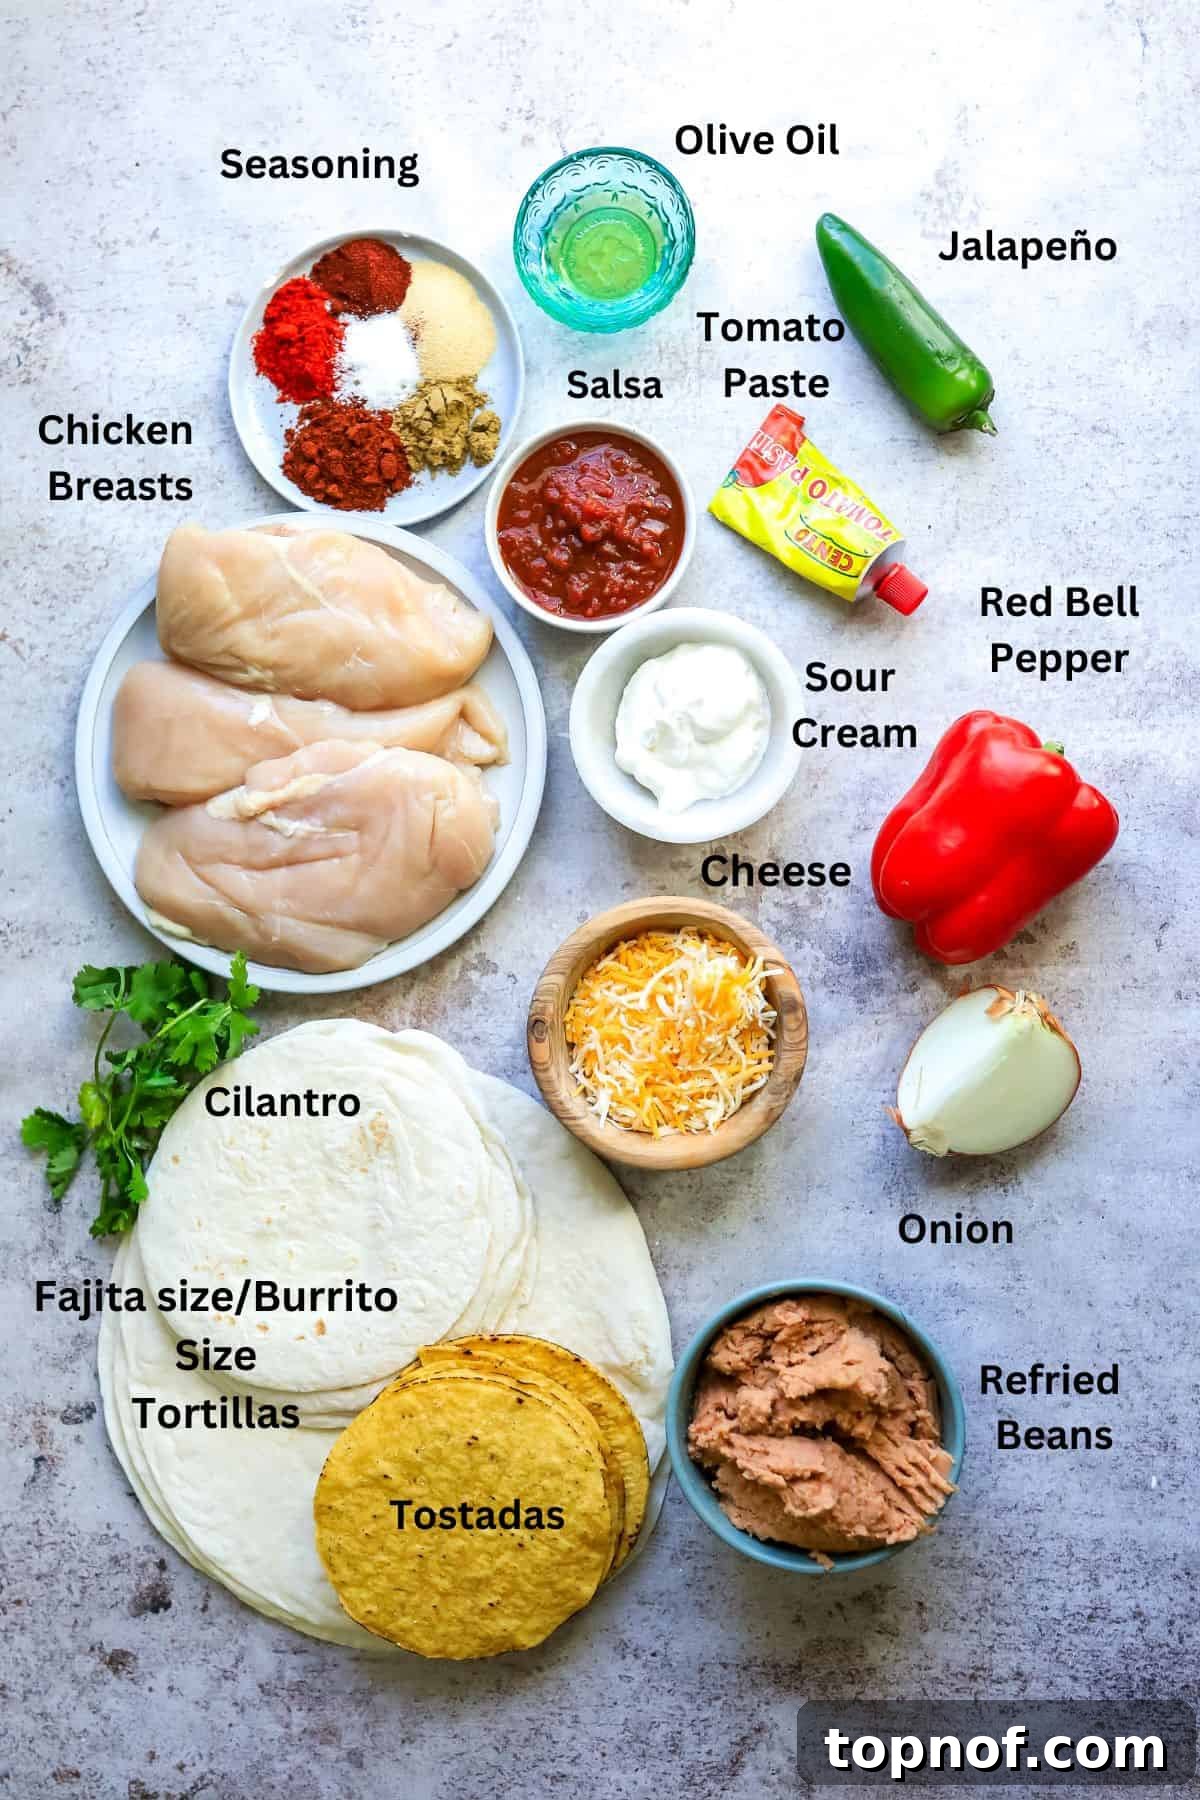
- Chicken: Boneless, skinless chicken breasts are our top recommendation for their lean protein content and ease of preparation. They absorb flavors beautifully and shred perfectly. For those short on time, a pre-cooked rotisserie chicken is an excellent shortcut. If using rotisserie chicken, remember it’s already seasoned, so you’ll want to reduce the added seasonings by half and omit any extra salt to avoid over-salting. Simply shred it and add it directly to the sautéed vegetables.
- Tortillas: You’ll need two sizes of tortillas to achieve the classic crunch wrap structure. Large, burrito-sized flour tortillas form the main outer shell, providing ample surface area for folding. Smaller, fajita-sized tortillas (or even smaller, cut-out rounds from another large tortilla) are essential for covering the center of the fillings, helping to seal the wrap and prevent tearing during the folding process.
- Salsa: The choice of salsa significantly impacts the flavor profile of your chicken filling. We love a smoky salsa with chipotle undertones, as it complements the seasoned chicken wonderfully. However, feel free to use any salsa you enjoy – mild, medium, hot, chunky, or smooth – to tailor the spice level and texture to your preference.
- Seasonings: A robust blend of spices is key to a truly flavorful chicken filling. Our go-to mix includes:
- Cumin: Adds an earthy, warm, and slightly pungent flavor that is characteristic of Mexican cuisine.
- Paprika: Provides a sweet, peppery, and often smoky depth, enhancing the color of the chicken.
- Salt: Essential for bringing out and balancing all the other flavors.
- Garlic Powder: Delivers a concentrated garlic flavor without the moisture of fresh garlic.
- Chili Powder: A foundational spice blend that offers a mild heat and complex flavor profile.
- Chipotle Powder: Infuses a smoky heat and distinctive chili flavor, perfectly complementing the smoky salsa.
- Refried Beans: Refried beans add a creamy, savory layer that’s integral to the crunch wrap experience. While canned refried beans are convenient, you can easily make this component healthier by using mashed pinto or black beans. Simply cook and smash them with a fork for a fresher, less processed option.
- Vegetables: Freshly chopped red bell pepper, onion, and jalapeño (if you like a kick!) are sautéed with the chicken, adding essential moisture, texture, and vibrant flavor to the filling.
- Tomato Paste: A small amount of tomato paste deepens the savory notes of the chicken mixture and helps to bind the flavors together.
- Tostadas: The secret to the “crunch” in Crunch Wrap Supreme! Crispy tostada shells are placed in the center, providing that satisfying textural contrast.
- Shredded Cheese: A sprinkle of your favorite shredded cheese (Monterey Jack, cheddar, or a Mexican blend) adds gooey deliciousness when heated.
- Optional Toppings: Don’t forget fresh additions like chopped romaine lettuce and diced tomatoes for freshness, and a dollop of sour cream or Greek yogurt for a cool, creamy finish.
All other ingredients and precise measurements can be found in the recipe card below, ensuring you have everything needed to create these magnificent wraps.
Customize Your Crunch Wrap: Recipe Variations
One of the best aspects of making Chicken Crunch Wrap Supremes at home is the freedom to customize them to your exact preferences. Don’t be afraid to experiment with different ingredients and flavors to make this recipe truly your own. Here are some fantastic variations to get you started:
- Protein Swaps:
- Chicken Breasts vs. Thighs: While chicken breasts are lean and shred easily, boneless, skinless chicken thighs offer a richer, more succulent flavor. Adjust cooking time slightly if using thighs.
- Rotisserie Chicken: As mentioned, rotisserie chicken is a brilliant time-saver. Just shred the meat and incorporate it into the sautéed vegetables. Remember to significantly reduce or omit the added salt and seasonings, as rotisserie chicken is typically well-seasoned.
- Ground Meat: For a different texture, try ground turkey, ground beef, or even ground plant-based meat. Brown the meat first, drain any excess fat, then proceed with adding the seasonings and other filling ingredients.
- Vegetarian/Vegan Options: For a meatless marvel, follow the lead of the Black Bean Crunch Wrap Supreme by replacing chicken with extra beans, sautéed mushrooms, crumbled tofu, or a hearty vegetable mix like corn and zucchini.
- Bean Alternatives:
- Healthier Choices: If you’re looking to boost the fiber and reduce sodium, opt for plain black beans or pinto beans. Simply mash them with a fork after warming them, or leave some whole for added texture. You can also season them with a pinch of cumin and chili powder.
- Spicy Beans: Stir in a dash of hot sauce or a pinch of cayenne pepper to your refried beans for an extra kick.
- Creamy Layers:
- Sour Cream Substitutes: For a higher protein option or to lighten things up, plain Greek yogurt is an excellent substitute for sour cream. It provides a similar tangy creaminess.
- Dairy-Free: Many plant-based sour cream alternatives are available for those avoiding dairy.
- Avocado Cream: Mash ripe avocado with a squeeze of lime juice for a fresh and healthy creamy layer.
- Ranch or Chipotle Aioli: Drizzle a little ranch dressing or homemade chipotle aioli for an added layer of flavor.
- Salsa and Sauce Variations:
- Enchilada Sauce: For a richer, deeper flavor, use a thick enchilada sauce instead of salsa in your chicken mixture.
- Hot Sauce: If you crave extra heat, incorporate your favorite hot sauce directly into the chicken filling or offer it as a topping.
- Green Chili Salsa: Swap red salsa for green chili salsa (salsa verde) for a brighter, tangier profile.
- Cheese Options:
- Melty Blends: Monterey Jack, Colby, or a Mexican cheese blend are fantastic for their melting properties.
- Spicy Cheese: Pepper Jack cheese will add a pleasant heat.
- Dairy-Free Cheese: Many excellent plant-based shredded cheese options are available for a dairy-free version.
- Extra Veggies and Toppings:
- For the Filling: Sauté finely diced bell peppers (any color), corn, or zucchini with your onions and jalapeños.
- Fresh Toppings: Add thinly sliced red onion, pickled jalapeños, fresh cilantro, a squeeze of lime juice, or even a dollop of guacamole or avocado slices for an ultimate finish.
With these variations, you can truly tailor your Chicken Crunch Wrap Supremes to suit any taste or dietary need, making them a versatile and exciting mealtime staple.
Step-by-Step Guide to Prepare the Chicken Filling
Creating the flavorful chicken filling is the heart of our Chicken Crunch Wrap Supremes. Follow these detailed steps to ensure your chicken is perfectly cooked, seasoned, and ready to be wrapped:
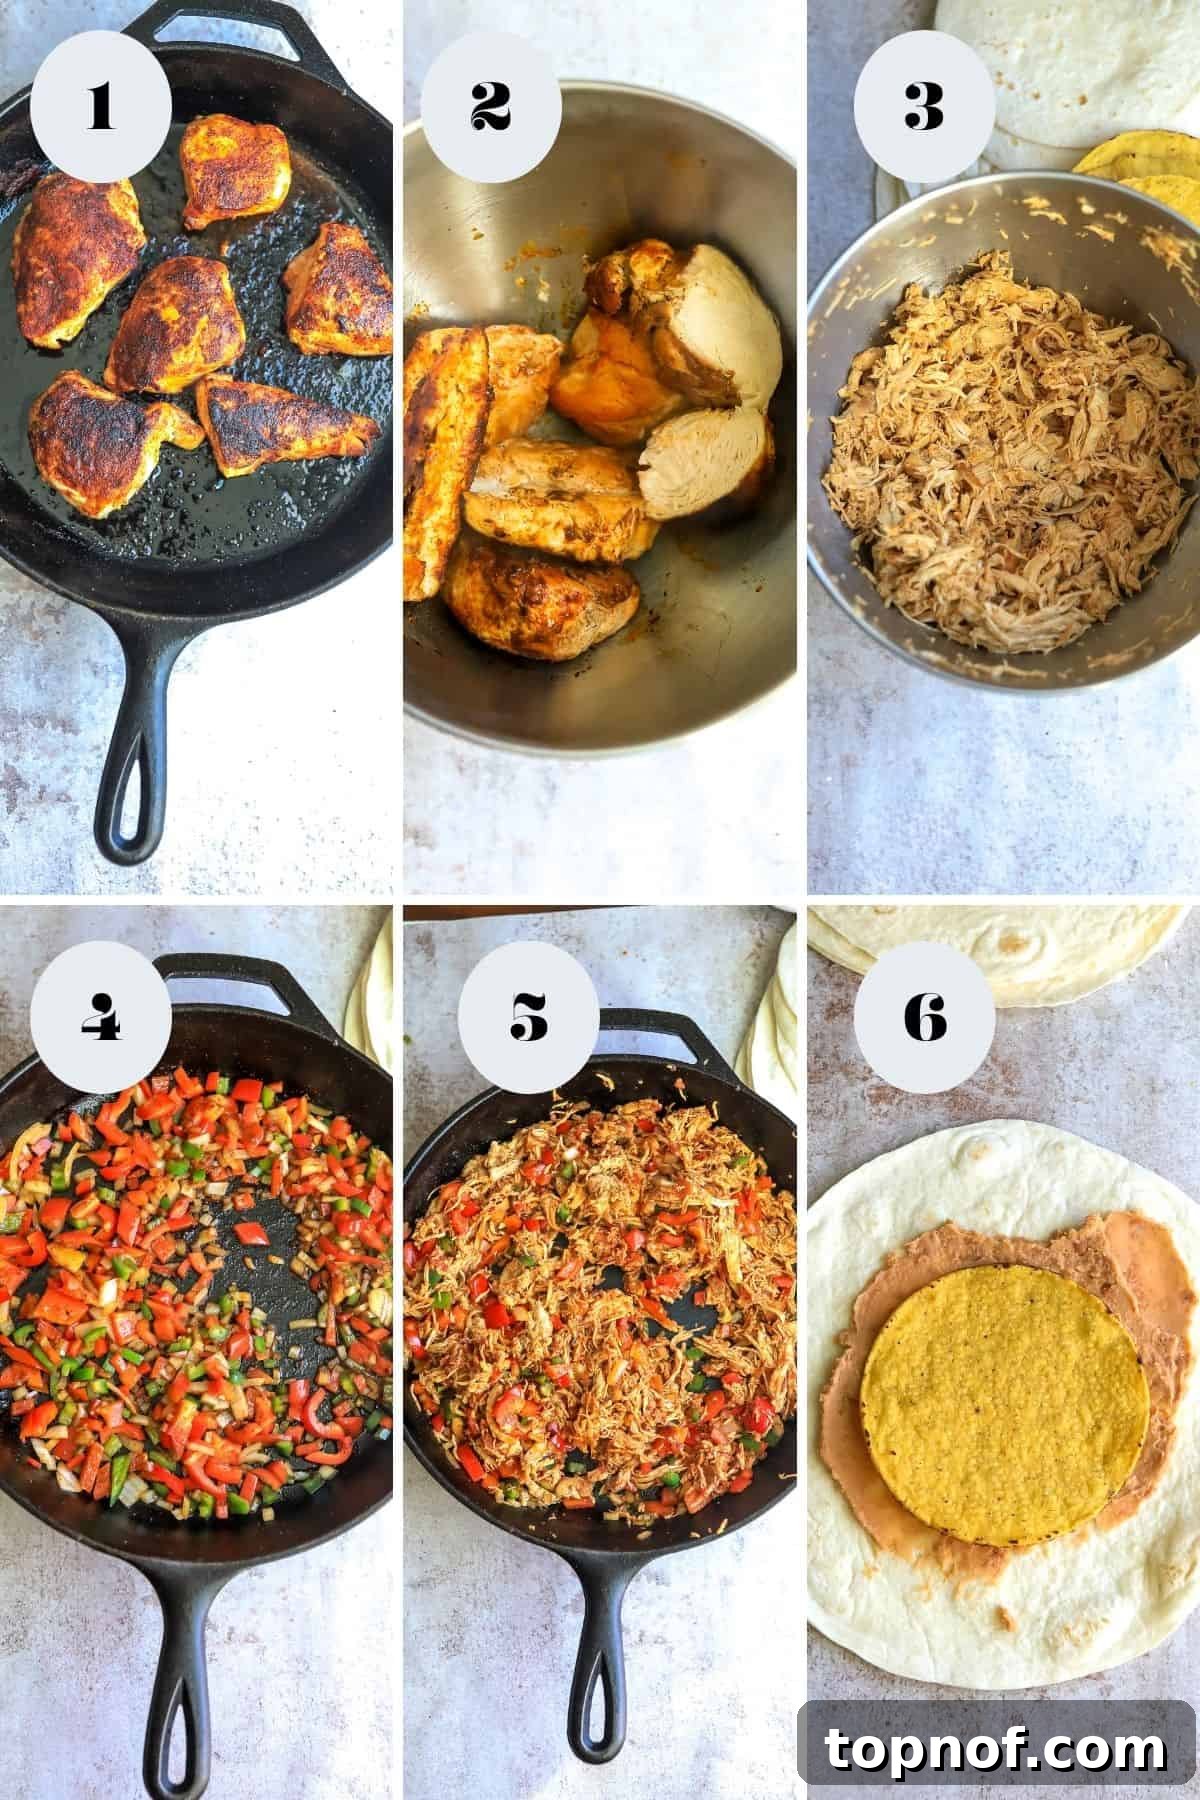
- Step One: Prepare and Cook the Chicken. Begin by preparing your chicken breasts. If they are particularly thick, cut them in half horizontally to create thinner cutlets. This ensures more even cooking and faster shredding later. In a small bowl, whisk together your seasonings (cumin, paprika, salt, garlic powder, chili powder, and chipotle powder). Rub half of this seasoning blend generously over both sides of the chicken breasts. Heat 1/2 tsp of olive oil in a heavy-bottomed skillet (cast iron or stainless steel works best) over medium-high heat until shimmering. Carefully add the seasoned chicken to the hot skillet. Cook for approximately 8-10 minutes per side, or until the internal temperature reaches 165ºF (74ºC) and the chicken is golden brown and cooked through. Avoid overcrowding the pan; cook in batches if necessary.
- Step Two & Three: Shred the Chicken. Once the chicken is cooked, remove it from the skillet and let it rest on a cutting board for 5 minutes. Resting allows the juices to redistribute, resulting in more tender and flavorful chicken. After resting, transfer the chicken to a stand mixer fitted with a paddle attachment. Turn the mixer on low speed and allow it to shred the chicken effortlessly (this is a fantastic kitchen hack!). Alternatively, you can use a hand mixer or two forks to shred the chicken manually. If you prefer, you can also cube the chicken into small, bite-sized pieces instead of shredding. Set the shredded chicken aside.
- Step Four & Five: Sauté Vegetables and Combine Filling. Using the same skillet (no need to clean it – those browned bits add flavor!), add another 1/2 tsp of olive oil if needed. Reduce the heat to medium. Add the chopped red bell peppers, onions, and garlic to the skillet. Sauté for about 3 minutes, or until the vegetables begin to soften and become fragrant. Now, add the remaining half of your seasoning blend to the vegetables and stir to combine, allowing the spices to toast slightly. Next, return the shredded chicken to the skillet. Stir in the tomato paste, ensuring it coats the chicken and vegetables evenly. Finally, pour in the salsa of your choice. Stir everything together until well incorporated and heated through. This mixture is your delicious, robust chicken filling!
Mastering the Art of Building Crunch Wraps
The magic of the Chicken Crunch Wrap Supreme lies in its layered construction and perfectly sealed, crispy exterior. This section will guide you through the assembly process, step by step, ensuring each wrap is a masterpiece of flavor and texture.
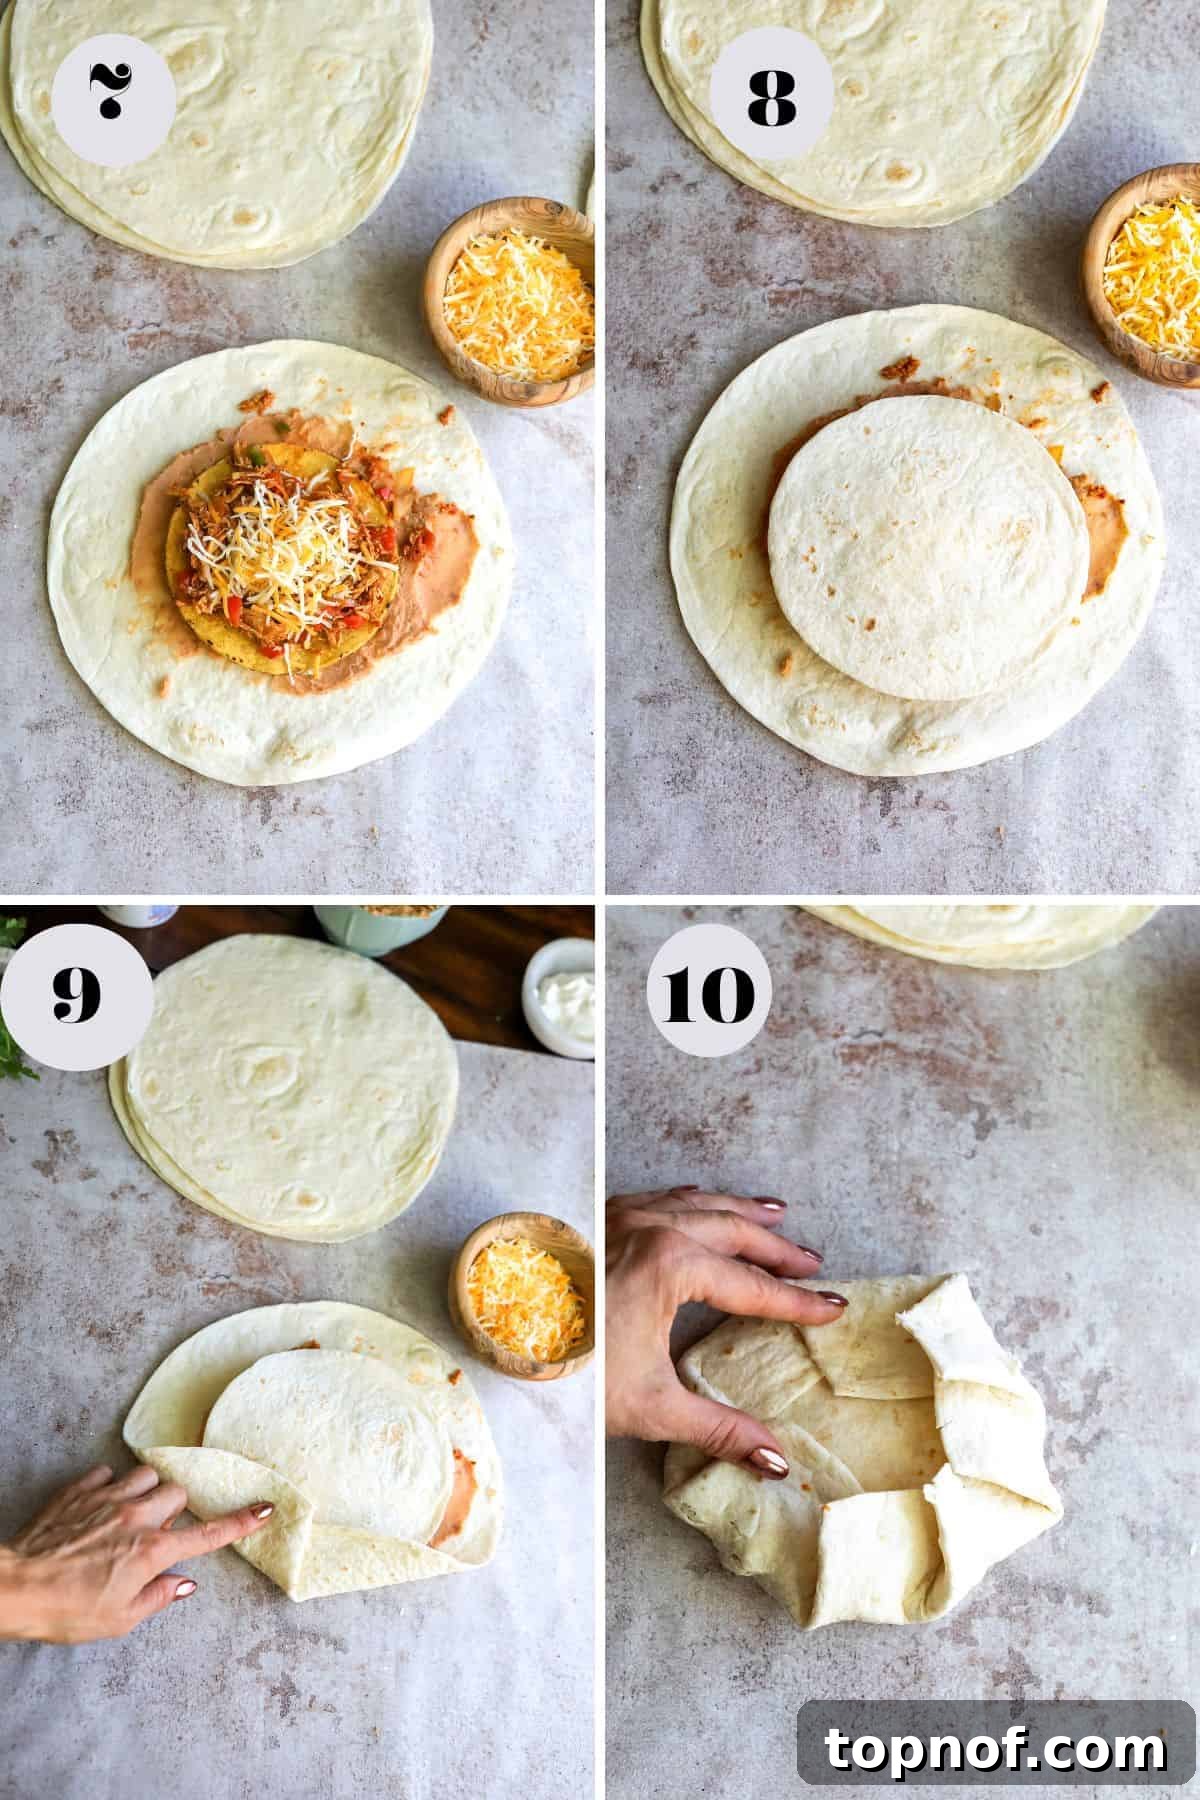
Step Six – Ten: Assemble the Layers. Once your seasoned chicken and salsa mixture is ready, it’s time to build your crunch wraps. This is where the layers come together to create that iconic taste and texture:
- Prepare your workspace: Lay a large burrito-sized tortilla flat on a clean cutting board or work surface. This will be your main outer shell.
- First layer – Beans: Spread a generous scoop of your refried bean mixture evenly across the center of the large tortilla, leaving a margin around the edges for folding. This layer provides a creamy, savory base.
- Second layer – The “Crunch”: Gently place a crisp tostada shell directly on top of the bean layer. This is the crucial element that gives the crunch wrap its name and satisfying texture.
- Third layer – Chicken Filling: Spoon a generous amount of the flavorful shredded chicken and vegetable mixture on top of the tostada. Ensure it covers the tostada evenly without being too thick, which could make folding difficult.
- Fourth layer – Cheese & Toppings: Sprinkle a handful of shredded cheese over the chicken. If you’re using optional fresh toppings like chopped lettuce or diced tomatoes, add them now. Finish with a dollop of sour cream or Greek yogurt for a cool, tangy contrast.
- Seal the deal – Inner Tortilla: Place a smaller fajita-sized tortilla (or a round cut from a larger tortilla) directly on top of all the fillings in the very center. This small tortilla helps to contain the ingredients and provides an anchor for folding, preventing leakage and tearing.
- Fold it up: Carefully begin to fold the excess edges of the large burrito tortilla inwards, over the small tortilla and all the fillings. Work your way around the circular tortilla, creating pleats and overlapping the edges until the entire wrap is sealed and forms a neat, hexagonal or octagonal shape. Ensure it’s as tight as possible without tearing the tortilla.
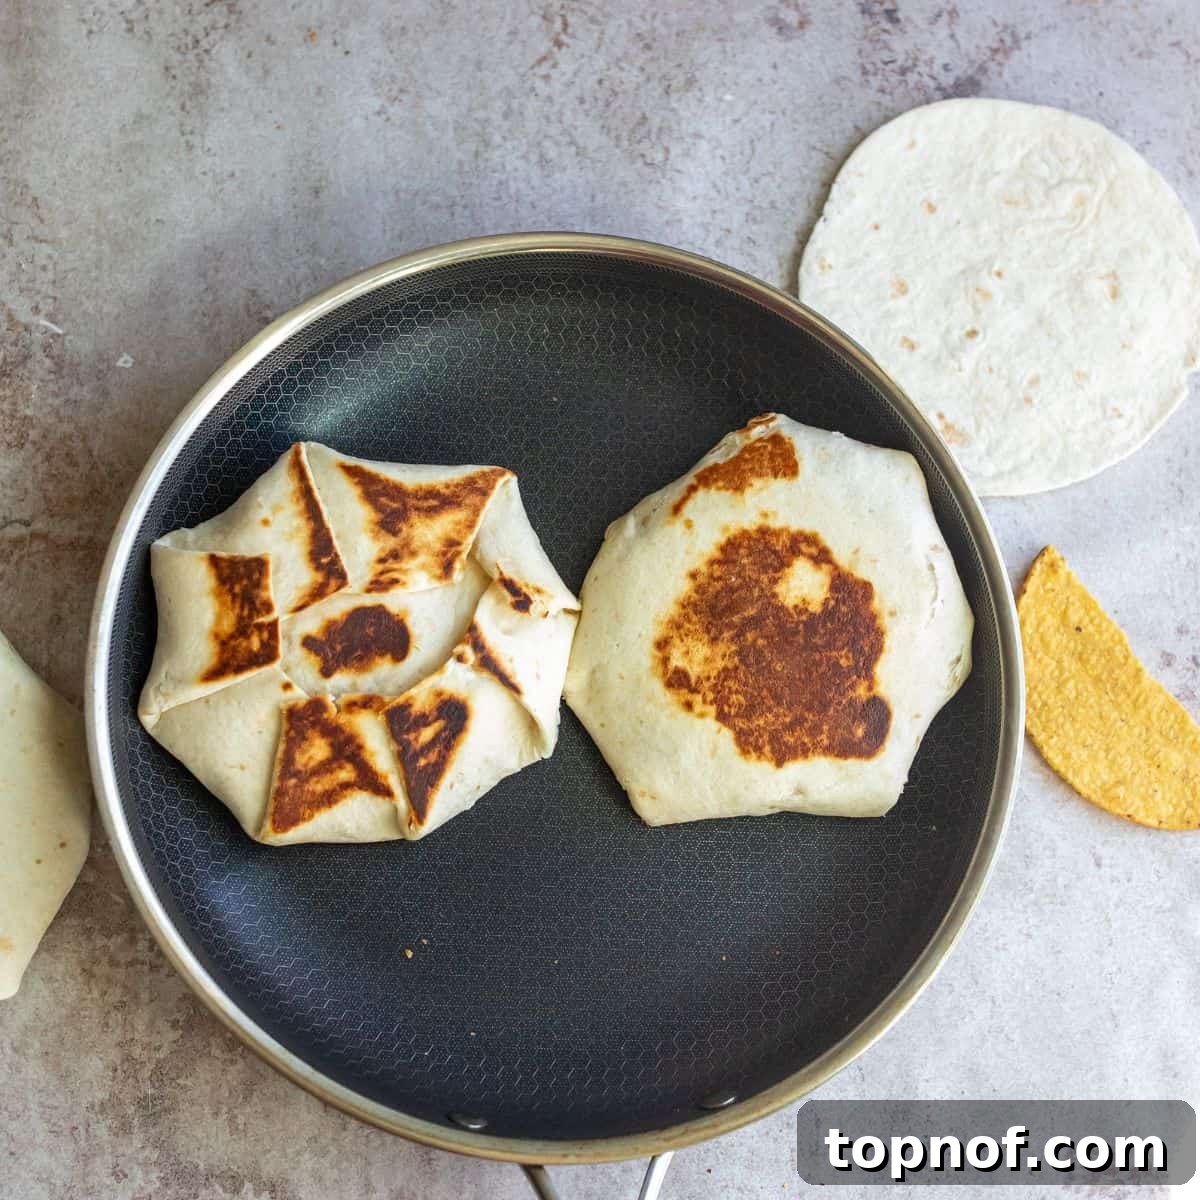
Step Eleven: Prepare for Toasting. Once a crunch wrap is assembled, it’s ready for its final transformation – the toasting! Grab a clean, dry non-stick pan or cast-iron skillet. While the pan heats, a great trick is to place an empty bowl or plate over your folded crunch wrap on the cutting board. This gently presses it down, helping to maintain its shape and seal the folds before it hits the heat. Lightly spritz or brush the clean pan with a little oil (olive oil or cooking spray works well).
Step Twelve: Toast to Perfection. Place the assembled crunch wrap supreme into the preheated skillet, making sure the folded side is facing down first. This is crucial for sealing the folds and preventing the wrap from unraveling during cooking. Cook on medium heat for about 2-3 minutes, or until the bottom is beautifully golden brown and securely sealed. Then, carefully flip the crunch wrap and toast the other side for another 3 minutes, or until it’s equally golden brown and crispy. The goal is a warm, crispy exterior with melty, flavorful fillings inside.
Repeat the assembly and toasting process for the remaining crunch wraps. Once done, serve immediately with your favorite optional toppings and enjoy the ultimate homemade crunch wrap experience!
To store leftovers, place them in an airtight container in the fridge for up to 3 days. Reheat them in a skillet, air fryer, or oven for the best texture. Microwaving is an option, but they won’t be as crispy.
Frequently Asked Questions About Chicken Crunch Wraps
Absolutely! To save time, you can cook the chicken filling mixture a day or two in advance. Store it in an airtight container in the refrigerator. When you’re ready to eat, simply reheat the chicken mixture gently and then proceed with assembling and toasting the crunch wraps. This makes weeknight dinners incredibly efficient!
Yes, crunch wraps reheat beautifully! For the best crispy texture, pop them in an air fryer at 350ºF (175ºC) for about 4-6 minutes, or warm them in a preheated oven at the same temperature until heated through and crispy. You can also reheat them in a skillet over medium heat, flipping occasionally. While microwaving is an option for convenience, they won’t retain their crunchiness.
Don’t worry, it happens! If a small tear occurs, you can often patch it with a small piece of another tortilla or simply continue folding. The toasting process usually helps to seal minor imperfections. Ensuring your large tortillas are fresh and pliable, and not overstuffing, can help prevent tears.
The key to extra crispiness is a hot skillet and a little oil. Make sure your pan is heated thoroughly before adding the wrap. Cooking each side for a full 3-4 minutes on medium heat, pressing down gently, will yield a beautifully golden and crispy exterior. A cast-iron skillet is particularly excellent for achieving maximum crispness.
Pro Tips for the Perfect Crunch Wrap
Achieving a restaurant-quality Chicken Crunch Wrap Supreme at home is easier than you think, especially with these insider tips and tricks:
- Choose the Right Tortilla Size: This is fundamental for successful assembly. Always use large flour tortillas that are generous enough to comfortably wrap all your delicious fillings without tearing. Standard or medium-sized tortillas typically won’t be large enough to create the signature sealed hexagonal shape. For the inner tortilla, a small fajita-sized one works perfectly, or you can cut a round from another large tortilla using a cookie cutter or knife.
- Avoid Overstuffing the Crunch Wrap: While it’s tempting to load up on fillings, overstuffing is the quickest way to a torn tortilla and a messy wrap. Start with moderate amounts of each filling layer. As you gain confidence and master the folding technique, you can gradually increase the filling. The goal is a well-proportioned wrap that holds together beautifully.
- Master the Folding Technique: The folding is crucial for sealing. Start by pulling one edge of the large tortilla over the small center tortilla, pressing it down onto the fillings. Continue around the perimeter, creating small, overlapping pleats, pulling them tightly towards the center. Aim for a neat, compact package.
- Customize the Wrap to Your Liking: Don’t hesitate to make this recipe truly your own!
- Spice it Up: For a fiery kick, add extra sliced jalapeños (fresh or pickled), a dash of your favorite hot sauce, or use a spicier salsa in the chicken mixture.
- Creamy Indulgence: If you prefer a richer, creamier texture, consider adding avocado slices, a dollop of guacamole, or a drizzle of ranch dressing or a homemade cilantro-lime crema.
- Veggie Boost: Feel free to swap out any of the suggested vegetables or add in extra chopped bell peppers (any color), corn, black olives, or even sautéed mushrooms to the chicken mix for added nutrients and texture.
- Cheese, Please: Experiment with different types of cheese! Pepper Jack for heat, a blend of Monterey Jack and cheddar for classic flavor, or a smoky gouda for something unique.
- Hot Pan, Crispy Results: Ensure your skillet is adequately heated before adding the crunch wrap. A moderately hot pan allows the tortilla to crisp up and brown without burning. Cook the folded side down first to seal the edges, then flip to toast the other side.
- Press for Perfection: While toasting, use a spatula or another heavy pan to gently press down on the crunch wrap. This ensures even contact with the hot surface, resulting in a more uniform golden-brown and crispy finish.
Delicious Pairings for Your Crunch Wrap Supreme
While these homemade Chicken Crunch Wrap Supremes are incredibly satisfying on their own, pairing them with the right sides can elevate your meal to a whole new level. Here are some fantastic suggestions to complement their rich flavors and crispy textures:
- For Extra Spice and Crunch: If you love an extra layer of texture and heat, my Chili Onion Crunch is an absolute game-changer. Its savory, crispy, and spicy notes provide an incredible contrast to the creamy and meaty crunch wrap, making every bite even more exciting.
- For a Fresh & Healthy Balance: To cut through the richness and add a refreshing element, a vibrant salad is an excellent choice. My Roasted Red Pepper Kale Salad, with its robust flavors and healthy greens, would be a perfect companion. The zesty dressing and tender kale provide a delightful balance to the savory crunch wraps.
- Classic Sides:
- Guacamole and Chips: A fresh bowl of creamy guacamole with a side of crispy tortilla chips is always a winning combination with Mexican-inspired dishes.
- Mexican Rice: A classic side of fluffy Mexican rice can soak up any extra flavors and make the meal even heartier.
- Black Bean Salad: A simple black bean and corn salad, dressed with lime and cilantro, offers a light and zesty counterpoint.
- Pico de Gallo: For a burst of fresh flavor, serve with a side of homemade pico de gallo.
- Beverage Pairings: Cool down the spice with a refreshing glass of agua fresca, a cold Mexican soda, or a crisp lager.
Whether you prefer to keep it simple or create a full feast, these pairings ensure your Chicken Crunch Wrap Supreme meal is nothing short of extraordinary.
Other Easy and Flavorful Meals to Try
If you’ve enjoyed the simplicity and deliciousness of these homemade Chicken Crunch Wrap Supremes, you’re in for a treat! Our kitchen is brimming with other easy-to-make recipes that are packed with flavor and perfect for any occasion. From savory main courses to delightful sauces, here are some more meals you might love to try:
Recipes
Buffalo Cauliflower Wraps
Sauces & Dressings
Hot Honey Recipe
Recipes
Mediterranean Ground Turkey Stuffed Peppers
Recipes
Buffalo Chicken Chili
If you loved this recipe, please let us know in the comments below! Also, be sure to follow us on Instagram & Pinterest for even more fun and delicious recipes designed to make you feel good from the inside out. Thanks for being here, and happy cooking!

Homemade Chicken Crunch Wrap Supremes
Bailey Rhatigan
15 mins
25 mins
4
Print Recipe
Equipment
- Sharp knife
- Heavy-bottomed skillet (cast iron recommended)
- Stand mixer or hand mixer (optional, for shredding chicken)
Ingredients
For the Chicken Filling
- .75-1 lb boneless, skinless chicken breasts *see notes for rotisserie option
- ½ tsp cumin
- ½ tsp salt
- ½ tsp garlic powder
- ½ tsp paprika
- ½ tsp chipotle powder
- 1 tsp olive oil *divided
- 1 small red bell pepper, finely chopped
- ¼ cup onion, finely chopped
- 1 small jalapeño, chopped (optional, for heat)
- 2 Tbsp tomato paste
- ½ cup salsa, *see notes for salsa choice
For the Crunch Wrap Assembly
- 4-6 large burrito-sized flour tortillas
- 4-6 tostada shells
- 4-6 small fajita or taco sized flour tortillas *or cut rounds from large tortillas
- ¼ cup shredded cheese *Mexican blend, Monterey Jack, or cheddar
- 1 cup low-fat refried beans *or mashed black/pinto beans
- ¼ cup sour cream *or plain Greek yogurt
Optional Add-ins / Toppings
- 2 Tbsp fresh chopped cilantro
- ½ cup romaine lettuce, shredded
- ½ cup tomatoes, diced
- Avocado slices or guacamole
- Extra salsa for serving
Instructions
Preparing the Chicken Filling
- Cut large chicken breasts in half horizontally to create thinner cutlets. In a small bowl, whisk together all the dry seasonings. Rub half of this blend onto the chicken. Heat 1/2 tsp olive oil in a heavy-bottomed skillet over medium-high heat. Add chicken and cook for 8-10 minutes per side, until cooked through (internal temperature 165ºF).
- Remove chicken from skillet and let rest for 5 minutes. Then, shred the chicken using a stand mixer, hand mixer, or two forks. Set aside.
- In the same skillet, add the remaining 1/2 tsp olive oil if needed. Add chopped bell peppers, onions, and jalapeño (if using). Sauté for about 3 minutes until softened. Stir in the remaining seasoning blend.
- Add the shredded chicken, tomato paste, and salsa to the skillet with the vegetables. Stir well until all ingredients are thoroughly combined and heated through. This is your delicious chicken crunch wrap filling!
Building and Toasting the Crunch Wrap
- Lay a large burrito-sized tortilla flat on a clean surface. Spread a scoop of refried beans in the center. Place a tostada shell on top of the beans.
- Spoon a generous amount of the chicken filling over the tostada. Sprinkle with shredded cheese, then add optional toppings like lettuce, tomatoes, and sour cream.
- Place a small fajita-sized tortilla (or a cut round) directly over the center of the fillings. This helps secure everything.
- Begin to fold the edges of the large tortilla inwards, over the small tortilla and fillings, creating small pleats until the entire wrap is sealed into a hexagonal shape.
- Heat a clean, dry skillet over medium heat. Lightly spritz or brush with oil. Place the assembled crunch wrap into the skillet, folded-side down first, to seal the edges.
- Cook for 2-3 minutes until golden brown and sealed. Flip the crunch wrap and toast the other side for another 3 minutes, or until deeply golden and crispy.
- Repeat the building and toasting process for the remaining crunch wraps. Serve immediately with avocado, extra salsa, or guacamole if preferred. Enjoy!
Notes
*Salsa Choice: Any salsa you enjoy will work well in this recipe. Choose a heat level and flavor profile that suits your taste. We particularly like a smoky salsa to complement the chipotle seasoning in the chicken filling.
*Do not overstuff the crunch wraps: This is a crucial tip for successful assembly. Overstuffing can lead to torn tortillas and a messy outcome. Keep the filling layers balanced to ensure the wrap holds its shape and seals properly, making for easier handling and a cleaner eating experience.
Storage: Store any leftover cooked crunch wraps in an airtight container in the fridge for up to 3 days. For best results when reheating, use a skillet, air fryer, or oven to restore their crispy texture. Microwaving is possible but will result in a softer wrap.
Nutrition
Serving: 1 Crunch Wrap | Calories: 514kcal | Carbohydrates: 62g | Protein: 32g | Fat: 15g | Saturated Fat: 6g | Polyunsaturated Fat: 3g | Monounsaturated Fat: 4g | Trans Fat: 0.01g | Cholesterol: 67mg | Sodium: 1814mg | Potassium: 769mg | Fiber: 8g | Sugar: 10g | Vitamin A: 1771IU | Vitamin C: 32mg | Calcium: 285mg | Iron: 5mg
Nutrition information is automatically calculated and should only be used as an approximation. Individual results may vary based on exact ingredients and portion sizes.
Additional Info
Bailey Rhatigan
15 minutes
25 minutes
Main Course
Mexican
4
514
30 minute meal, Mexican food, Chicken Wraps, Crispy Wraps
Enjoyed this recipe? Leave a comment below and share your experience!